


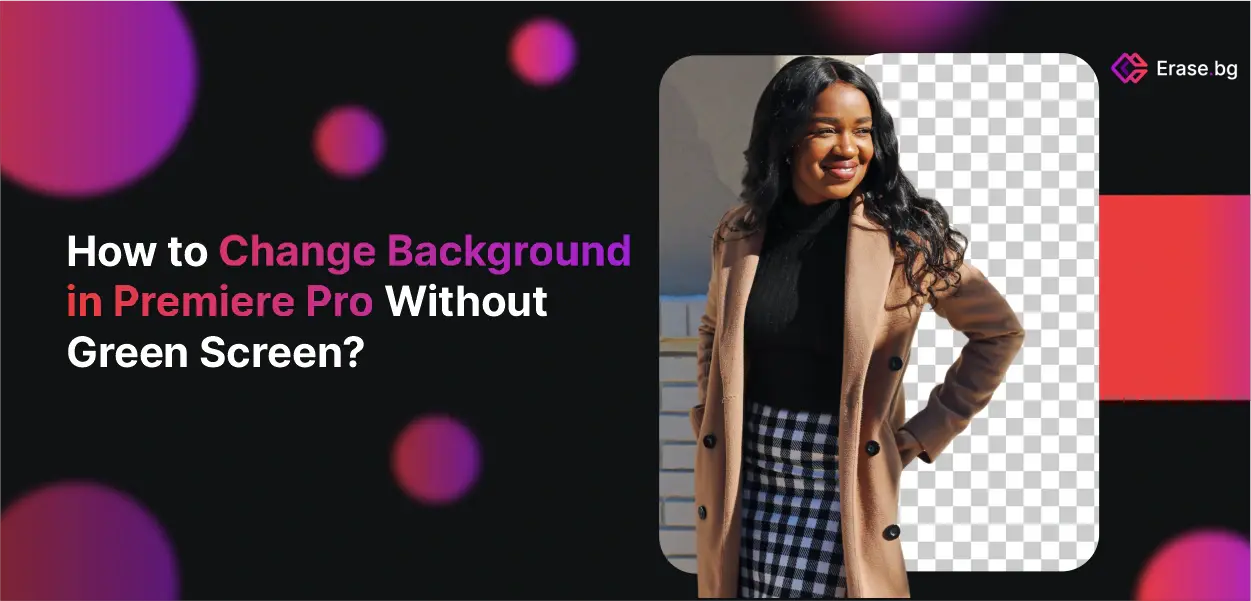
How to Change Background in Premiere Pro Without Green Screen?


Are you ready to take your video editing skills to the next level? Imagine being able to change the background in your Premiere Pro projects without the need for a green screen. Yes, you heard it right! With our expert tips and techniques, you can seamlessly remove backgrounds in Premiere Pro without the hassle of setting up a green screen.
In this comprehensive blog post, we'll walk you through the step-by-step process of removing backgrounds in Premiere Pro with no green screen required. Whether you're a beginner or a seasoned editor, our easy-to-follow guide will empower you to replace backgrounds effortlessly and elevate the visual appeal of your videos.
Say goodbye to the limitations of traditional green screen setups and hello to a world of creative possibilities. Let us show you how to unlock the full potential of Premiere Pro and transform your videos with stunning background replacements. Get ready to unleash your creativity and bring your vision to life like never before!
What is Premiere Pro?
Premiere Pro is a professional video editing software developed by Adobe Inc. It's widely regarded as one of the industry-leading tools for video editing, used by filmmakers, content creators, and professionals worldwide.
With a user-friendly interface and powerful features, Premiere Pro allows users to edit videos with precision and creativity. From basic video editing tasks like cutting and trimming to advanced techniques such as colour grading and special effects, Premiere Pro offers a comprehensive suite of editing tools.
It supports a wide range of video formats and integrates seamlessly with other Adobe Creative Cloud applications, providing a cohesive workflow for video production. Whether you're creating content for social media, broadcasting, or film, Premiere Pro empowers users to bring their creative visions to life with ease and efficiency.
Benefits of Premiere Pro
Premiere Pro stands as a cornerstone in the realm of video editing, offering professionals and enthusiasts alike a robust suite of tools and features. Renowned for its versatility and seamless integration within the Adobe Creative Cloud ecosystem, Premiere Pro empowers users with advanced editing capabilities, real-time performance, and extensive format support.
Whether crafting cinematic masterpieces or dynamic web content, its intuitive interface and comprehensive toolkit ensure efficiency and creativity in every project. From precise timeline editing to collaborative workflows and creative effects, Premiere Pro remains a go-to choice for transforming ideas into captivating visual stories with unparalleled ease and precision.
- Professional Editing Tools: Premiere Pro provides robust editing capabilities, including advanced video and audio editing tools, timeline-based editing, and multi-camera editing support.
- Integration with Adobe Ecosystem: Seamless integration with other Adobe Creative Cloud apps like After Effects and Photoshop allows for streamlined workflows and enhanced creative possibilities.
- Wide Format Support: Premiere Pro supports a wide range of video formats and resolutions, making it versatile for various project requirements, from web videos to high-definition films.
- Efficient Workflow: Features like dynamic linking, real-time editing, and GPU acceleration enhance productivity by speeding up the editing process and reducing rendering times.
- Creative Effects and Transitions: Access to a vast library of built-in effects, transitions, and plugins enables editors to enhance their videos creatively without leaving the application.
- Collaboration Tools: Built-in collaboration tools like shared projects and team projects facilitate seamless collaboration among editors, whether they're working locally or remotely.
- Cross-Platform Compatibility: Premiere Pro is compatible with both macOS and Windows operating systems, ensuring flexibility and accessibility for editors on different platforms.
These benefits collectively contribute to Premiere Pro's reputation as a powerful and efficient video editing software preferred by professionals across various industries.
What is a Green Screen in Videos and Photos?
A green screen, also known as a chroma key background, is a technique used in photography and videography to replace the background of an image or video with another scene or graphic.
The process involves filming or capturing subjects in front of a solid-coloured backdrop, typically green or blue, which can be easily removed or "keyed out" using editing software. This allows editors to superimpose the subject onto different backgrounds, creating a variety of visual effects and settings.
Green screens are commonly used in film and television production, as well as in photography studios and content creation for online platforms. They offer flexibility and versatility, enabling creators to transport subjects to virtually any location or environment without the need for complex sets or extensive post-production work.
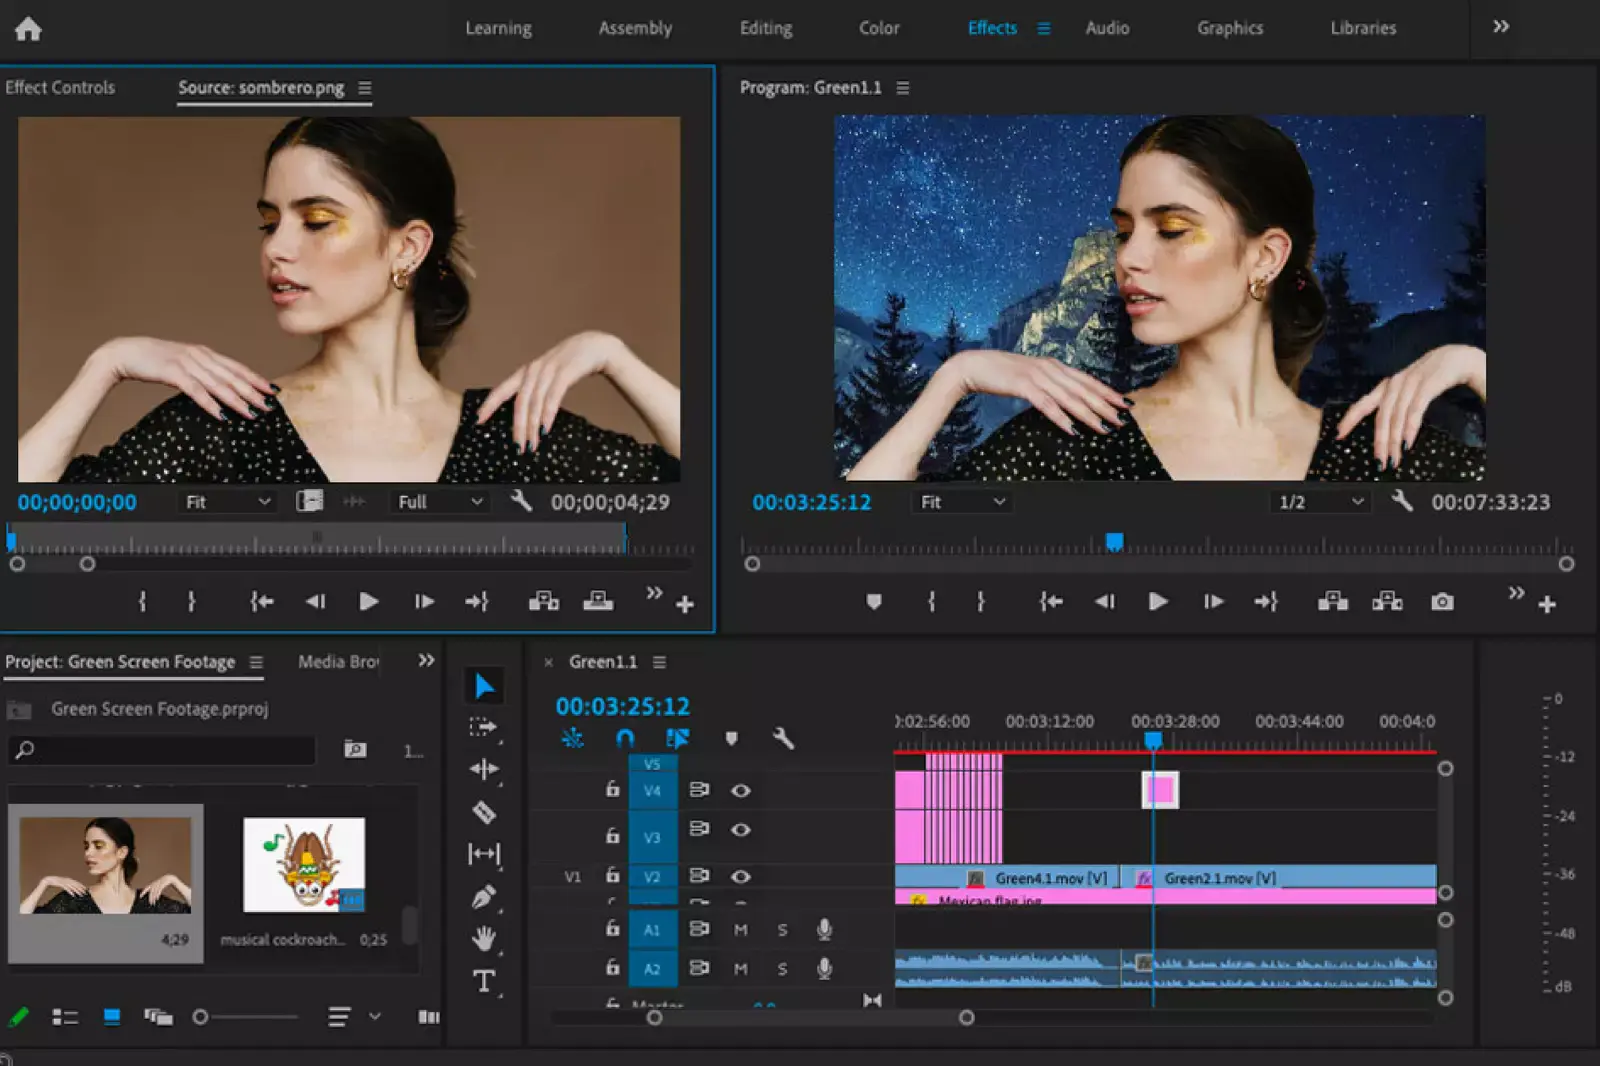
How to Remove Green Screen in Adobe Premiere Pro
Removing green screens in Adobe Premiere Pro CC is a fundamental skill for video editors. In this tutorial, we'll walk you through the process step by step, empowering you to achieve clean, seamless compositions without the need for complex setups.
From importing footage to applying the Ultra Key effect and fine-tuning the results, you'll learn everything you need to know to master this technique and elevate your video editing game. Let's dive in and unleash the power of Premiere Pro CC to remove green screens!
Step 1: Open Adobe Premiere Pro CC and import your footage with the green screen background.
Step 2:Go to the Effects panel, search for "Ultra Key," and apply it to your footage.
Step 3: In the Effect Controls panel, use the eyedropper tool to select the green colour of the background.
Step 4: Adjust the settings in the Matte Generation and Matte Cleanup sections to refine the key and remove any leftover green spill.
Step 5: Import your desired background footage or image into Premiere Pro and place it on the timeline below your keyed footage.
Step 6: Adjust your foreground and background elements' positioning, scaling, and timing to achieve the desired effect.
Step 7: Preview your composition to ensure everything looks as intended, then export your video with the new background intact.
How to Use Chroma Key in Adobe Premiere Pro
Chroma keying, often called green screening or blue screening, is a technique used in video editing to replace a specific colour in the footage with something else. Adobe Premiere Pro offers powerful tools for chroma keying, allowing you to integrate subjects into any background you choose seamlessly.
Whether you're aiming to place actors in exotic locations, create futuristic environments, or simply enhance production values, mastering chroma keying in Premiere Pro opens up a world of creative possibilities.
By following precise steps and utilising Premiere Pro's robust features, you can achieve professional-quality results that elevate your video projects to new heights of visual sophistication.
Step 1: Arrange your media.
Ensure a smooth workflow by organizing your media. Place the foreground footage above the background on the timeline, setting the stage for your chroma critical masterpiece.
Step 2: Crop it out.
Precision is key. Use the Crop effect to eliminate any unwanted areas in the background. Adjust the Left and Right values to blend your subject into the scene seamlessly.
Step 3: Remove the background.
Introduce the powerful Ultra Key effect. Select the background color to remove – in this case, the green screen. Watch as your subject comes to life against a new backdrop.
Step 4: Clean it up.
Fine-tune your chroma key with precision. Switch to Alpha Channel Output to identify the remaining background shades. Adjust Pedestal, Mid Point, and other settings until your subject stands out crisply. Quick navigation with the Tab key streamlines the process.
Step 5: Play with color.
Inject creativity with the Tint effect. Transform your subject to black and white, then choose a vibrant color to replace it. Experiment with different hues to achieve the desired visual impact.
Step and Repeat:
Let your creativity flow. Experiment with diverse colors, backgrounds, and video clips. Whether for social media or professional projects, mastering chroma keying in Premiere Pro opens the door to endless possibilities. Embrace the art of storytelling through seamless integration and captivating visuals.
Additional Tips and Techniques
- Optimise Lighting: Ensure even and adequate lighting on your subject and background to ease the background removal process in Premiere Pro.
- Garbage Matte Technique: Employ the garbage matte technique to crop out unwanted areas of the scene before applying the keying effect for cleaner results.
- Colour Correction: Apply colour correction after keying to match the foreground and background seamlessly for a professional look.
- Advanced Tools: Explore advanced tools in Adobe After Effects or Premiere Elements for more intricate background removal tasks beyond Premiere Pro's capabilities.
- Experimentation: Feel free to experiment with different settings and techniques to find the best approach for your specific footage and desired outcome.
Advanced Techniques: Beyond Premiere Pro
Looking to master the art of background removal in Premiere Pro without the need for a green screen? Dive into our comprehensive guide, where we'll explore how to change your background. Whether you're a novice or a seasoned editor, unlock the secrets to professional-level video compositions effortlessly.
- Adobe After Effects: Utilize the Roto Brush tool in Adobe After Effects for intricate background removal tasks, offering advanced compositing features beyond Premiere Pro.
- Adobe Premiere Elements: Explore guided edits and the Auto Smart Tone feature in Adobe Premiere Elements for a beginner-friendly approach to background removal.
- DaVinci Resolve: Experiment with DaVinci Resolve's advanced tools for background removal, offering robust features for professional-grade video editing.
- CyberLink PowerDirector: Explore background removal capabilities in CyberLink PowerDirector, offering intuitive tools for creating polished videos.
- Final Cut Pro: Utilize Final Cut Pro's advanced keying features for precise background removal, catering to the needs of professional video editors.
How to Remove the Green Background of An Image Online
Remove a green background using an online tool, and start by uploading your image. Select the green background using the tool's colour selection feature. Adjust settings like tolerance and feathering to refine the selection around your subject.
Once satisfied, apply the background removal function to instantly replace the green with transparency or a new background of your choice. Download the edited image in your preferred format.
Ensure your subject is well-lit against the green screen for optimal results. This straightforward process allows for quick and effective background removal, ideal for various creative and professional applications.
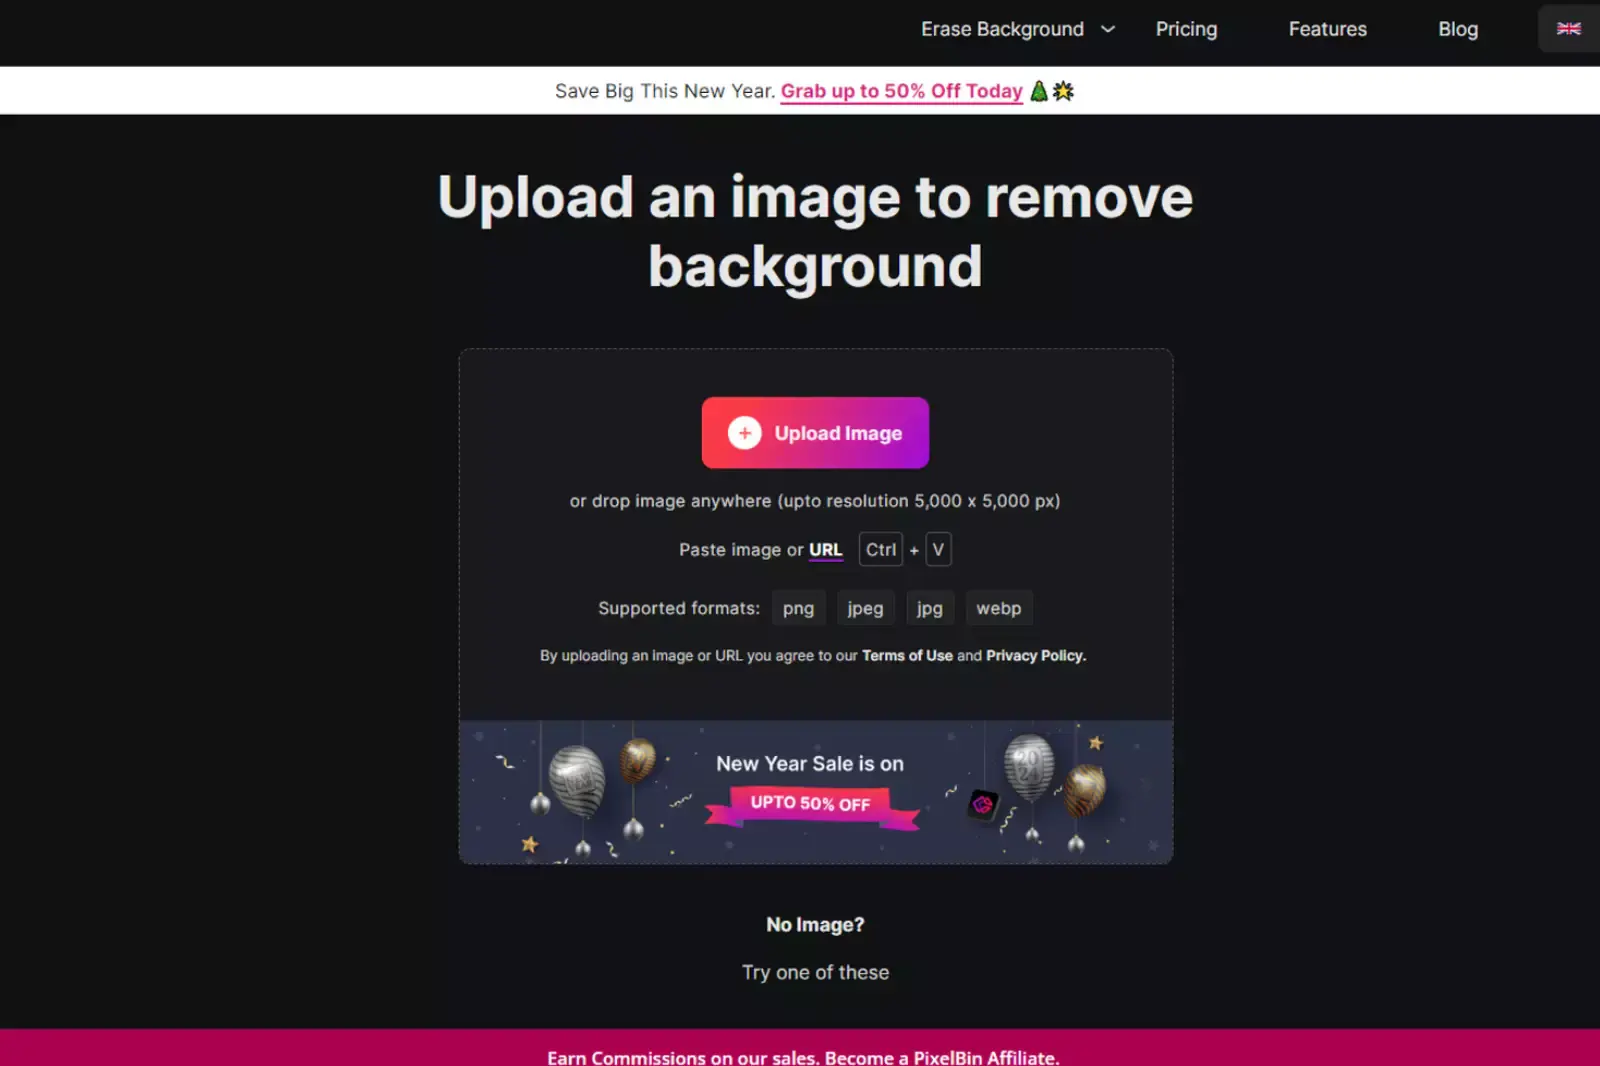
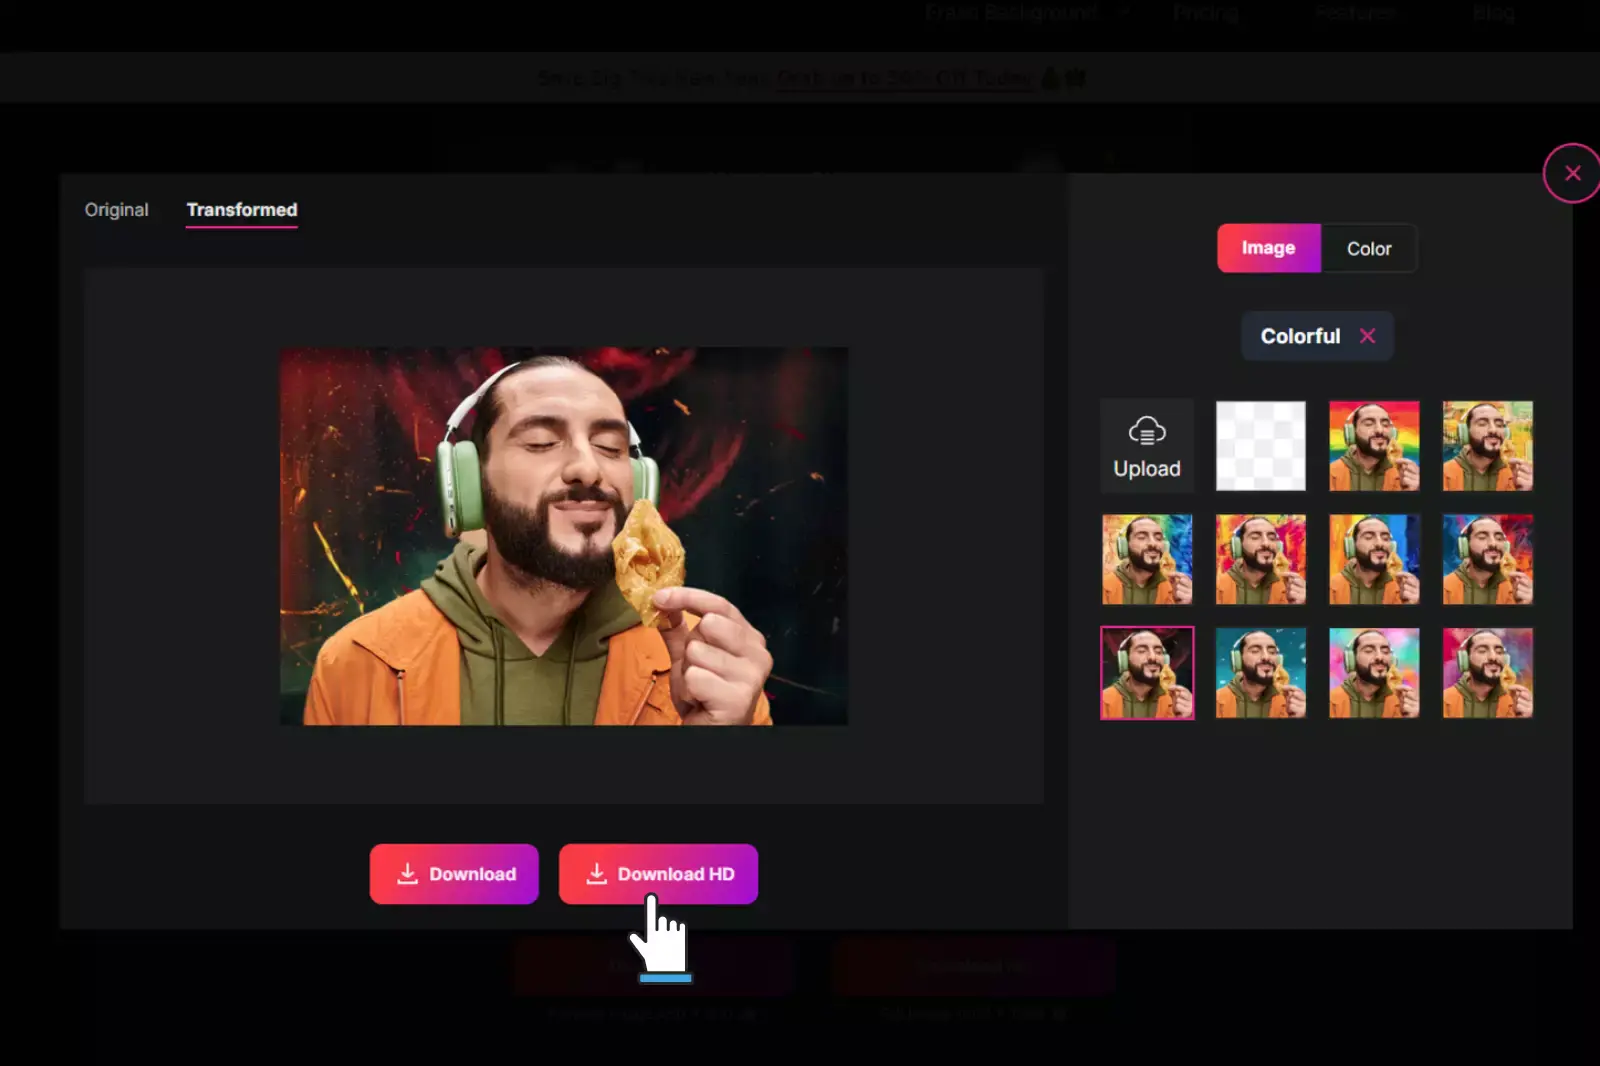
Step 1: Upload Your Image: Begin by visiting Erase.bg and uploading the image you want to edit. The AI-driven tool quickly analyzes the content, identifying the subject and background.
Step 2: Automated Background Removal: Erase.bg efficiently removes the background, accurately distinguishing between the subject and the green screen. The automated process ensures precision, saving you time and effort.

Step 3: Refine the Edges (Optional): If needed, Erase.bg allows you to refine the edges manually. This ensures that intricate details are preserved, especially around hair or complex shapes.
Step 4: Select a New Background: After successfully removing the green background, Erase.bg allows you to choose a new background. Select from a variety of colors or upload your own image to personalize the backdrop.
Step 5: Download Your Edited Image: Once you're satisfied with the changes, simply download your edited image. Erase.bg provides the final result with a transparent or new background you've chosen.
Advantages of Using Erase.bg:
Erase.bg leverages advanced AI technology to remove backgrounds from images with high accuracy effortlessly. Offering a user-friendly interface, support for various formats, and high-resolution outputs, it’s ideal for both individual and professional use. Its batch processing and integration options enhance its versatility for diverse image editing needs.
- Automatic Background Removal: Erase.bg uses advanced AI algorithms to detect and remove backgrounds from images automatically. This feature saves users time and effort compared to manual editing methods.
- High Accuracy: The AI technology behind Erase.bg is designed to handle complex images with multiple elements. It can distinguish between foreground and background with high precision, even in images with intricate details.
- User-Friendly Interface: The platform is designed to be intuitive and easy to navigate. Users, regardless of their technical expertise, can upload images and achieve background removal quickly without needing advanced skills.
- Support for Various Image Formats: Erase.bg supports a wide range of image formats, including PNG, JPEG, and more. This flexibility ensures that users can work with different types of images without worrying about format compatibility.
- High-Resolution Outputs: The service provides high-resolution outputs, maintaining the quality of the image after the background has been removed. This is crucial for professional applications where image quality is paramount.
- Batch Processing: For users who need to process multiple images at once, Erase.bg offers batch processing capabilities. This feature is especially useful for businesses or individuals with large volumes of images.
- Customisable Editing Tools: Beyond automatic removal, Erase.bg provides tools for manual adjustments. Users can refine the edges and make precise corrections to ensure the final image meets their needs.
- Integration Capabilities: Erase.bg offers API integration, allowing developers to incorporate background removal features into their applications or workflows. This flexibility makes it a versatile tool for various business needs.
- Cost-Effective: With both free and paid plans available, Erase.bg caters to different budget levels. The free plan offers basic features, while the paid plans provide additional functionalities and higher-quality outputs.
- Quick Turnaround: The processing time is usually very fast, allowing users to get their images edited and ready for use in a short period. This efficiency is beneficial for time-sensitive projects.
These advantages make Erase.bg a valuable tool for anyone needing to remove backgrounds from images with ease and accuracy.
Conclusion
Changing backgrounds in Premiere Pro without a green screen requires precise masking and layering techniques. By utilising tools like the Pen Tool for detailed masking and employing adjustment layers, you can seamlessly integrate new backgrounds into your footage, enhancing your video's visual appeal and flexibility.
FAQ's
How does Erase.bg work?
Erase.bg uses advanced AI algorithms to automatically identify and remove backgrounds from images, delivering precise results.
Can I refine the edges manually?
Yes, Erase.bg allows users to manually refine edges for intricate details and optimal precision in background removal.
What background options are available?
Erase.bg offers a variety of background options, including solid colors and the ability to upload custom images for a personalized touch.
Is Erase.bg suitable for quick edits?
Absolutely, Erase.bg's efficient automated process makes it perfect for users seeking swift and high-quality background removal.
Can I download images with transparent backgrounds?
Yes, Erase.bg provides the option to download images with transparent backgrounds, offering versatility in how the edited images can be used.
Is Erase.bg suitable for all users?
Yes, Erase.bg features a user-friendly interface, making it accessible to both beginners and experienced editors for a seamless editing experience.
.webp)

.webp)

.webp)

.webp)
.webp)


