


How to Change Background Transparent In Paint?


Microsoft Paint and Paint 3D have emerged as surprisingly popular tools in digital creativity. Despite their simplicity, these programs offer a range of basic editing capabilities like cropping, rotating, resizing, and even crafting new illustrations. Their straightforward interfaces make them a preferred choice for both primary and occasionally more intricate editing tasks.
One feature that has garnered particular interest is the ability to create images with transparent backgrounds. This functionality is precious as it allows for seamless layering of images over one another.
While ideal for essential modifications, the 'Transparency selection' in Microsoft Paint may yield a lower quality for more sophisticated images. It allows users to select specific parts of an image and colour to render it transparent. This comprehensive tutorial delves into the steps to achieve a transparent background using Paint and Paint 3D.
We aim to guide you through this process with clear, step-by-step instructions, ensuring that even those new to these programs can easily follow along. Whether for professional work or personal projects, mastering this technique can add a new dimension to your digital artistry.
What is Background Transparent In Paint?
n Paint is a beneficial and straightforward technique that opens up creative possibilities. This feature lets you remove the background from an image, rendering it transparent. You can effortlessly layer images over different backgrounds, merge photos seamlessly, or create unique designs.
What's particularly delightful about using Paint for this task is its user-friendly interface. Even if you're new to graphic editing, Paint's intuitive design makes creating transparent backgrounds easy and enjoyable. The joy of transforming an ordinary image into something extraordinary with just a few clicks is genuinely satisfying.
This functionality is not just a tool; it's a gateway to creativity, enabling users to explore their artistic capabilities without complex software. The ability to make backgrounds transparent in Paint exemplifies how simple tools can produce impressive results, making it a favourite feature among amateur and seasoned users.
Whether you're working on a personal project or a professional assignment, the ability to create transparent backgrounds in Paint is an invaluable skill that adds a professional touch to your work.
How to make a Transparent Background in Paint?
Whether you're a seasoned artist or just starting, the ability to create a transparent background in images is a valuable skill. It opens up a world of creative possibilities, allowing you to layer images, create collages, or prepare graphics for presentations and websites. The straightforward process can be a fun way to enhance your digital projects.
Step-by-Step Instructions:
Opening the Program:
Launch Paint on your Windows 10 machine. This program is a beautiful tool for basic image editing and offers a user-friendly interface.
Selecting Your Image:
Click on 'File' and then 'Open' within Paint. Browse through your files and select the image you wish to edit. This step is your gateway to creativity, setting the stage for your image transformation.
Activating Transparent Selection:
Once your image is open, navigate to the 'Select' option. Here, you’ll find the 'Transparent selection' feature. Activating this feature is crucial in creating a transparent background, as it isolates the part of the image you want to retain.
Using the Free-form Selection Tool:
With the 'Free-form selection tool', you can meticulously select the area of the image you wish to keep. This tool provides precision and control, ensuring your final image looks exactly as you envisioned. The unselected portion of the image will be set to become transparent.
Finalising the Image:
After making your selection, copy and paste the image into a new location. You'll notice that the background of the pasted image is now transparent. This final step is where you see the result of your efforts, transforming your image into a versatile graphic that can be used in various applications.
How to make a Transparent Background in Paint using Layers?
Creating a transparent background in Paint using layers is an exciting and creative process that allows for greater control and precision in your image editing. This method is advantageous when isolating a specific element of your image with a clean and transparent background. Here’s a step-by-step guide to help you achieve this with a positive and enthusiastic approach:
Step-by-Step Instructions:
Accessing Layers:
Begin by opening Paint and navigate to the 'Layers' panel on the right-hand side. This panel is your gateway to advanced image editing, allowing you to work separately with different aspects of your image.
Duplicating the Layer:
Right-click on your photo in the Layers panel and select 'Duplicate Layer'. This step creates a copy of your image, giving you a safety net as you edit.
Hiding the Bottom Layer:
Hide the bottom layer of the image that you just duplicated. This action focuses your attention on the top layer, where the magic of transparency will happen.
Using the Magic Wand Tool:
Select the original picture from the Layers panel. Then, pick the Magic Wand tool from the toolbar on the left. This tool is handy for automatically selecting similar areas of your image.
Selecting the Background:
With the Magic Wand tool, click on the sections of the background you wish to remove. This step requires patience and a steady hand to ensure accuracy.
Deleting the Background:
Press 'Delete' on your keyboard. This action removes the selected areas, bringing you one step closer to achieving a transparent background.
Saving Your Work:
Click 'File' and 'Save as' to finalise your work. Rename your file as desired and save it in PNG format. Saving as a PNG is crucial as it maintains the transparency of your background.
How to Make the background transparent in Paint 3D
Creating a transparent background in Paint 3D, the modernised version of the classic Paint program offers a more advanced and detailed approach to image editing. This process is perfect for those looking to remove backgrounds precisely, especially when working with intricate details like fur or hair.
Whether you're a graphic designer, a digital artist, or someone who loves experimenting with images, this guide will walk you through the steps to achieve a flawless transparent background in Paint 3D.
Step-by-Step Instructions:
Launching Paint 3D:
Start by opening Paint 3D, a versatile tool for modern image editing. Its updated features provide more control over the editing process.
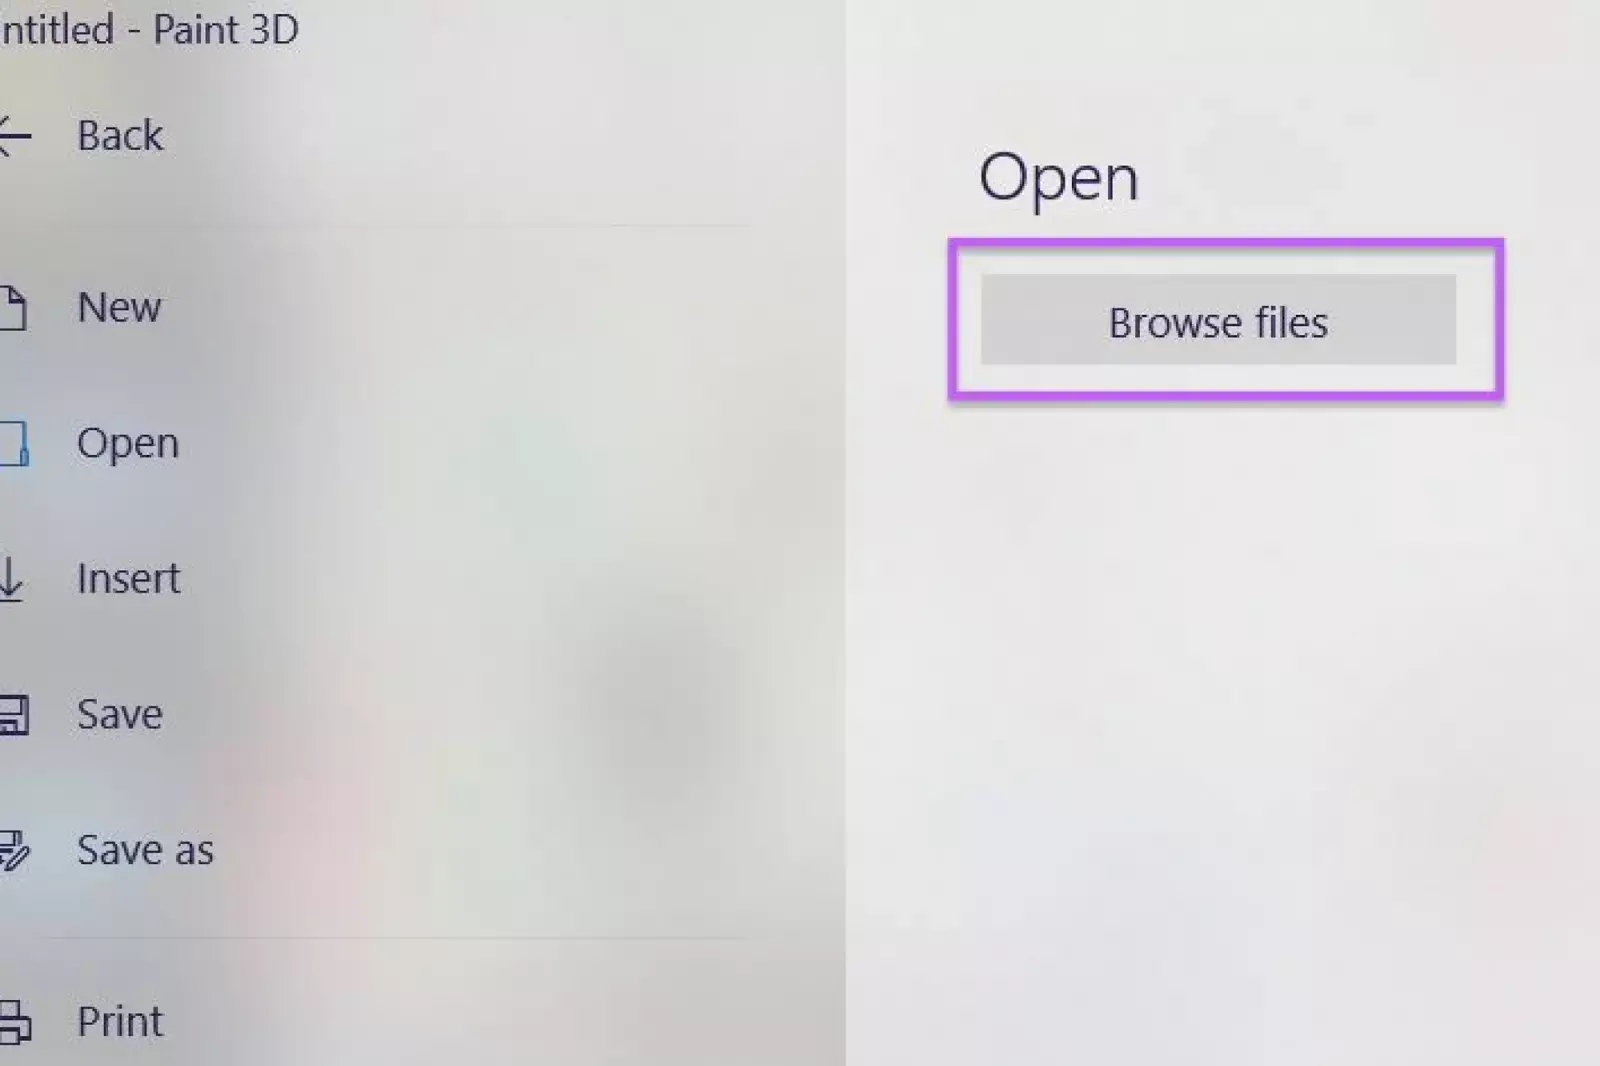
Selecting Your File:
Click on the menu in the top left-hand corner, then select 'Browse files'. Choose the image from which you want to remove the background. This is your first step towards transforming your image.
Using Magic Select:
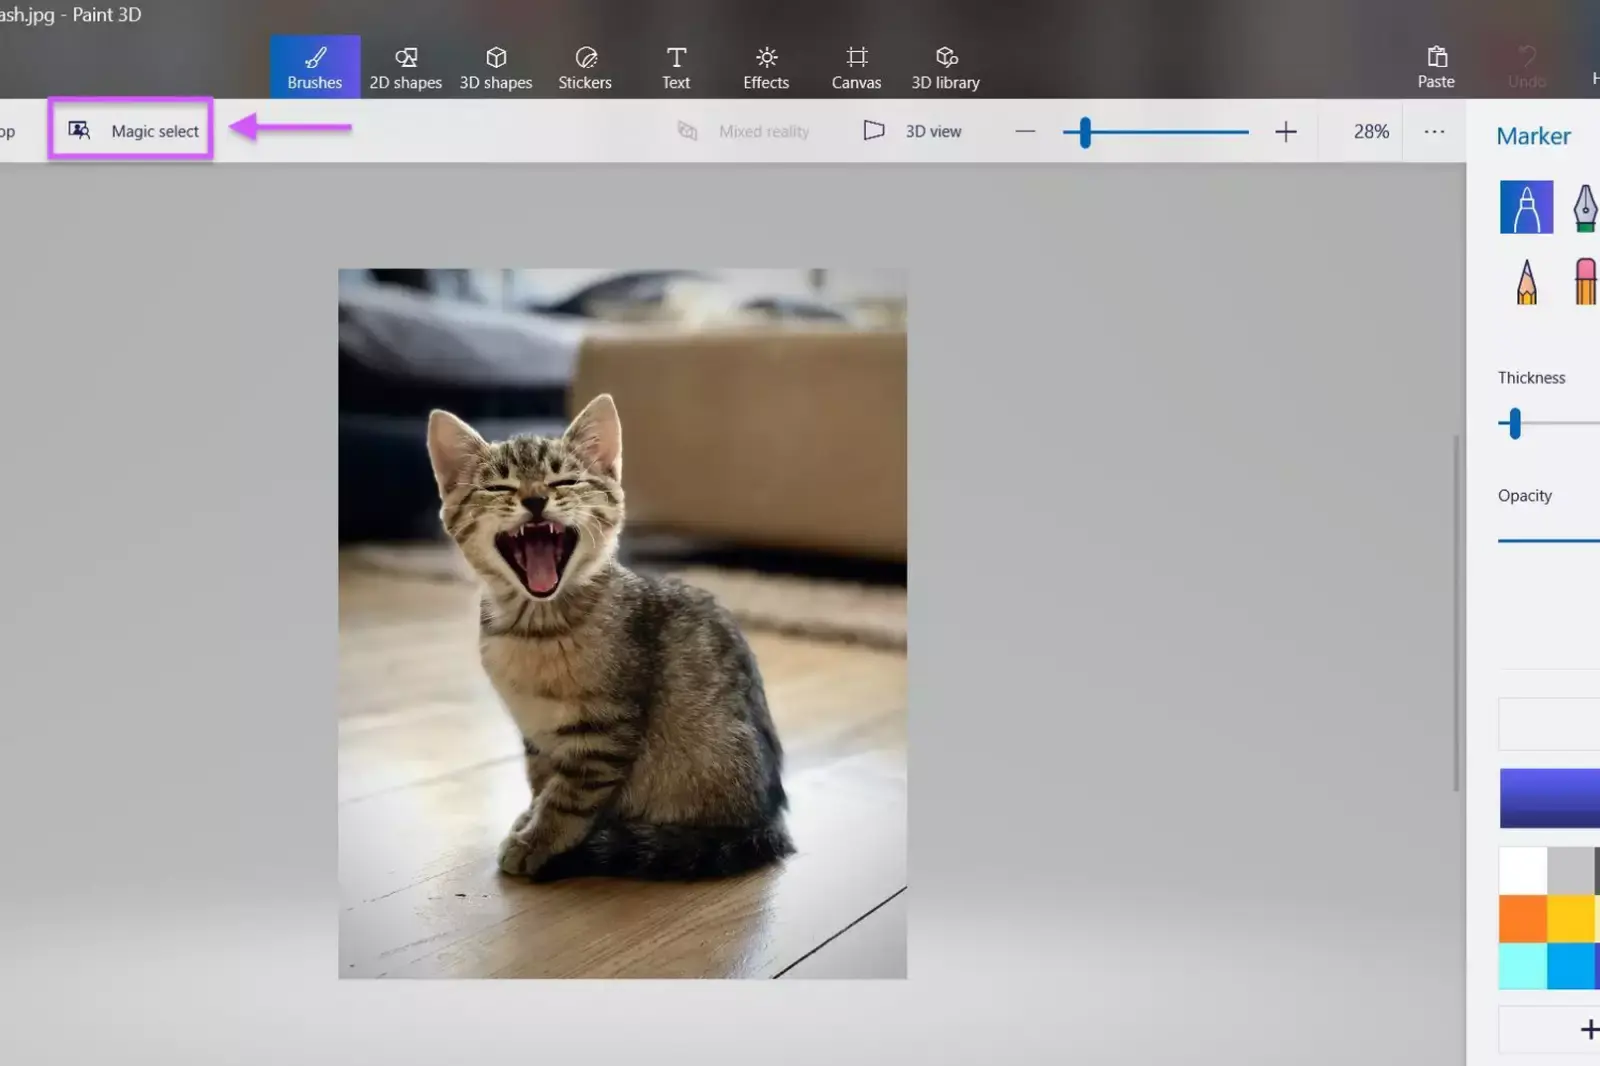
In the top bar, find and click on 'Magic select'. This powerful feature allows you to make precise selections with ease.
Refining the Selection:
Adjust the borders of the selection closely around your subject, like the edges of a cat’s fur in our example. This step is crucial for isolating the subject with accuracy.
Adjusting Your Selection:
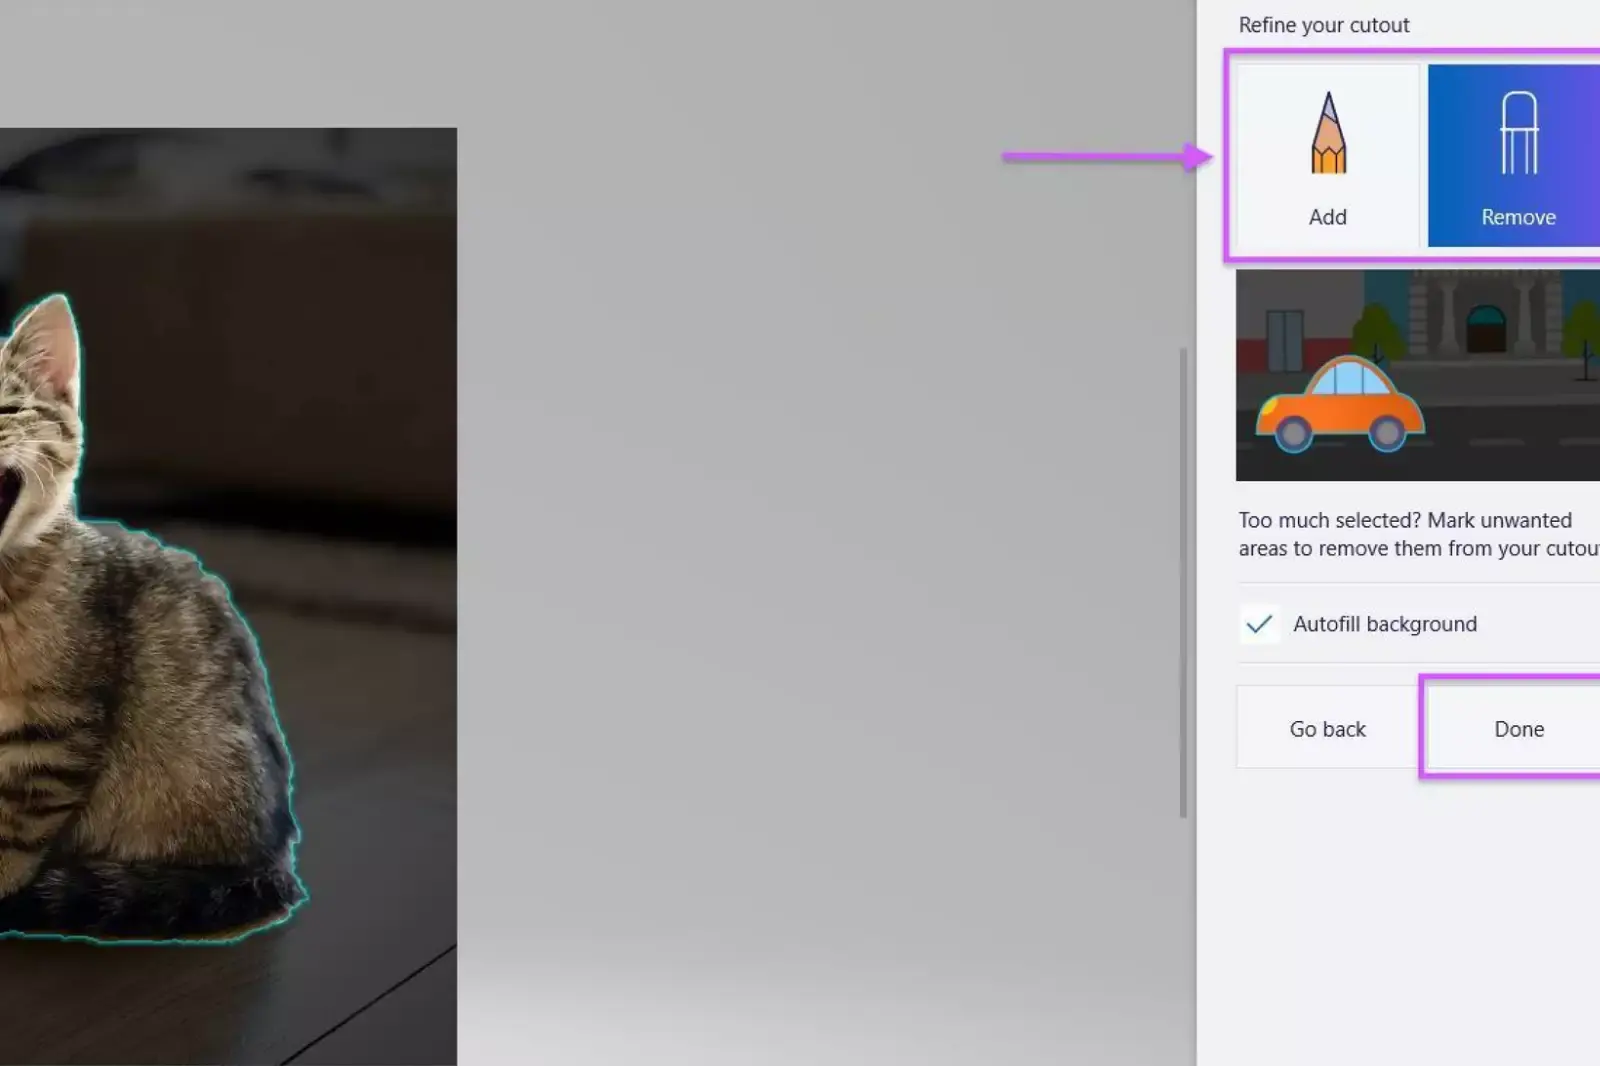
After clicking 'Next', use the 'Add/Remove' tabs to refine your selection. If Paint 3D has removed too much, use the 'Add' function to correct it. Conversely, if a part of the background is still visible, use the 'Remove' function to deselect it.
Removing the Background:
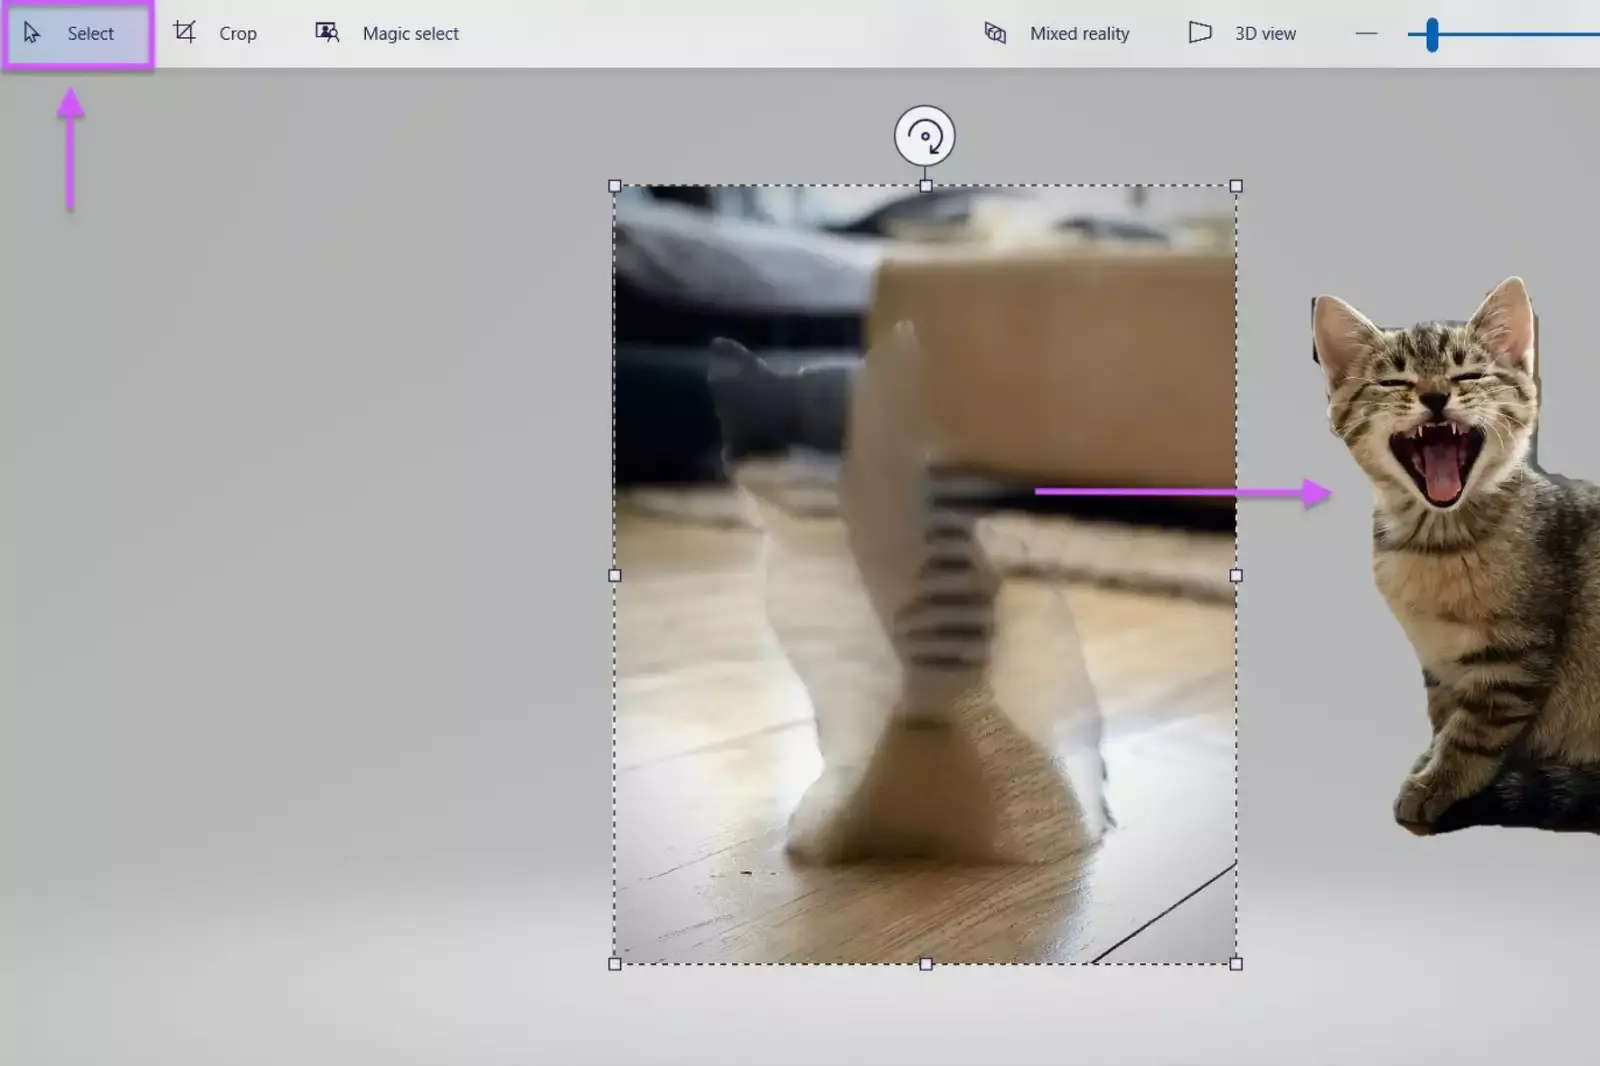
Once you’re satisfied with the selection, click 'Done'. Then, select and drag the object to one side. Use the 'Select' tool to highlight and delete the remaining background.
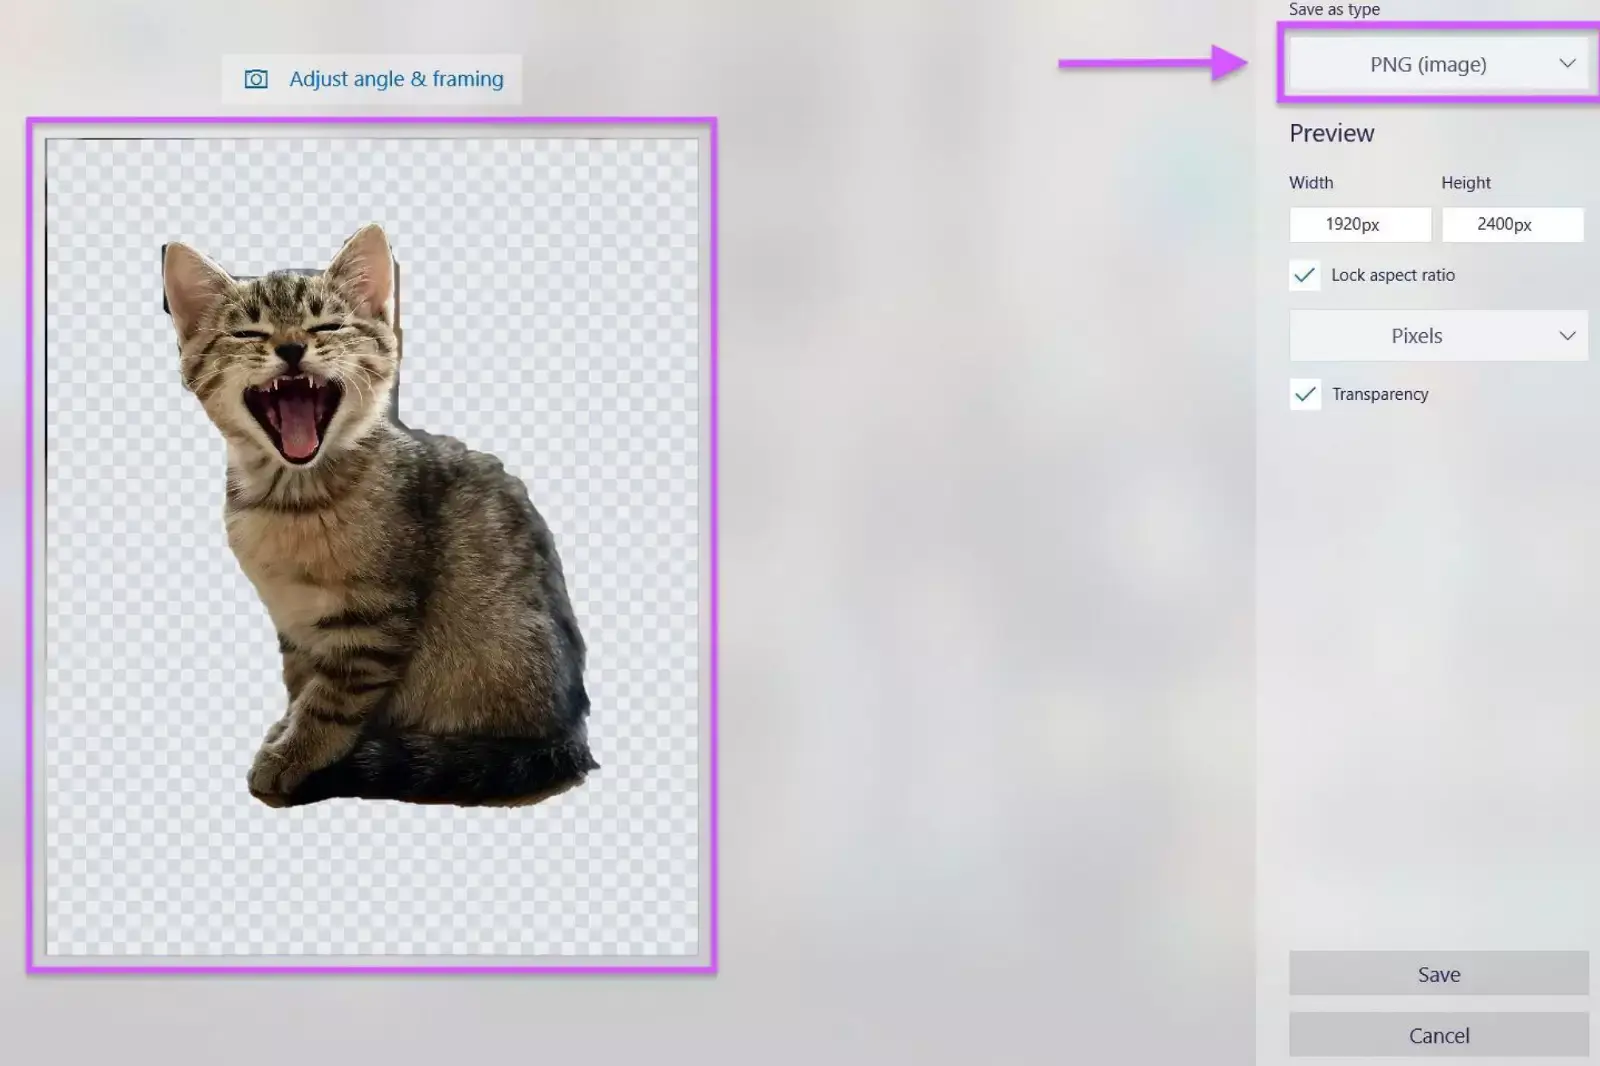
Finalizing the Transparent Background:
With the background removed, reposition your main subject back to the centre. Then, proceed to save your image: go to Menu > Save as > PNG Image. Ensure that the 'Transparency' option is selected.
Saving Your Edited Image:
Save your image. Now, you have a beautifully edited image with a transparent background, ready to be used in various applications like presentations or graphic designs.
By following these steps in Paint 3D, you can achieve a transparent background that adds a professional touch to your images. This technique enhances digital artworks or presentations with high-quality, custom images.
Effortlessly Make Image Backgrounds Transparent with Erase.bg: A Quick and User-Friendly Alternative to Paint
Erase.bg stands as a remarkably efficient and user-friendly alternative to traditional image editing programs like Paint for creating transparent backgrounds. This tool is designed to simplify the process, making it accessible to users of all skill levels, from beginners to professionals. Whether you're working on graphic design, photo editing, or personal projects, Erase.bg offers a swift and effective solution to removing backgrounds from images.
Step-by-Step Guide to Using Erase.bg:
Navigating to Erase.bg:
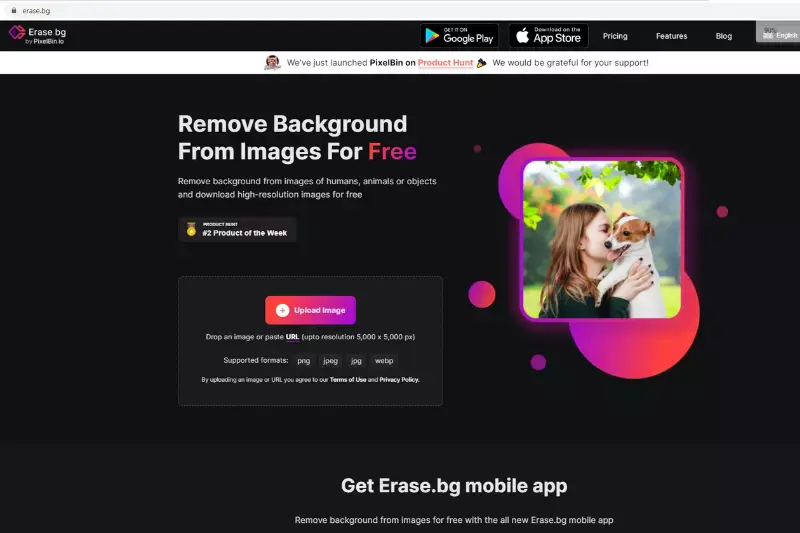
Open your web browser and visit the Erase.bg website. This platform is designed to be intuitive and easy to navigate, ensuring a smooth experience right from the start.
Uploading Your Image:
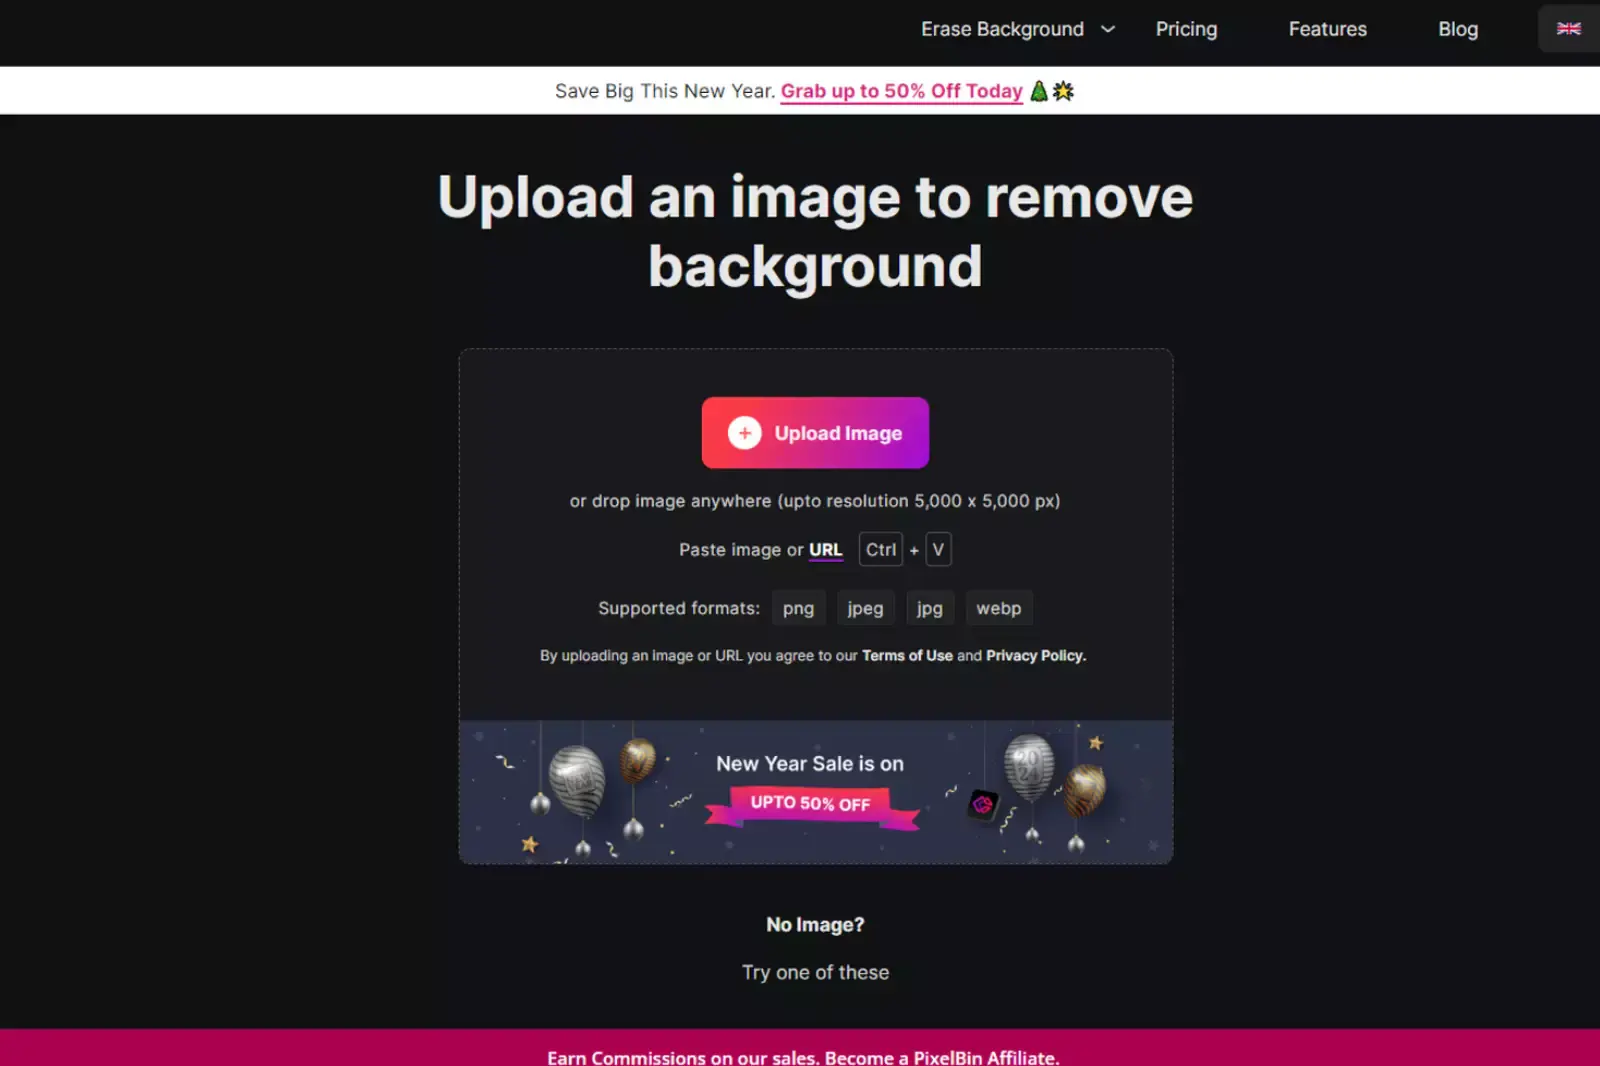
Once on the Erase.bg site, look for the option to upload your image. This can typically be done by clicking a button labelled ‘Upload Image’ or similar. Select the image from your device that you want to edit.
Automatic Background Removal:
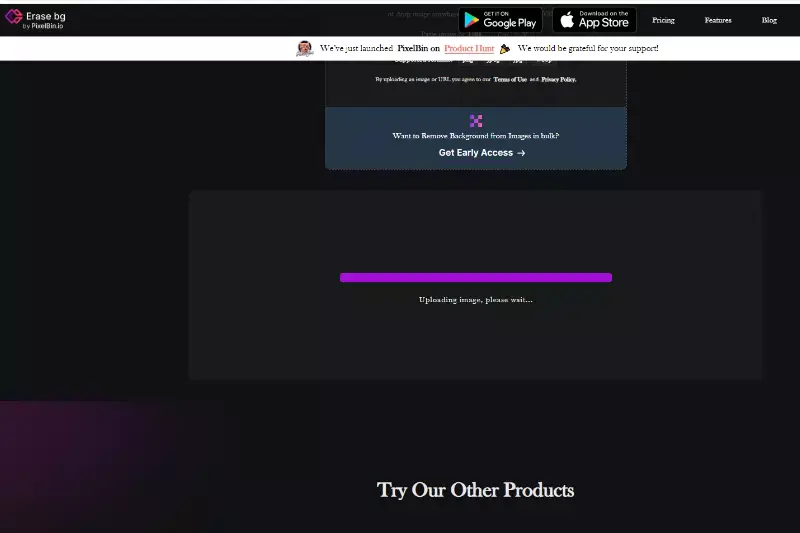
After uploading, Erase.bg will automatically process your image. The advanced algorithms of Erase.bg work to detect and remove the background from your image efficiently, saving you the time and effort of manual editing.
Reviewing and Refining:
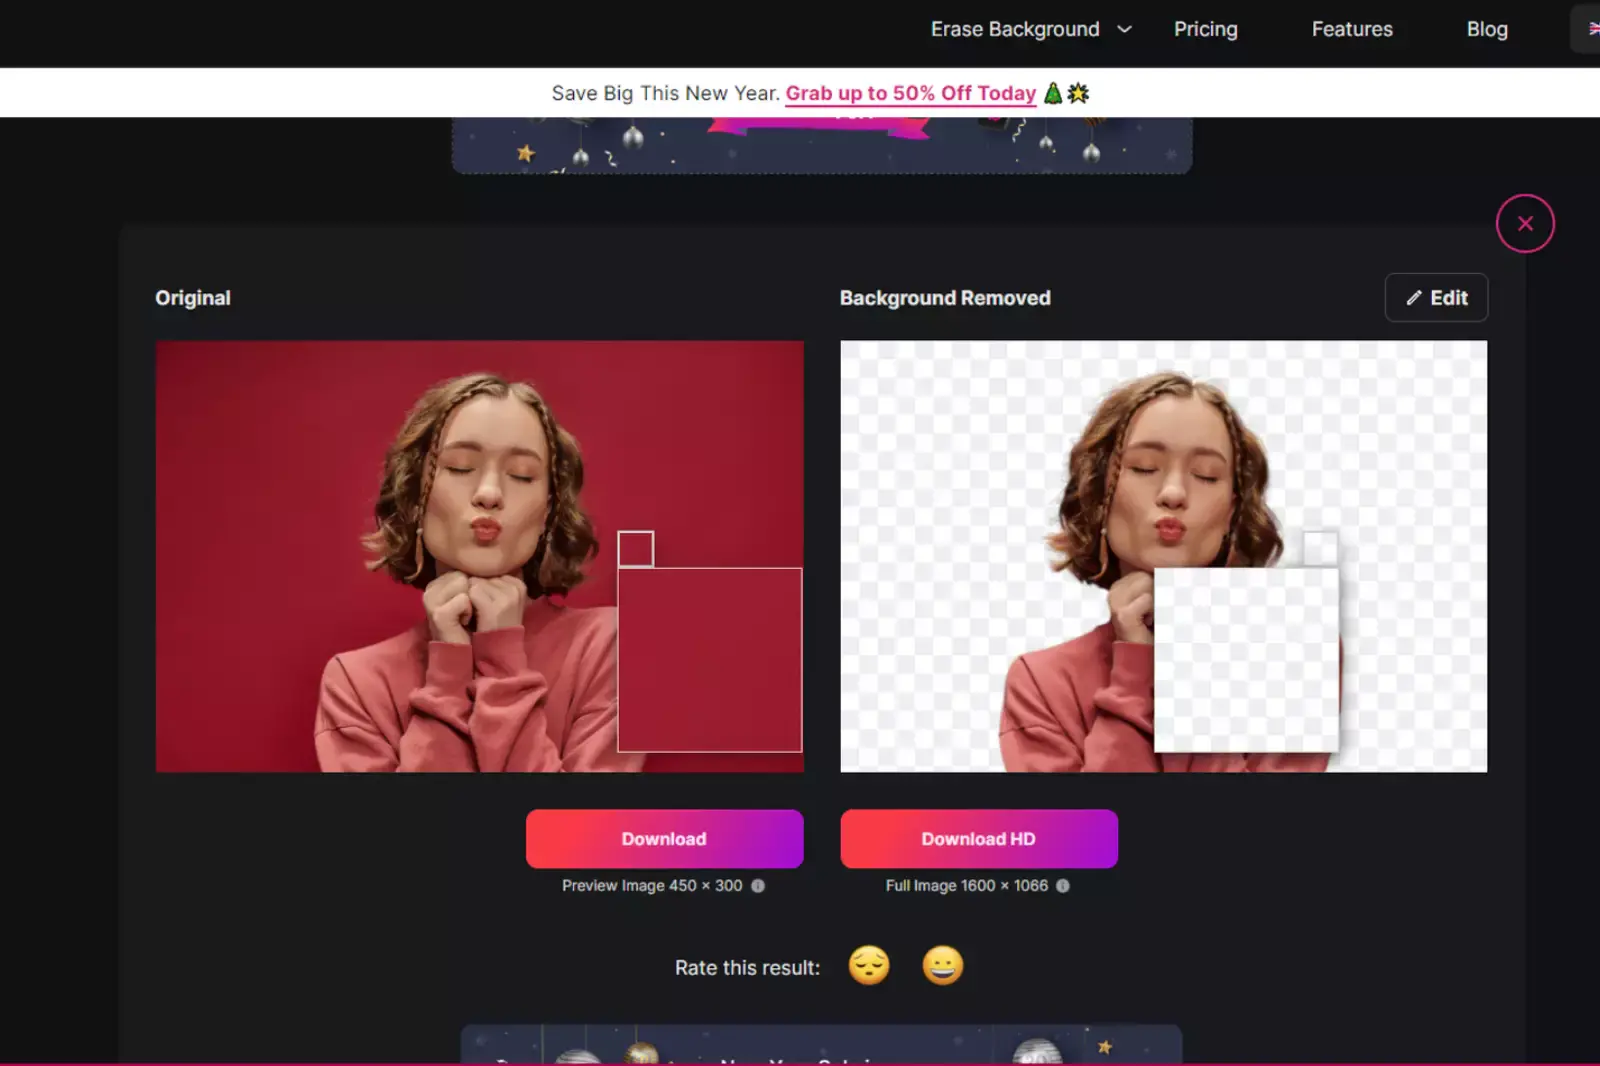
Once the background is removed, review the image. If any areas need further refinement, some versions of Erase.bg may offer tools to make minor adjustments.
Downloading the Edited Image:
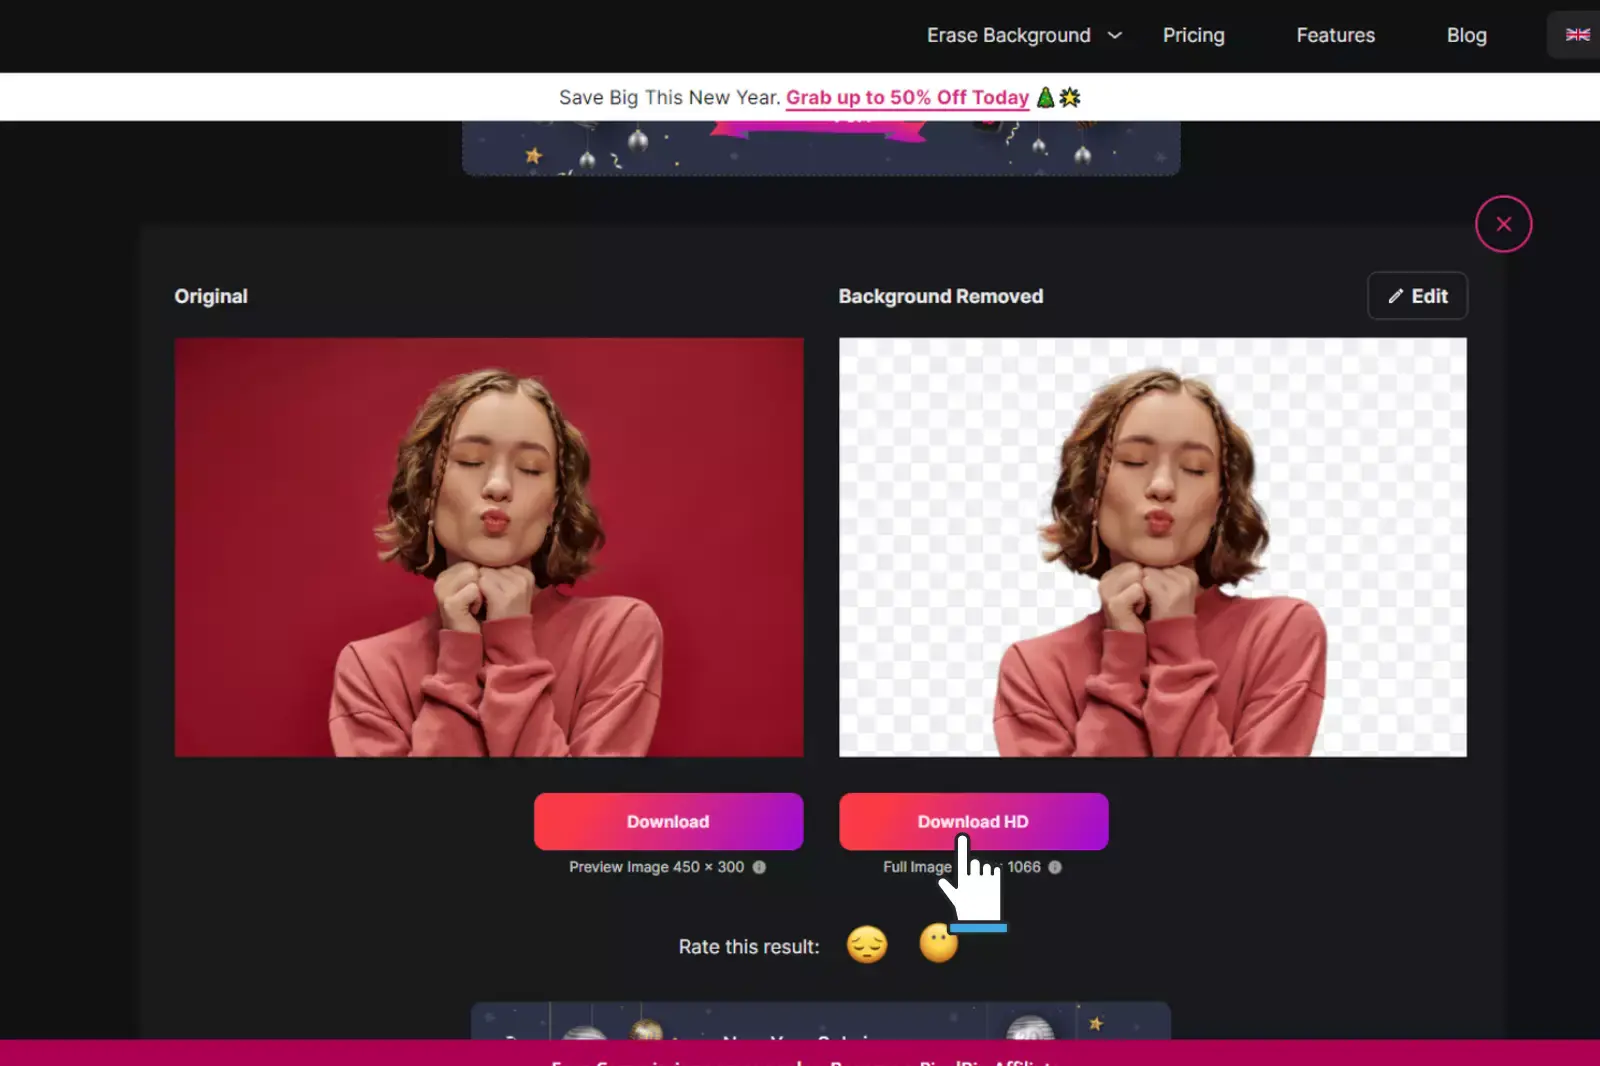
After you are satisfied with the edited image, you can download it directly to your device. Erase.bg usually provides the image in a format that supports transparency, such as PNG.
Using Your Transparent Image:
With the image downloaded, it's now ready to be used in various applications. You can incorporate it into graphic design projects, presentations, or any other medium that benefits from a clean, transparent background.
Erase.bg is a quick and efficient method for making image backgrounds transparent, offering a practical alternative to more traditional and time-consuming methods like Paint. This tool is ideal for those seeking.
Conclusion
Erase.bg revolutionizes the way we approach image editing by offering a quick, efficient, and user-friendly solution for making backgrounds transparent. This tool caters to a wide range of users, from professionals looking for a fast alternative to traditional software to beginners seeking an easy-to-use platform.
The simplicity of Erase.bg, combined with its powerful background removal capabilities, makes it a standout choice for anyone needing transparent images without the hassle of complex editing processes.
FAQ's
What is Erase.bg?
Erase.bg is an online tool designed to remove backgrounds from images quickly and efficiently, creating a transparent background without the need for manual editing.
How does Erase.bg work?
It uses advanced algorithms to detect and remove the background from uploaded images automatically, simplifying the process of creating transparent backgrounds.
Is Erase.bg free to use?
Erase.bg offers free services, but premium options for additional features or higher-resolution image processing might exist.
Can Erase.bg handle complex images?
Yes, it is designed to work with a variety of images, including those with complex backgrounds or intricate details.
What file formats does Erase.bg support?
It typically supports standard image formats like JPG and PNG, with the final image usually provided as a PNG to maintain transparency.
Is an account required to use Erase.bg?
No account is needed for primary usage, but some features require signing up for enhanced functionality or saving your editing history.
.webp)

.webp)

.webp)

.webp)
.webp)


