


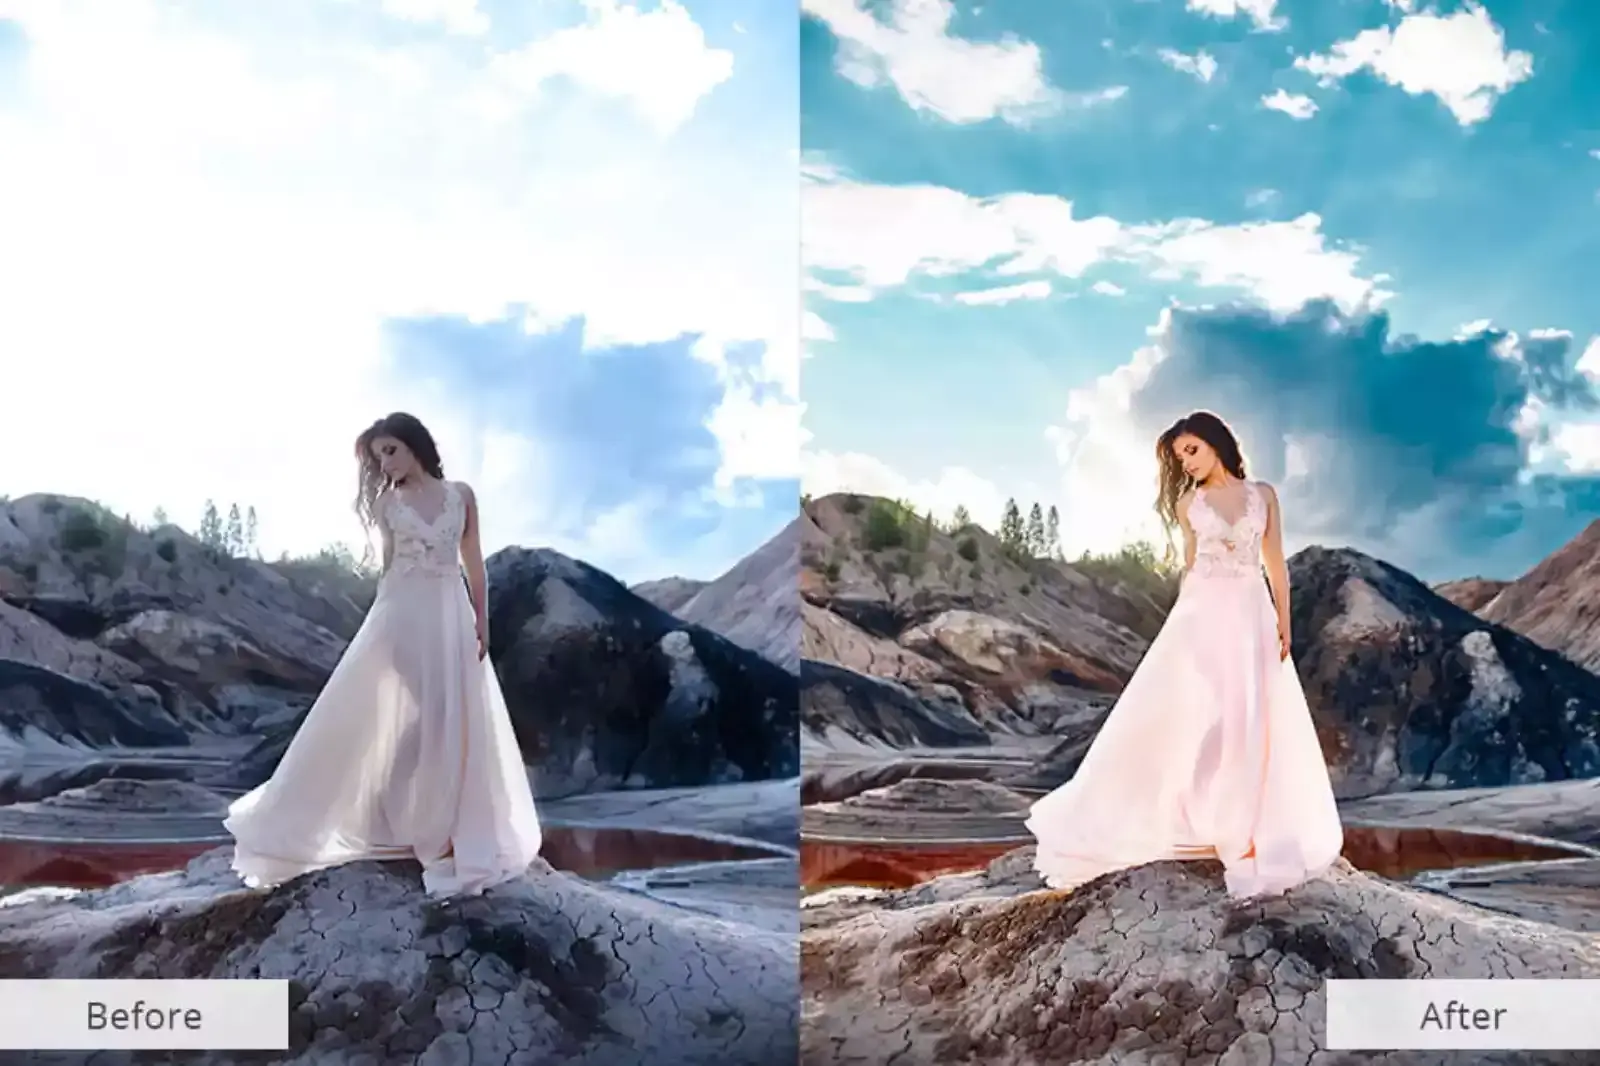
Make Your Photos Pop with Color Correction


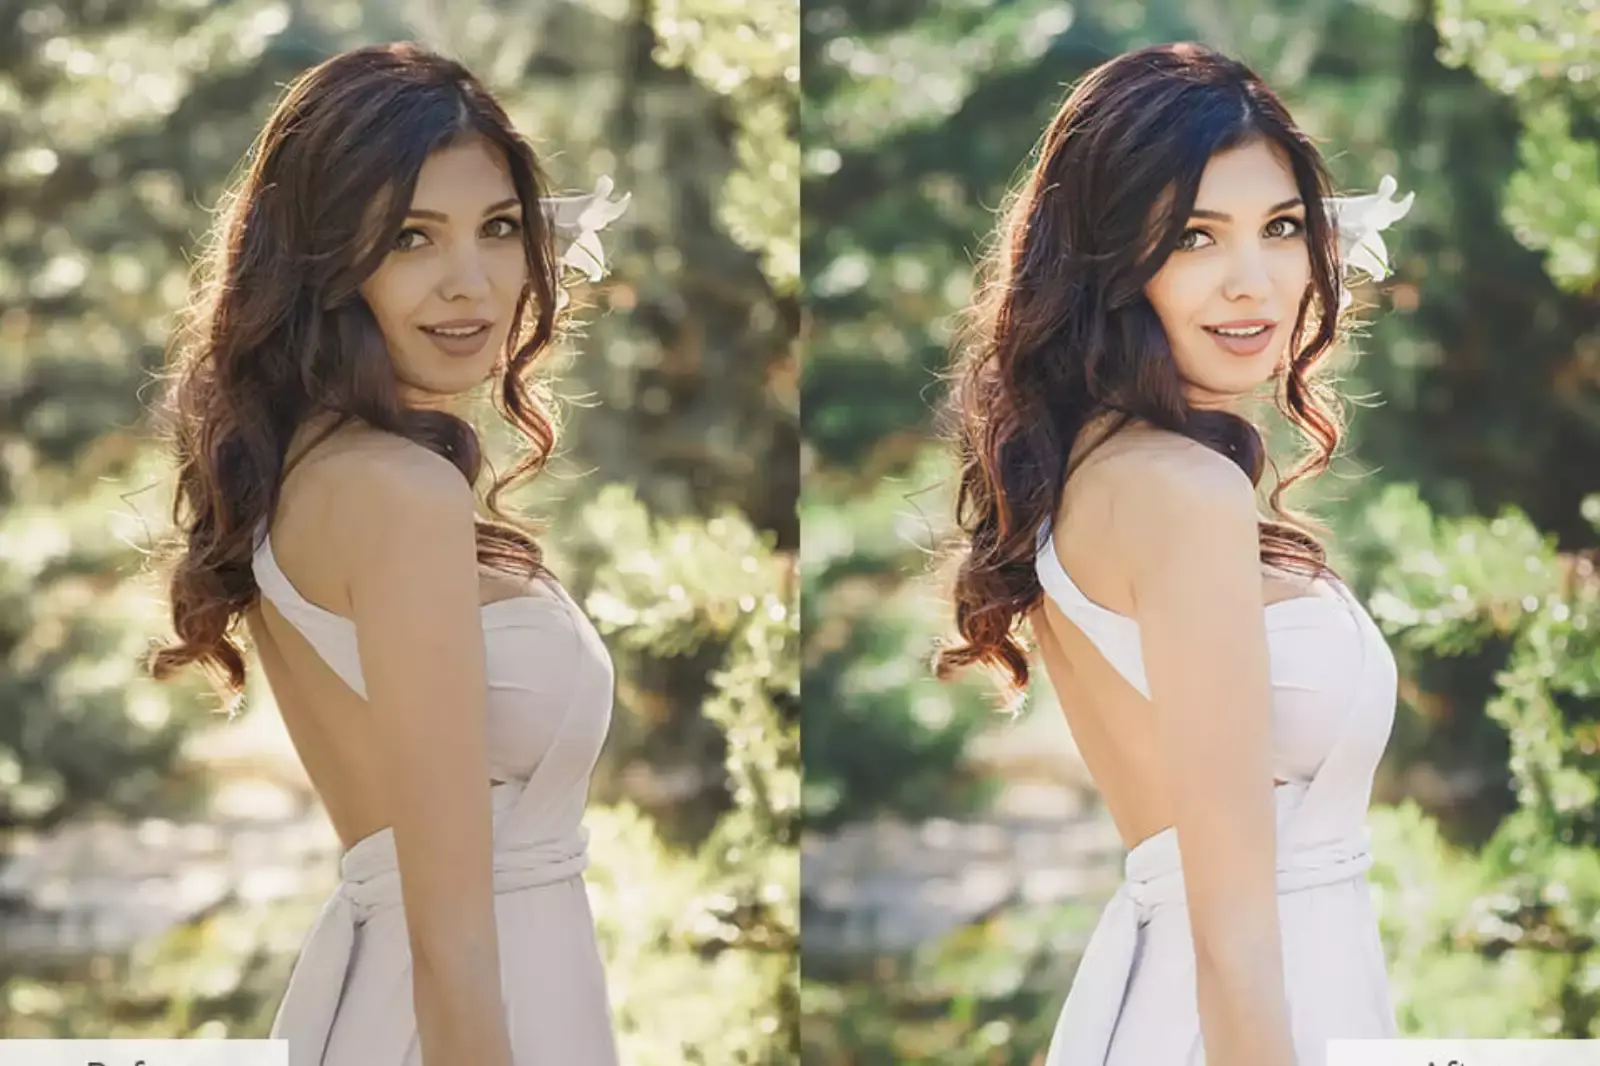
With all the editing options available to make your photos look just right, it can be hard to know which options are best to use and how they affect your photos. Color correction can be a powerful tool when used correctly and will make your photos look their best.
Still, you should know some essential things about color correction in general and how it’s used in editing photos before you begin. Here are some tips on using color correction to bring out the true beauty of your photos with just the proper adjustments so that your subject shines through with stunning clarity and vibrancy.
Color Correction
To many, the world of photography is a mystery. When your camera takes a picture, it captures more than just your subject. Tons of lights often create a photo that needs to be more focused, over-exposed, and too colorful. In other words, it doesn't show you the beauty or aesthetic you wanted in the first place.
This is where color correction comes in to save the day and bring back some beauty to those pixelated photos! Using specific tools like curves, highlights/shadows, and various filters, you can change how your pictures look.
From making them brighter to adding warmth, you can make your pictures pop by tweaking these minor things. Don't be afraid of trying new things! Whether adding certain filters or editing certain aspects in photoshop, try new things until you find what works best for you and share that knowledge with others.
Color Correction V/S Color Grading
Color Grading is done through an automated process, whereas color correction involves a manual process. The most common method of color grading is to create a LUT (Look-Up Table) which will change colors across the spectrum. You can also use elements in your photo or video such as balance, contrast, and saturation to color grade.
As for the difference between Color Grading and Color Correction? When correcting colors in post-production, it is often essential to match the original footage shot on set as closely as possible so that it seems seamless. There's no disparity between what was filmed originally and what is being corrected later on down the line.
Tools required
The basics for color correction include exposure, white balance, clarity, contrast, and vibrance. You can use tools like Adobe Photoshop or Lightroom to achieve these effects on your photos. All you need to do is open up the photo you want to work on in either of those programs and find the adjustments tab under the adjustment options on the right side of your screen.
Once there, choose the effect you want to add by sliding your cursor across its name until it lights up. A new window will then appear containing all of that setting's details: how much you should adjust it and what exactly it will change within your photo. Experimenting is key because no two photos are alike; every correction is entirely different based on what makes that photo look best.
Saturation
One of the most basic adjustments you can make to your photos is adjusting the saturation. Increasing or decreasing the saturation will give your photos a more muted or intense look. We recommend that beginners start by playing around with it on their computers before adjusting it on their phones.
We need to think of a good reason why someone would want to adjust the saturation on their phone before playing around and deciding if they want a less saturated photo. This might come as a surprise, but color correction and social media are different.
Saturated colors generally do better on social media platforms than desaturated ones (especially on Instagram). When people complain about the oversaturation of color, they often need to realize that these adjustments create content for mobile users.
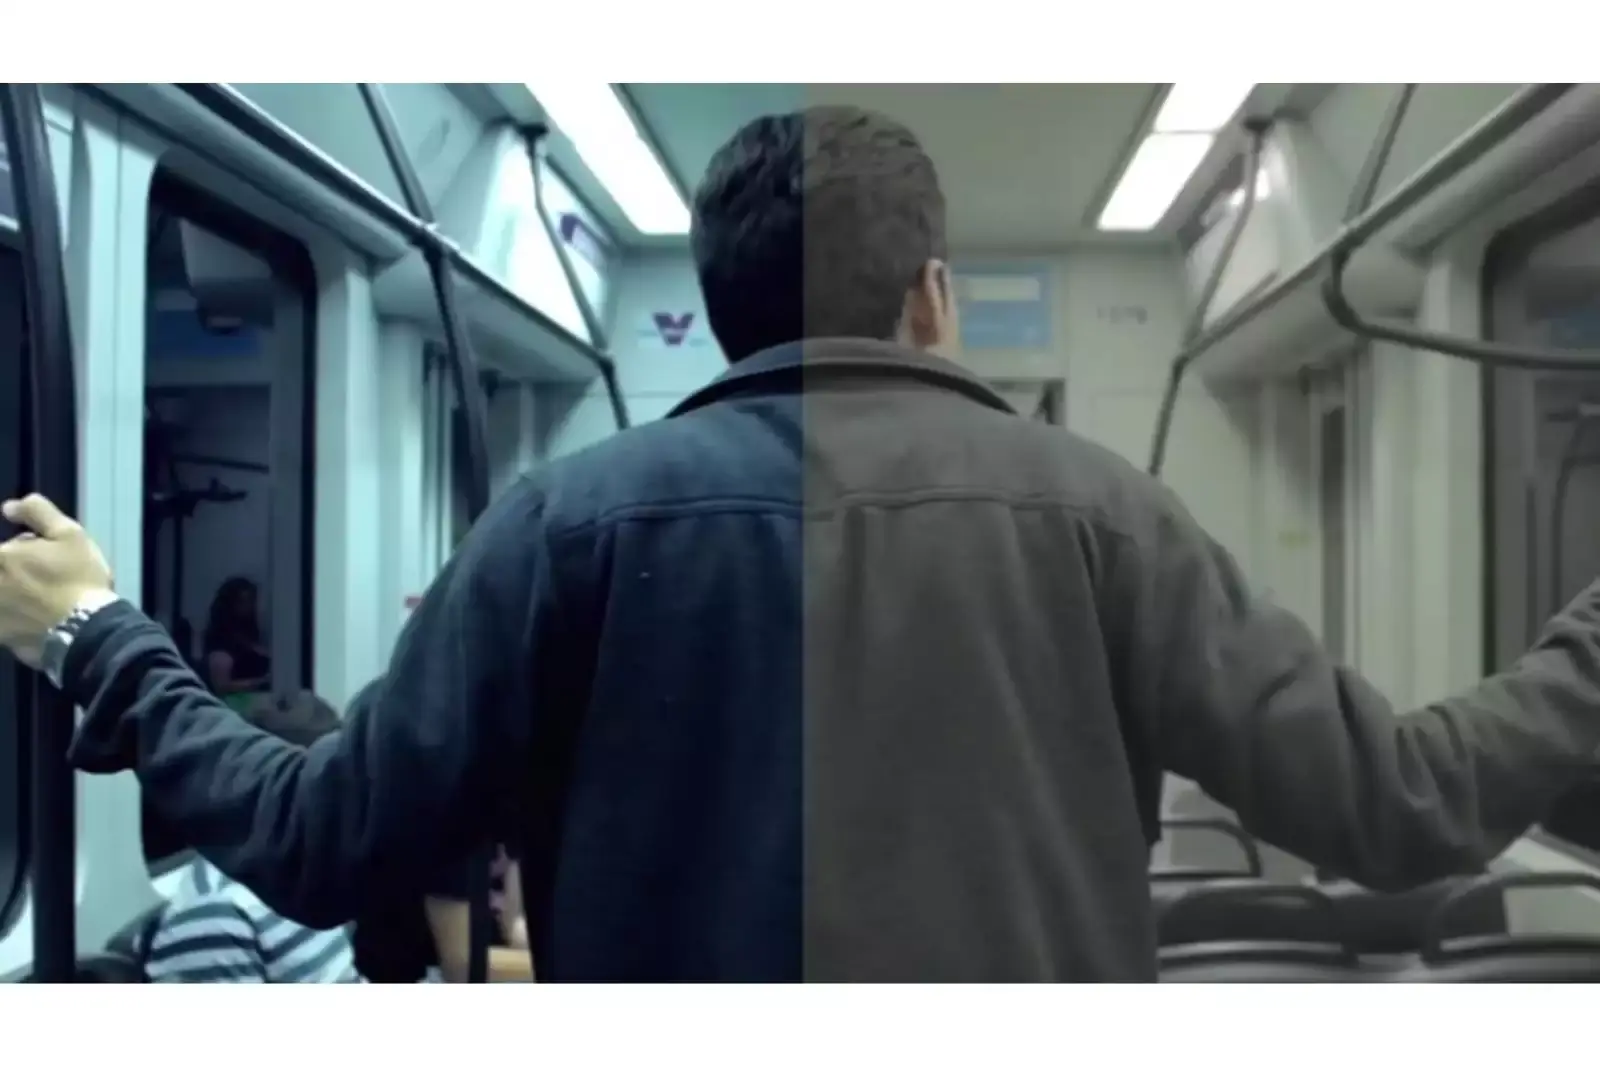
Temperature
Have you ever taken a photo to find out later that it had horrible color correction? I have! It was around Christmas time, and I had taken a photo of my daughter wearing her new knit cap. Well, the color was all wrong! If only I had known there was an easy way to fix this.
If you take the extra time and use color Correctly, everything will be perfect. This powerful feature is available inside Lightroom or Camera Raw, so you don't need Photoshop anymore. All it takes is one click, and voila - your photos will look flawless before your eyes. Give it a try for yourself today - you'll be happy that you did!
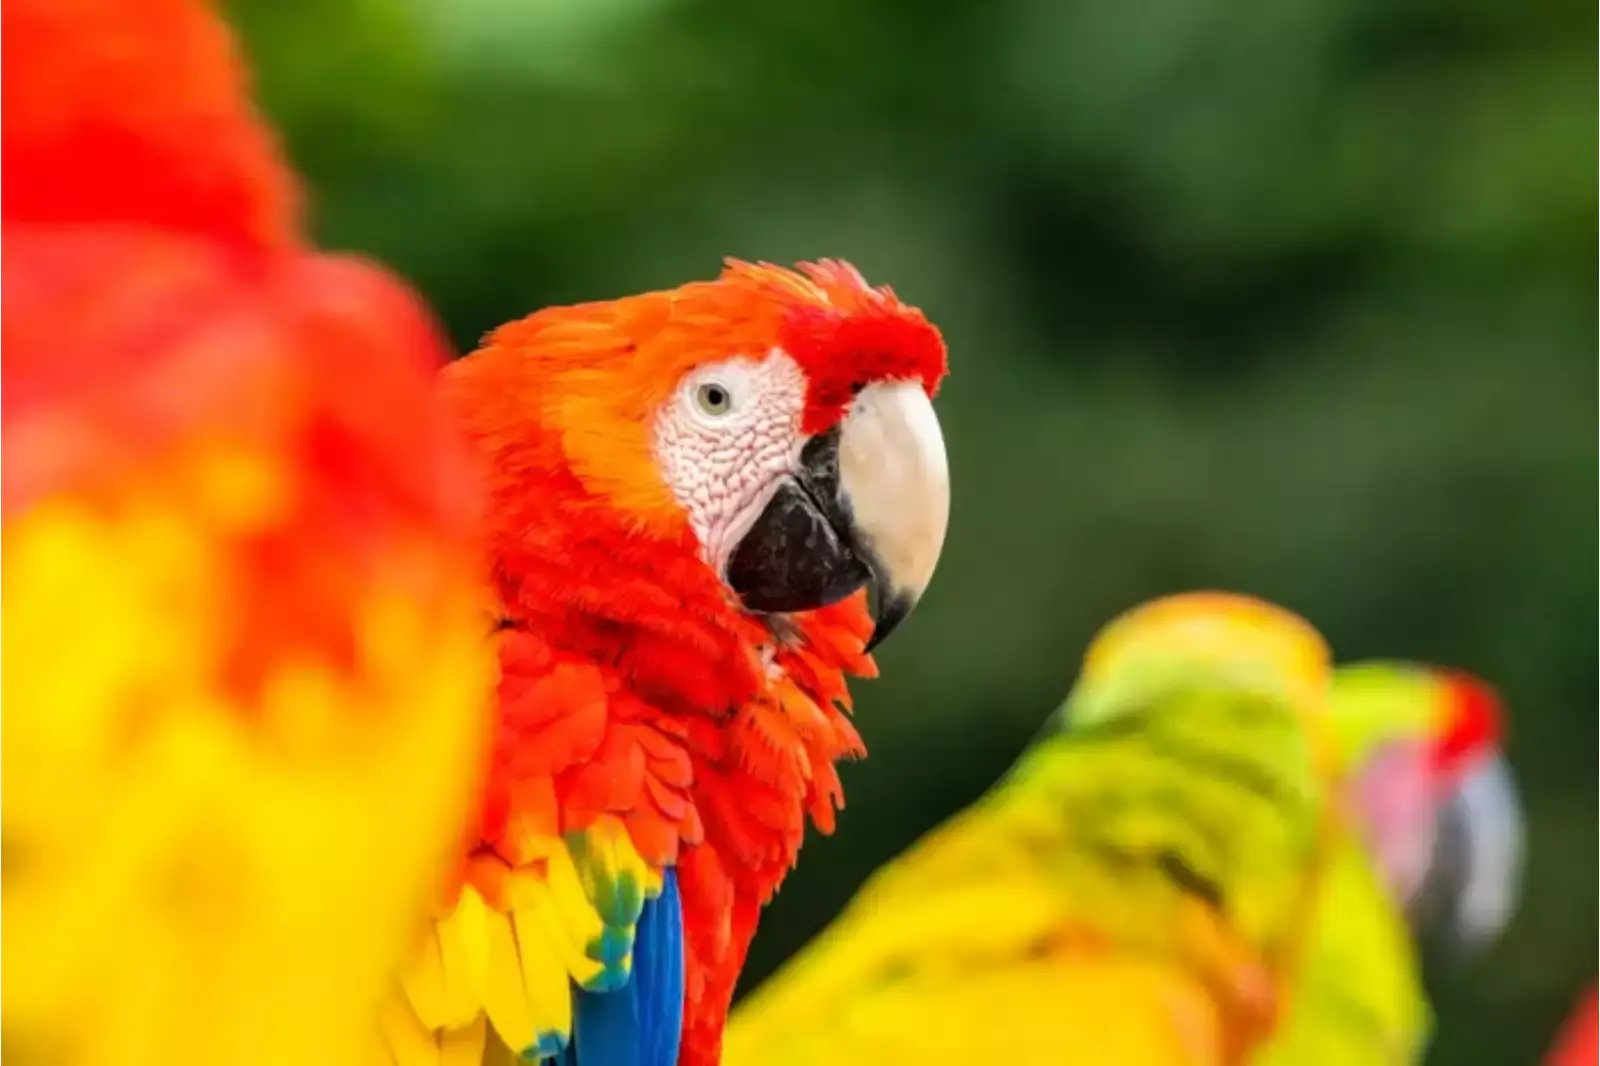
Hue
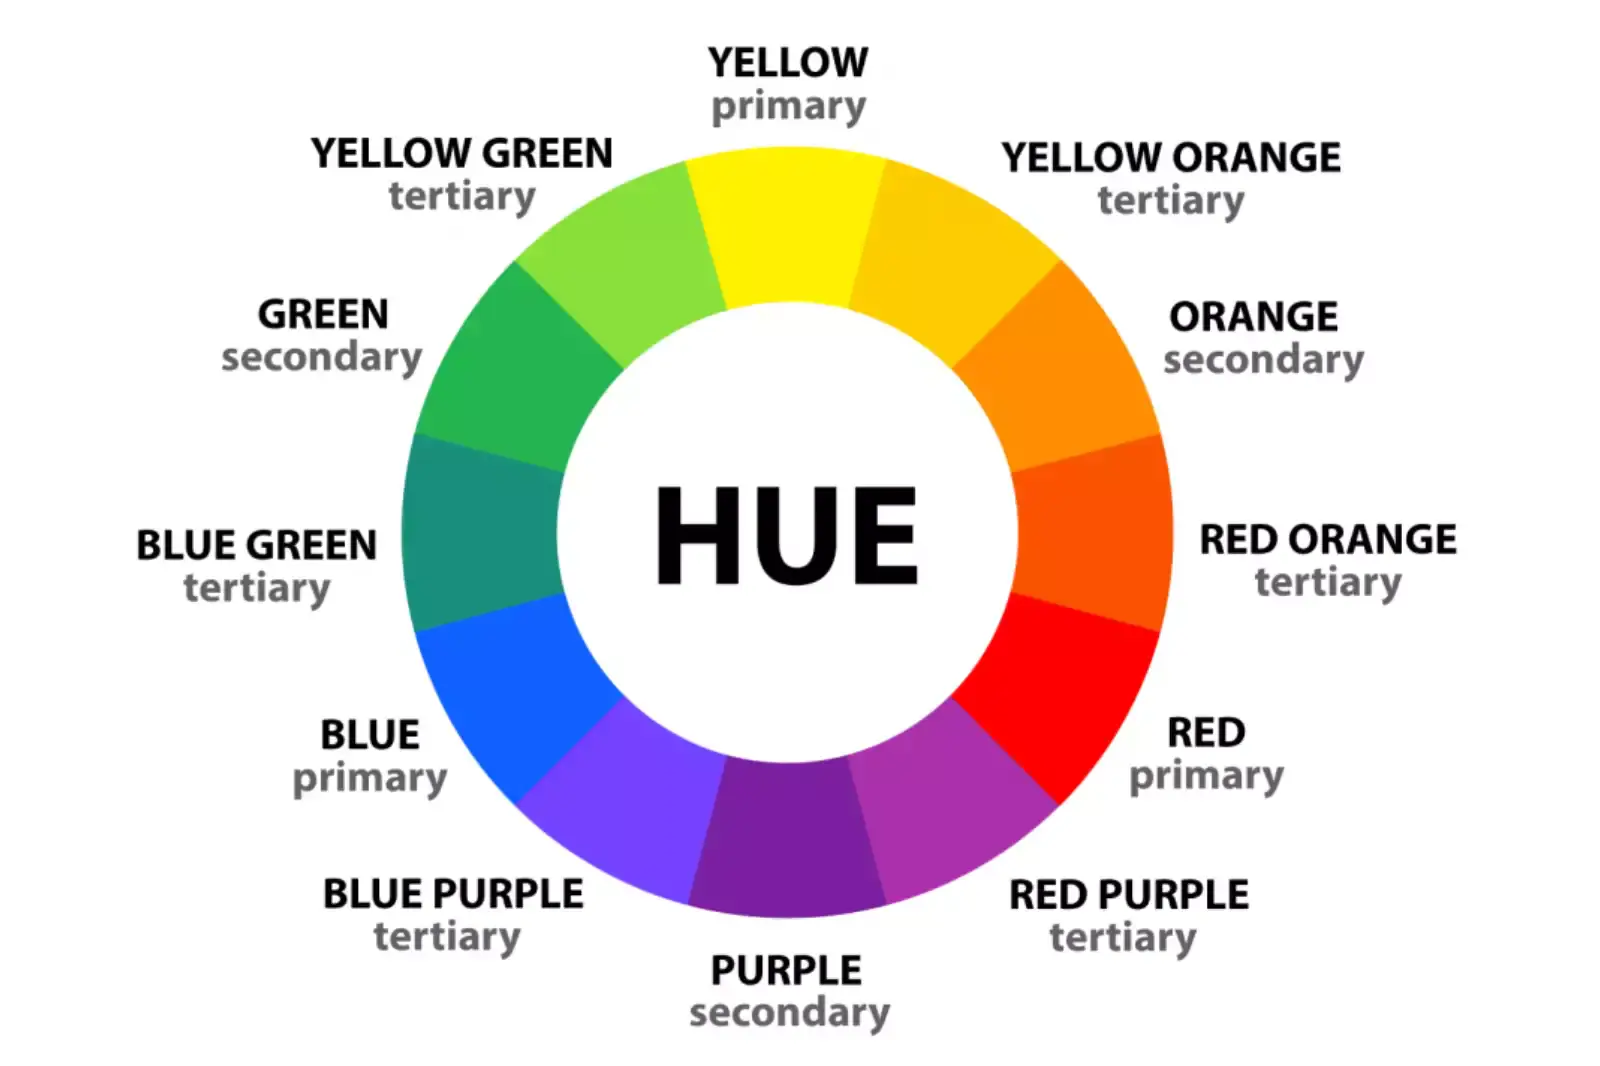
Photo color correction is a simple and easy way to make your photographs come alive. You can take a flat, dull-looking image and turn it into something special. This type of editing offers endless possibilities. With just a few clicks, you can change the lighting in an image or increase contrast in an otherwise blurry photo.
Using a photo editor can be confusing, especially if you’re new to editing. But to make your job easier, we’ve broken down color correction and hue into bite-sized definitions, so you know exactly what each is! Hue is a visual representation of an object’s or color’s location on a spectrum.
With a photo editor like Snapseed or VSCO Cam, you can manipulate hue by changing reds, greens, and blues based on their position on that spectrum. Suppose you want your image to look brighter than it currently does, move away from yellow (towards cyan). Try adding more orange or red to add warmth and tint to an image without increasing saturation too much. The possibilities are endless!
How to Become a Master of Color Correction In Photography
If you've ever taken a photo and seen it looks awful on your camera but fine on your phone, you've come across the frustration of color correction. For people who rely heavily on photo editing software like Adobe Lightroom or Photoshop, color correction is something we take for granted. Still, for beginners, it can take a lot of work.
What does temperature do? What does exposure do? And what about white balance? The first thing you need to know is that there are many different kinds of color correction:
- Warm up images so they look more inviting.
- Cooling them down, so they appear moodier.
- Adjusting saturation (colors) so they pop against a bright background.
- Fixing skin tones by changing either red, yellows, blues or greens.
Once you understand the basics of each type, finding which one suits your needs becomes easier. If you want to warm up an image in a light room setting, open your photos in Adobe Lightroom and click Develop Module at the top of the screen.
Then select Color under Basic Adjustments on the left-hand side of the screen and adjust the temperature. It should give you options from blue-cooler temperatures to yellow-warmer temperatures. Keep it cool enough, as this could ruin your image.
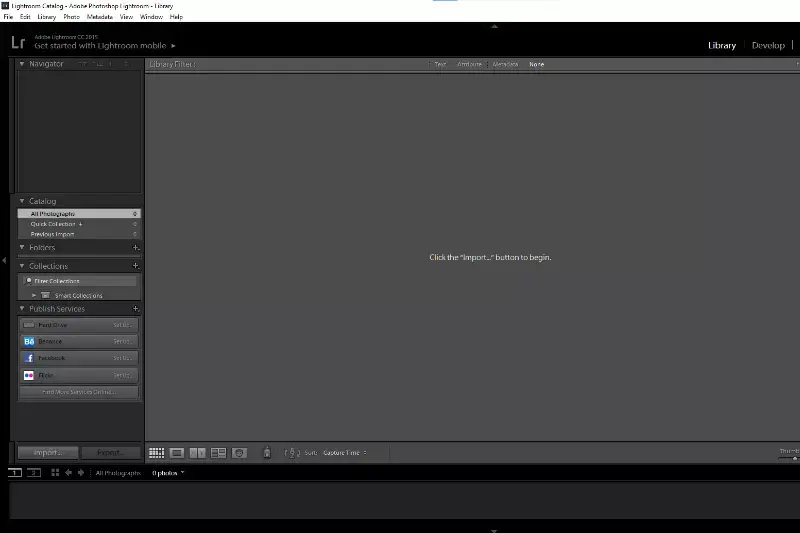
Working with Lightroom for Color Correction
Many of us look at a photo and see it as either good or bad. But all sorts of elements determine whether a photo is good or bad. One such element is color correction, which refers to adjusting the color of an image after it has been taken.
Lightroom offers powerful tools for both editing and organizing your photos. Still, one of its best features is the ability to make changes to your images using Develop presets. When you use Lightroom's built-in presets, you can choose anyone that seems appropriate based on your image and automatically have it change colors, contrast levels, sharpness, etc.
Step by Step Approach
Step 1 - When you open Lightroom, select Open Library > Import. For Sources, find the one with an icon of a photo, and press the import button on the bottom right.
Step 2 - Select an image from the top bar and click Library.
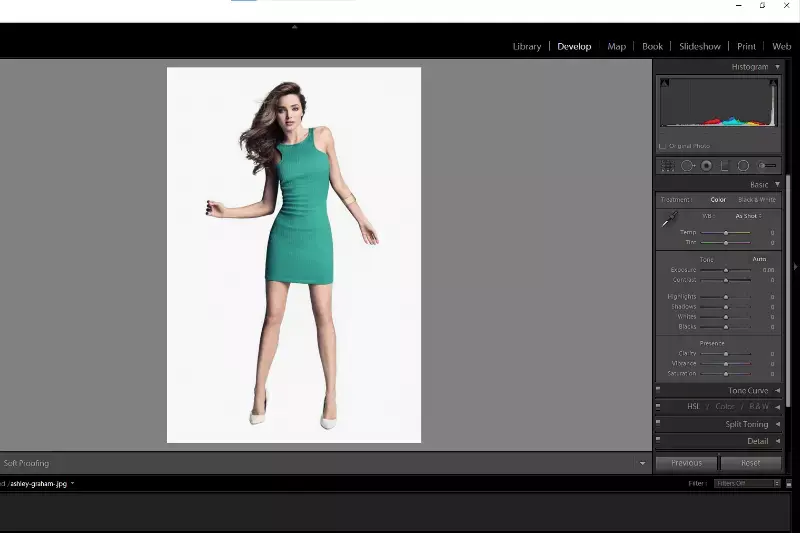
Step 3 - The Basic Panel has a set of tools to correct color issues.
Step 4 - Under the Custom Section, you'll find Temperature, which is set to 0. To make your image colder, adjust the Temperature to -100.
.webp)
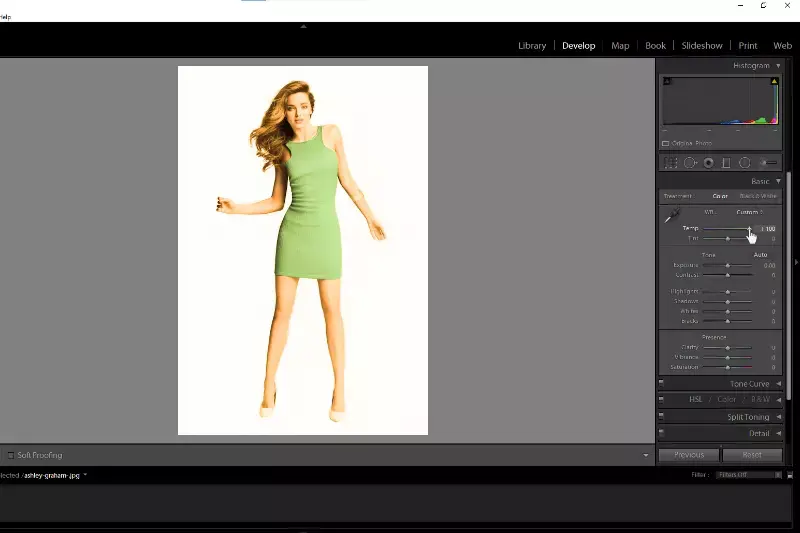
Step 5 - Set the Temperature to +100 to give your image blue tones. With this method, the image will appear yellow. The same can be done with the overall saturation of all the colors in Presence.
Step 6 - Under the third box, you will find HSL/ Color/ B&W. From there, you can change the hue and saturation of red, orange, green, aqua, blue, purple, and magenta of any individual object.

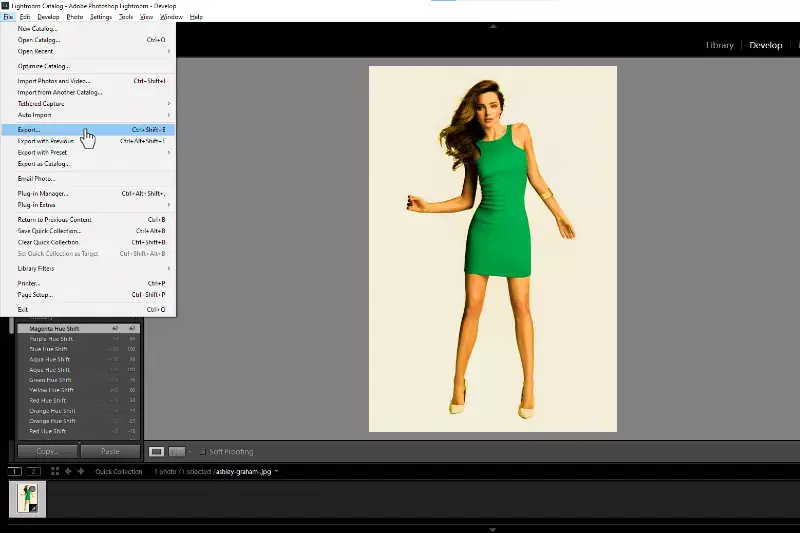
Step 7 - Select your image on the bottom bar, then click File > Export > Save in your desired setting/format > Export.
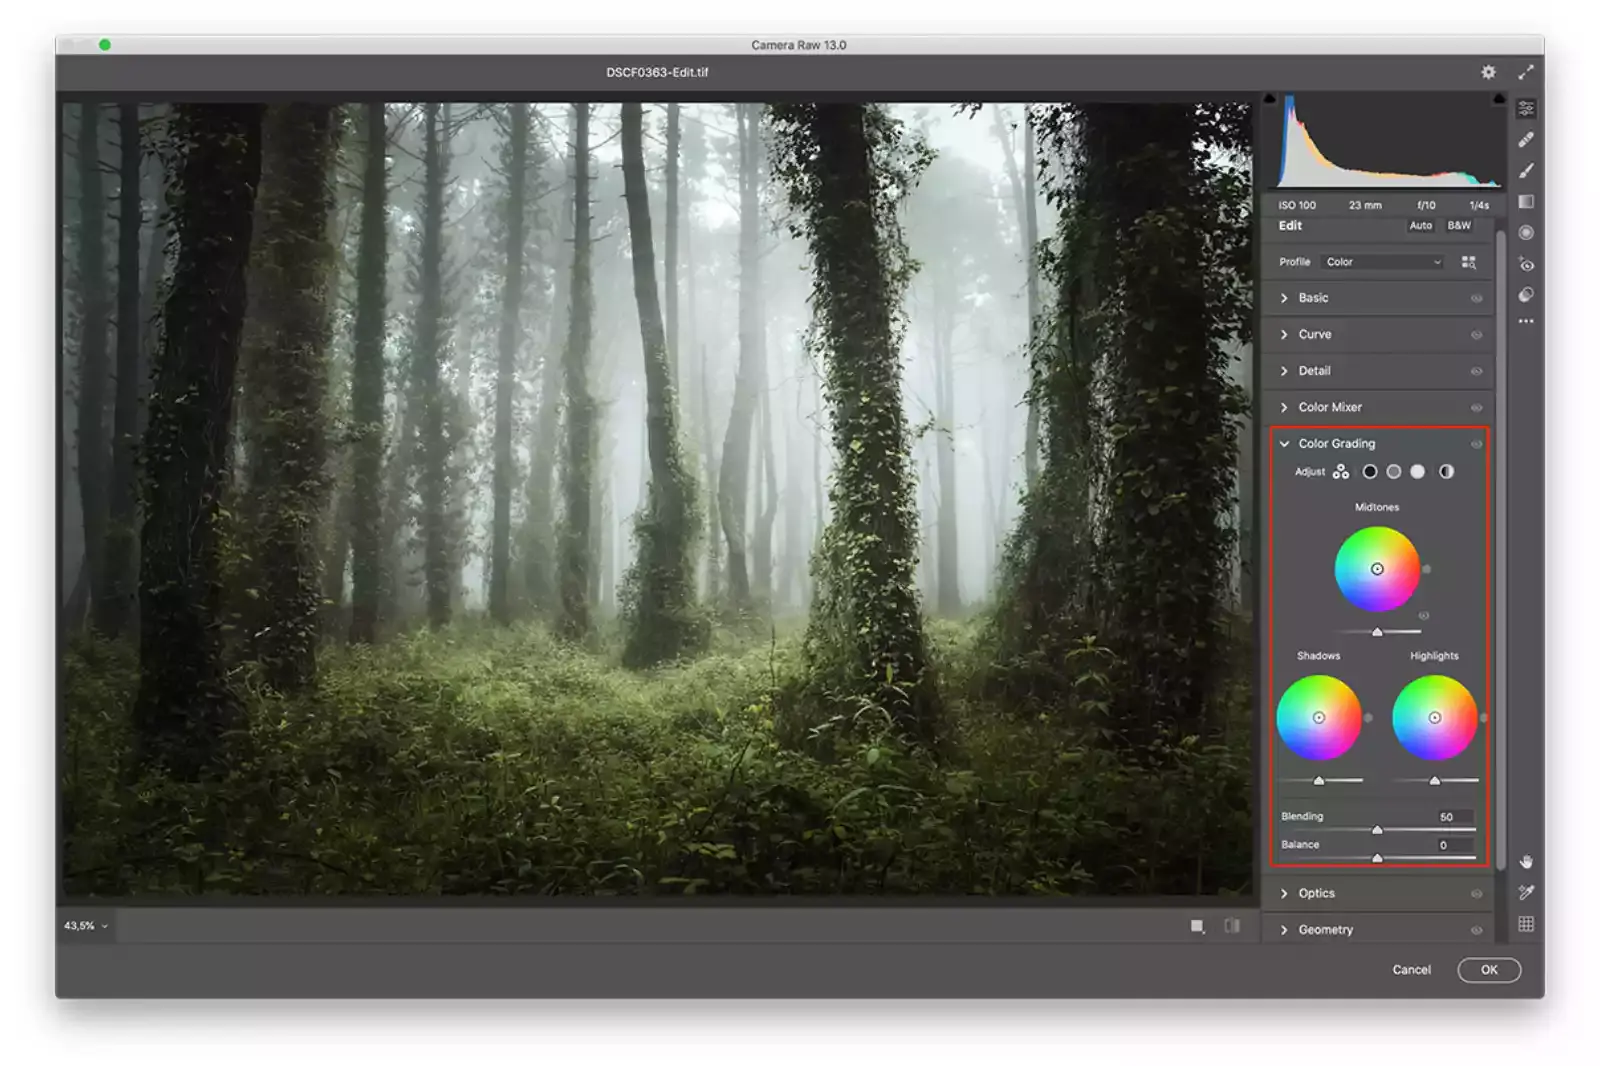
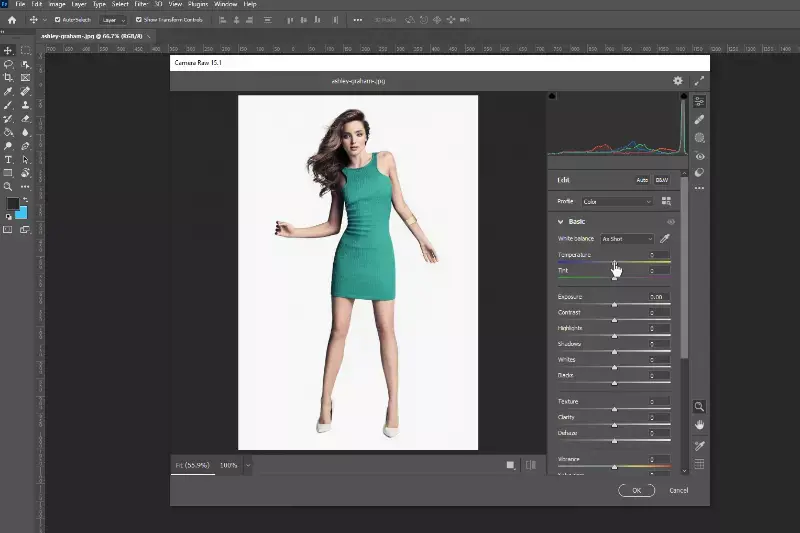
Working with Photoshop for Color Correction
Colour correction is a fantastic place to start. We have access to the curves and levels tool when using Photoshop for colour correction. We'll first create a duplicate layer for editing purposes. I always like to look at my image before fixing it in case I need any changes beforehand.
Now let's look at what curves and levels can do for us. The most important thing to remember when working with both of these tools is that the white points on each tool correspond with one another. Moving them closer together will darken the image, while moving them farther apart will lighten it up.
The red points on curves are used for tone-shaping. They allow you to give images more contrast or add warmth by dragging them up or down. Levels work similarly to curves but allow finer control over tonal values and colors within an image. To adjust this, drag any of the three sliders around until they meet where they want to be!
Step by Step Approach
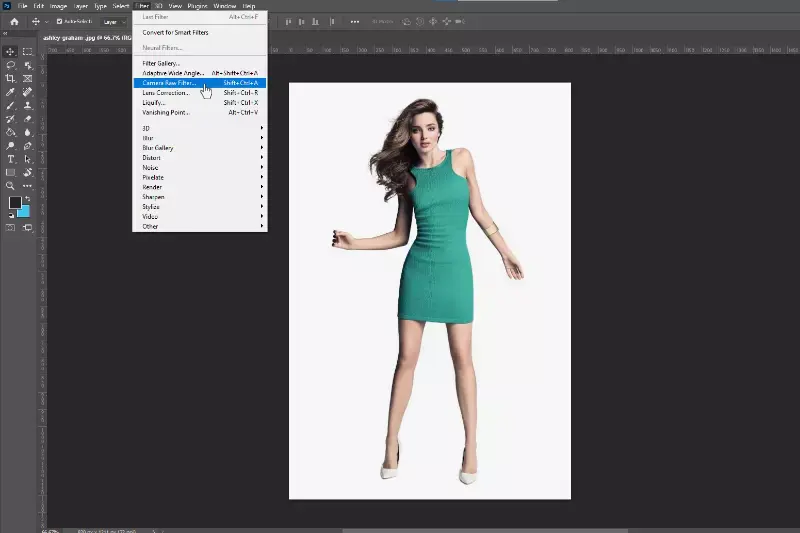
Step 1 - Open the image in Photoshop > Filter > Camera-Raw Filter.
Step 2 - At the top of the panel, you will find a Temperature slider that changes the color tone of your photo depending on what mood you want to create. In the next part of the panel, you will find a Saturation slider where you can intensify or dull the colours.
Step 3 - Slider bars for hue and luminance can be found under the Color Mixer, where you can change the red, orange, yellow, green, aqua, blue, purple, and magenta shades individually.

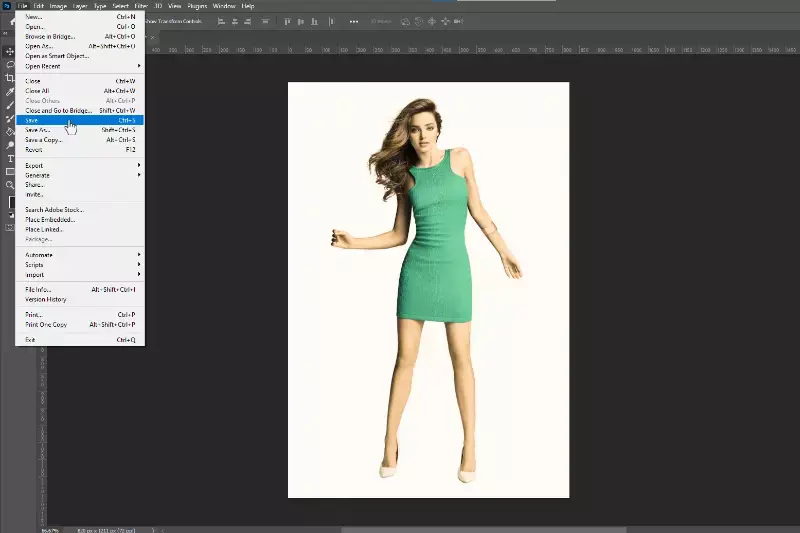
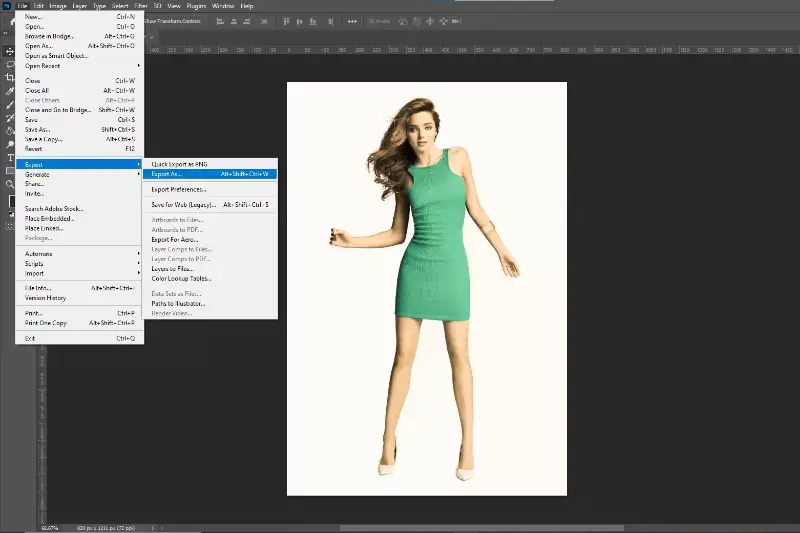
Step 4 - If you want to edit the image again, you can save it in Photoshop by going to File > Save, or if you want to save it on your device, you can export it by going to File > Export.
Step 5 - You can choose from any extension in the menu. If you want to export in JPEG format, go to Export > JPEG.
Conclusion
Improving photos with photo correction tools can be difficult, especially if you don’t know what you’re doing. If you want to take your photos from good to great, it’s essential to understand how color correction can make a difference.
In this guide, we’ll show you how to do just that by walking you through the basic functions of Lightroom and Bridge and some of the best techniques for improving your images through color correction with Photoshop or other editing software.
FAQ's
Why color correction is important?
You've been scrolling through your Instagram feed, seeing photos of all the amazing destinations you'll be visiting in the next year. Seeing all those rich, beautiful colors makes you want to go see them in person. There's just one problem: your travel photos are looking a little lackluster. You don't have to resign yourself to second-best when it comes to color correction for your smartphone's camera!
Is color grading necessary?
Color grading is an option that will help you take your photos to the next level. The perfect example of this is seeing a sunset and knowing it needs color correction to make it even more stunning. When it comes to color grading, the style you choose will depend on what kind of look you want for your photo: if you are trying to capture the authenticity of the scene, a natural style might be best; but if you want a more surreal or vintage feel, those options are available as well.
What is color correction in photo editing?
Most of the time, when we take a photo it needs to be balanced to what our eyes saw, but if you have any flaws in the photo or color casts then it will not appear as clear. While there are many ways to fix this problem, like Photoshop, for instance, there is also a way to do this on your phone's camera app. It's simple!
How do you make your color pop?
To make colors pop in your photos, you can adjust the saturation and contrast, use targeted editing tools to enhance specific colors, and ensure proper lighting and exposure during photography to bring out the vibrancy and richness of the colours.
How do I color correct a photo?
To color correct a photo, you can use photo editing software to adjust the white balance, contrast, saturation, and individual color channels until the colors appear more accurate and balanced.
How do you edit photos to make them pop?
To make photos pop, you can enhance them by adjusting the brightness, contrast, and saturation levels, applying selective edits to enhance specific areas, and ensuring proper sharpening and clarity to bring out the details and make the image visually striking.
.webp)

.webp)

.webp)

.webp)
.webp)


