


How to Remove Background Music From a Video?


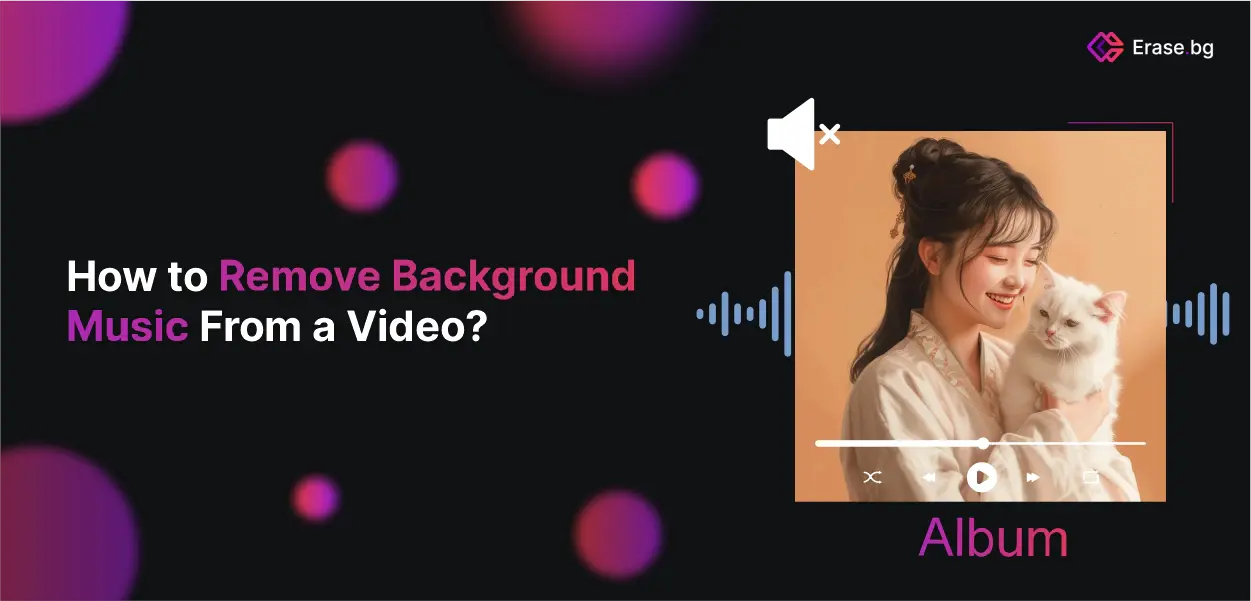
Are you tired of background music downloading out critical dialogue in your videos? Whether you're a content creator, a professional videographer, or simply someone who wants to clean up personal recordings, the need to remove background music from video has never been more crucial. Imagine transforming your videos with crystal-clear audio, making every spoken word shine without unwanted musical interference. Our comprehensive guide on removing background music from a video online will show you exactly how to achieve this effortlessly.
In today's digital age, high-quality audio is essential for engaging content. Background music can often distract or overwhelm the primary audio, especially in interviews, tutorials, or personal vlogs. Fortunately, advanced online tools now allow anyone to remove background music from video quickly and efficiently. These user-friendly solutions offer a straightforward way to enhance your audio, ensuring your audience hears every word.
Don't let background music ruin your videos any longer. Dive into our step-by-step guide and discover how to remove music from video seamlessly. With just a few clicks, you can elevate the quality of your content, making it more professional and enjoyable for your viewers. Start your journey to better audio today!
What is Background Music in Any Video?
Background music in any video serves as an underlying soundtrack that complements the visual content without necessarily being the main focus. It plays a crucial role in setting the tone, mood, and atmosphere of the video, enhancing the emotional impact and engagement of the audience.
Background music can subtly influence the viewer's perception, feelings, and reactions to the video content, whether it's to evoke sadness, joy, suspense, or tranquillity. In filmmaking, advertising, corporate presentations, educational content, and even in personal videos, the choice of background music is strategic. It can:
- Reinforce the Narrative: Music can underscore the storytelling aspect, highlighting key moments, transitions, and themes.
- Create Emotional Depth: By carefully selecting music that aligns with the emotional trajectory of the video, creators can deepen the viewer's emotional connection to the content.
- Enhance Viewer Engagement: Background music can make a video more captivating and memorable, encouraging viewers to watch through to the end.
- Establish Pace and Rhythm: The tempo and dynamics of the music can influence the perceived pace of the video, making scenes feel faster or slower.
- Cultivate a Specific Atmosphere or Setting: Music can evoke specific times, places, cultures, or environments, aiding in world-building and context setting.
Choosing the right background music involves considering the video's target audience, the message or emotion being conveyed, and the overall aesthetic vision. The music should be balanced with the other audio elements, such as dialogue and sound effects, to ensure it supports rather than distracts from the video content.
Benefits of Removing Background Music from Videos
In today's digital age, video content reigns supreme across various platforms, from social media to educational resources and marketing materials. However, not all videos are created equal; sometimes, background music can hinder rather than enhance the viewing experience. That's where the ability to remove background music from videos becomes crucial.
Whether you're a content creator striving for clarity, an educator aiming for comprehension, or a marketer seeking professionalism, understanding how to eliminate background music can elevate your content. This article delves into the importance and benefits of removing background music from videos, shedding light on why it's a vital skill in the digital landscape.
- Enhanced Clarity: By removing background music, the primary audio, such as dialogue or narration, becomes more prominent and easier to understand, improving clarity and communication.
- Professional Quality: Videos with clear, uninterrupted audio appear more polished and professional, helping to elevate your brand and make a more substantial impact on your audience.
- Increased Engagement: Clear audio keeps viewers engaged, as they can focus on the content without being distracted by background music, leading to better viewer retention and satisfaction.
- Compliance with Copyright Laws: Removing background music from video ensures you avoid copyright issues, allowing you to use your videos without fear of legal repercussions or content removal.
- Versatility in Editing: Once you remove music from a video, you have greater flexibility in editing. You can easily add new background music or sound effects that better suit the mood and message of your video.
How to Remove Background Music from a Video without Affecting the Dialogue?
Removing background music from a video without affecting the dialogue requires precise editing techniques. One effective method involves using audio editing software or online tools specifically designed for this purpose. These tools utilise advanced algorithms to isolate and
music while preserving the clarity of the dialogue.
Users can upload their videos to these platforms and apply filters or settings to target and eliminate the music frequencies while leaving the dialogue intact. Adjusting audio levels, applying noise reduction filters, or manually editing the audio tracks can minimize background music without compromising dialogue quality.
By carefully balancing audio elements and leveraging the capabilities of these tools, users can achieve professional-quality results, ensuring that the dialogue remains clear and prominent while removing unwanted background music seamlessly.
17 Tools to Remove Background Music from Video
LALAL.AI
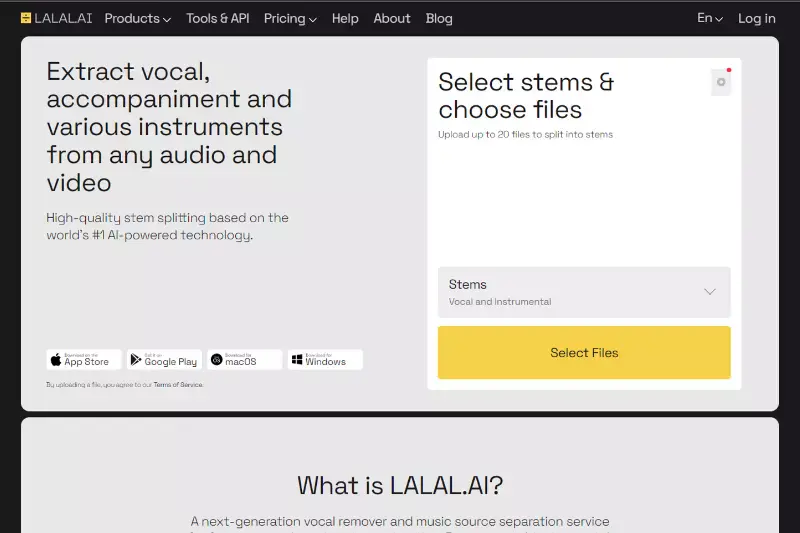
With its advanced AI-powered technology, LALAL.AI revolutionises how users remove background music from videos. Offering a seamless solution to eliminating unwanted audio while preserving essential dialogue or vocals, LALAL.AI stands out as a user-friendly and effective tool. With its intuitive interface and precise noise-cancelling capabilities, users can effortlessly achieve professional-grade results in removing background music from videos.
Whether for personal projects or professional endeavours, LALAL.AI caters to diverse needs, ensuring high-quality audio output in various video formats. Experience unparalleled convenience and audio clarity with LALAL.AI today.
Key features:
- Next-Generation Source Separation: LALAL.AI utilises cutting-edge AI algorithms to separate vocals from background music accurately.
- High-Quality Results: Users can expect top-notch audio quality in the extracted vocals, free from artefacts or distortions.
- User-Friendly Interface: The intuitive design makes it easy for users to upload videos and customise settings.
- Multiple File Format Support: LALAL.AI accepts various video formats, including MP4, AVI, and MOV, ensuring compatibility with different devices.
- Flexible Noise Cancelling Levels: Users can adjust the noise cancelling level to achieve the desired balance between vocal clarity and background music removal.
- Online Convenience: As an online tool, LALAL.AI eliminates the need for software installation, allowing users to access its features from any device with an internet connection.
steps:
- Open LALAL.AI on your preferred browser.
- Upload your video file containing the background music you want to remove.
- Use the intuitive interface to select the desired noise cancelling level.
- Process the video file to extract vocals and remove background music.
- Download the processed video with clear audio or listen to it online.
By following these steps, users can effortlessly remove background music from videos and enhance the overall audio quality for various purposes.
Audacity

Audacity stands as a pillar in the realm of audio editing, offering a comprehensive suite of tools to remove background music from videos seamlessly. Renowned for its versatility and user-friendly interface, Audacity caters to both novices and seasoned professionals alike. With a plethora of features tailored for precision editing, including noise reduction and spectral editing, Audacity empowers users to achieve pristine audio quality effortlessly.
Its ability to handle multiple tracks simultaneously, coupled with support for plugins, makes it a go-to solution for anyone seeking to remove background music from videos with ease and finesse, all without costing a dime.
Key Features:
- Noise Reduction: Audacity offers effective noise reduction tools to eliminate unwanted background music from videos.
- Multi-track Editing: Users can work with multiple audio tracks simultaneously, allowing for seamless editing and manipulation.
- Effects and Filters: Audacity provides a wide range of effects and filters to enhance audio quality and remove background noise.
- Spectral Editing: This feature enables users to visualize and edit audio frequencies, making pinpointing and removing background music easier.
- Batch Processing: Audacity supports batch processing, allowing users to apply edits to multiple audio files simultaneously.
- Plugin Support: With support for plugins, users can expand Audacity's functionality and customize their editing experience further.
Steps:
- Import Video: Open Audacity and import the video file containing the background music.
- Select Audio: Isolate the audio track containing the background music.
- Apply Noise Reduction: Use Audacity's noise reduction tools to reduce or eliminate the background music.
- Preview and Adjust: Preview the edited audio and make any necessary adjustments to achieve the desired result.
- Export: Once satisfied, export the edited audio track and sync it back with the original video.
By leveraging Audacity's powerful features and user-friendly interface, users can effectively remove background music from videos and achieve professional-quality results.
Media.io Vocal Remover

Media.io stands out as a comprehensive, user-friendly platform that revolutionizes the way we approach audio editing in videos. With its Vocal Remover feature, powered by advanced AI technology, users can effortlessly strip away background music and noise, unlocking the pristine clarity of vocal tracks—all at no cost.
This tool is a boon for content creators, educators, and anyone looking to enhance the auditory dimension of their videos without the hassle of complex software or steep learning curves.
Key Features:
- AI-Powered Vocal Isolation: Media.io utilizes advanced AI technology to accurately isolate and remove vocals from audio tracks, ensuring that background music is effectively separated without compromising the quality of the remaining audio.
- Multiple File Format Support: Media.io supports a wide range of audio and video file formats, including MP3, WAV, MP4, and MOV. This versatility allows users to work with virtually any type of media file for their projects.
- User-Friendly Interface: The platform offers an intuitive and easy-to-use interface that simplifies the process of removing vocals. Even users with minimal technical skills can navigate and utilize the tool efficiently.
- Fast Processing Speed: Media.io provides quick processing times, allowing users to upload, edit, and download their files rapidly. This feature is particularly beneficial for users who need to work on multiple files or meet tight deadlines.
- High-Quality Output: The tool ensures that the output audio or video file maintains high quality. The processed files retain their original fidelity, making them suitable for professional use in various projects.
- Online Accessibility: As an online tool, Media.io can be accessed from any device with an internet connection. This eliminates the need for downloading and installing software, offering convenience and flexibility for users on the go.
Steps:
- Step 1 - Visit Media.io's homepage and click "Choose Files" to upload your video.
- Step 2 - Allow the AI to analyze and process your file, identifying and isolating unwanted audio elements.
- Step 3 - Tailor the noise removal process by selecting specific types of noise to eliminate, using the provided checkboxes for customization.
- Step 4 - Download the cleaned voice track, now free from background distractions, directly to your device
- Step 5 - Employ Media.io's online video editor to seamlessly integrate the refined voice track back into your original video, creating a harmonious final product.
Veed.io
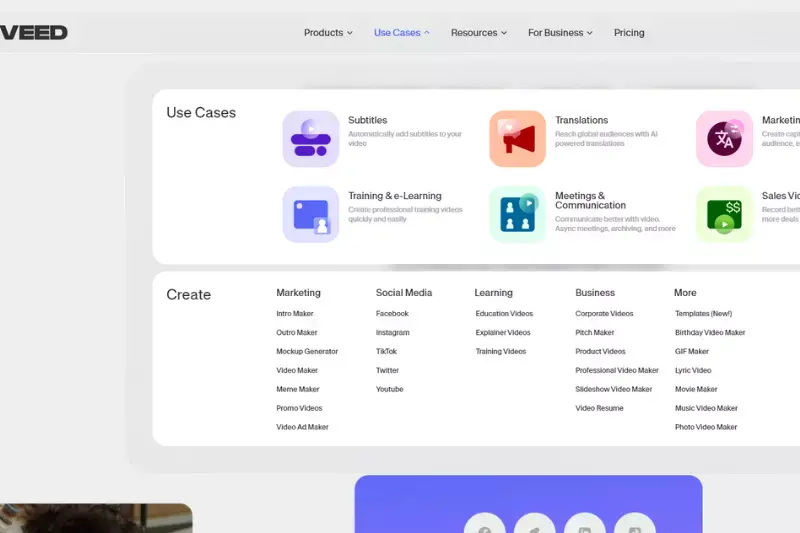
Veed.io is a powerful and intuitive tool designed for video creators who need to remove background music from videos effortlessly. Whether you're looking to enhance your video's audio quality or simply want to eliminate distracting music, Veed.io provides an efficient solution.
This online tool is perfect for those who want to remove background music from a video without any technical hassle. With Veed.io, you can remove background music from video online free, making it accessible for everyone, from beginners to professionals.Veed.io makes it simple and efficient to remove background music from videos, offering a seamless solution for creators looking to improve their video content.
Key Features:
- User-Friendly Interface: Veed.io's simple and intuitive design makes it easy to remove background music from your videos, even for beginners.
- Advanced Audio Editing: The tool offers precise audio editing capabilities, allowing you to fine-tune the audio and isolate the music track effectively.
- Fast Processing: Veed.io ensures quick processing, so you can remove background music and get your edited video ready in no time.
- High-Quality Output: Despite being an online tool, Veed.io delivers high-quality audio output, maintaining the integrity of your original video.
- Multiple Format Support: Veed.io supports various video formats, making it convenient to upload and export videos in different file types.
- No Downloads Required: Being an online tool, Veed.io requires no software downloads, providing a hassle-free experience.
Steps:
- Upload Your Video: Visit the Veed.io website and upload the video file from which you want to remove background music.
- Select Audio Editing Tools: Once the video is uploaded, choose the audio editing tools to isolate and identify the background music.
- Remove Background Music: Use the tool to remove the background music from your video. You can preview the changes in real-time.
- Fine-Tune Audio: Adjust the remaining audio to ensure it meets your desired quality and clarity.
- Export the Video: Once satisfied with the audio, export the edited video in your preferred format.
- Download Your File: Download the final video file with the background music removed, ready for use.
Adobe Audition
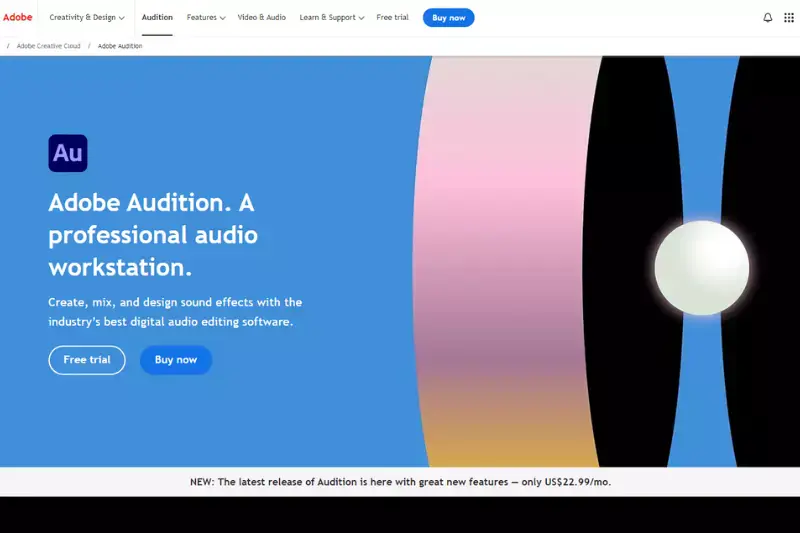
Adobe Audition is a audio editing software renowned for its robust capabilities in removing background music from videos. With its intuitive interface and advanced tools, Adobe Audition empowers users to effortlessly eliminate unwanted audio elements while retaining the integrity of the original content. Whether you're a novice or an experienced audio professional, Adobe Audition provides the perfect solution for seamlessly removing background music from videos.
Explore its versatile features and streamline your workflow to achieve pristine audio quality without compromising on efficiency. Experience the power of Adobe Audition for free and transform your videos with ease.
Key Features:
- Noise Reduction: Utilize advanced noise reduction tools to effectively eliminate background music from video clips while preserving dialogue and other essential audio elements.
- Spectral Frequency Display: Visualize audio frequencies in real-time, allowing for precise editing and targeted removal of unwanted sounds.
- Multitrack Editing: Seamlessly edit multiple audio tracks simultaneously, enabling efficient workflow and precise adjustments.
- Adaptive Noise Reduction: Employ adaptive algorithms to automatically identify and reduce background noise, ensuring optimal audio quality.
- Remixing and Mashups: Create custom remixes and mashups by easily extracting and manipulating individual audio elements within a video.
- Batch Processing: Streamline your workflow by applying background music removal to multiple video files simultaneously, saving time and effort.
Steps:
- Import Video: Open your video file in Adobe Audition's multitrack editor.
- Select Audio Track: Identify the audio track containing the background music you want to remove.
- Apply Noise Reduction: Use the noise reduction tools to isolate and remove the background music while preserving the desired audio.
- Fine-tune Settings: Adjust settings such as threshold levels and frequency ranges to achieve optimal results.
- Preview and Export: Preview the edited video to ensure satisfactory results, then export the file in your preferred format.
Adobe Audition offers unparalleled versatility and precision for removing background music from videos, making it an essential tool for content creators and audio professionals alike.
Filmora

Filmora, a video editing software, simplifies the process of creating stunning videos for both beginners and professionals alike. With its intuitive interface and powerful features, Filmora enables users to remove background music effortlessly, ensuring clear audio and enhanced storytelling.
Whether you're a content creator, vlogger, or filmmaker, Filmora offers a seamless editing experience with advanced tools to remove background music from videos and customise audio settings. With Filmora, you can achieve professional results and bring your creative vision to life without any hassle.
Key Features:
- Intuitive Interface: Filmora's intuitive interface makes it easy for beginners to navigate and edit videos seamlessly.
- Background Music Removal: With Filmora, users can remove background music from videos effortlessly, enhancing the clarity of dialogue or adding their own soundtracks.
- Advanced Editing Tools: Filmora provides a wide range of advanced editing tools, including trimming, cropping, and audio adjustments, allowing users to customize their videos precisely.
- Rich Effects Library: Explore Filmora's extensive library of effects, transitions, and filters to elevate the visual appeal of your videos.
- Flexible Export Options: Filmora offers flexible export options, enabling users to save their videos in various formats suitable for different platforms.
- Support and Updates: Benefit from Filmora's dedicated customer support and regular updates, ensuring a smooth editing experience and access to the latest features.
Steps:
- Import Video: Launch Filmora and import your video clip into the editor.
- Remove Background Music: Select the audio track containing the background music and delete it from the timeline.
- Adjust Settings: Fine-tune the audio settings to optimize the sound quality.
- Preview and Export: Preview your edited video and export it in your preferred format.
Kingshiper
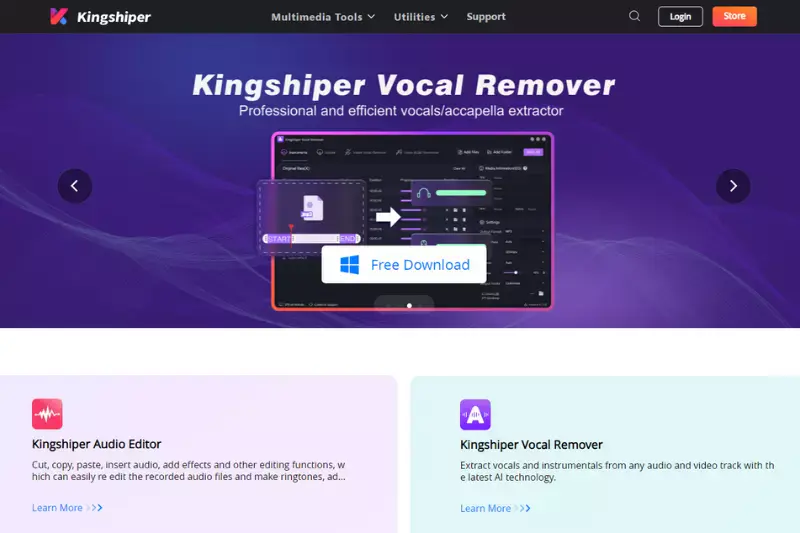
KingShiper is an innovative online tool designed to help you remove background music from videos seamlessly. Whether you're looking to extract dialogue for a clearer presentation or simply want to remove unwanted music, KingShiper offers a straightforward and efficient solution. With user-friendly features and advanced algorithms, this tool makes the process of removing background music from videos quick and hassle-free.
KingShiper is perfect for those who need to remove background music from video online free and ensure high-quality audio output. KingShiper simplifies the process of removing background music from videos, providing a reliable and efficient tool for all your audio editing needs. Whether you're a professional editor or a casual user, KingShiper makes it easy to achieve the perfect audio balance in your videos.
Key Features:
- User-Friendly Interface: KingShiper boasts a simple and intuitive interface, making it easy for users of all skill levels to remove background music from their videos.
- High-Quality Output: The tool ensures that the audio quality remains high, even after the background music has been removed.
- Quick Processing: KingShiper’s advanced algorithms allow for fast processing, so you can remove background music from video online free in no time.
- Supports Multiple Formats: The tool supports various video formats, making it versatile and convenient for different types of projects.
- Cloud-Based Processing: All processing is done online, so there’s no need for additional software downloads or installations.
- Secure and Confidential: Your files are processed securely, ensuring your content’s privacy and confidentiality.
Steps:
Upload Your Video:
- Go to the KingShiper website and click on the “Upload” button.
- Select the video file from which you want to remove background music.
Select Audio Track:
- Once the video is uploaded, choose the audio track that contains the background music.
- The tool will automatically detect and highlight the audio track for you.
Apply Music Removal:
- Click on the “Remove Music” option to start the process.
- KingShiper’s advanced algorithms will isolate and remove the background music from the video.
Preview the Result:
- After processing, preview the video to ensure the background music has been effectively removed.
- Make any necessary adjustments if needed.
Download the Edited Video:
- Once satisfied with the result, click on the “Download” button to save the video.
- Your video is now free from background music and ready for use.
MP4 Compress

MP4 Compress is a versatile online tool designed to simplify the process of video editing, including the ability to remove background music from video files. Whether you're creating content for social media, professional presentations, or personal projects, MP4 Compress offers an easy-to-use interface that makes it straightforward to edit audio tracks.
If you’re wondering how to remove background music from a video, MP4 Compress provides a solution that is both accessible and effective. Best of all, you can remove background music from video online for free, ensuring your projects are clear and professional.
By using MP4 Compress, you can easily remove music from video files, enhancing the clarity and professionalism of your content. Whether for personal or professional use, this tool simplifies how to remove background music from a video, providing a free and efficient online solution.
Key Features :
- User-Friendly Interface: MP4 Compress offers an intuitive and straightforward interface, making it easy for users of all skill levels to navigate and edit their videos.
- High-Quality Output: Ensure that your edited videos maintain high audio and visual quality even after background music removal.
- Fast Processing: Experience quick processing times, allowing you to edit and download your videos without long waits.
- Support for Multiple Formats: MP4 Compress supports various video formats, ensuring compatibility with your files.
- No Download Required: As an online tool, MP4 Compress requires no software installation, making it convenient and accessible from any device.
- Secure and Private: Your uploaded files are kept secure and are automatically deleted after processing to ensure privacy.
Steps :
- Upload Your Video: Go to the MP4 Compress website and upload your video file by clicking the 'Upload' button.
- Select Audio Editing Options: Choose the option to edit audio tracks and select the background music you wish to remove.
- Remove Background Music: Use the tool to isolate and remove the background music from your video.
- Preview the Edited Video: Check the preview to ensure the background music has been successfully removed.
- Download Your Video: Once satisfied with the results, download the edited video file.
CapCut on Mobile

CapCut is a versatile mobile video editing app that has gained popularity for its powerful features and intuitive interface. Among its many capabilities, CapCut allows users to remove background music from videos seamlessly. Whether you're a content creator looking to refine your video projects or simply trying to enhance personal recordings, CapCut makes it easy to remove background music from video files.
This guide will walk you through how to remove background music from a video using CapCut, highlighting its key features and providing step-by-step instructions.By using CapCut, removing background music from videos is a straightforward process that can be completed directly on your mobile device. This app provides a practical solution for anyone looking to refine their video content and remove music from video files efficiently.
Key Features:
- User-Friendly Interface: CapCut’s intuitive design ensures that even beginners can navigate and use the audio editing tools with ease.
- Precise Audio Separation: The app allows for precise isolation of audio tracks, making it simpler to remove background music without affecting other audio components.
- Multiple Audio Tracks: CapCut supports the editing of multiple audio tracks, giving users flexibility in managing various sound elements.
- High-Quality Output: The app maintains the quality of the video and audio after editing, ensuring professional results.
- Real-Time Preview: Users can preview changes in real-time, making it easier to achieve the desired audio balance.
- Export Options: CapCut offers various export formats, enabling users to save their edited videos in the preferred format for different platforms.
Steps:
- Download and Install CapCut: First, download CapCut from the App Store or Google Play Store and install it on your mobile device.
- Import Your Video: Open CapCut and tap on the "New Project" button to import the video from which you want to remove background music.
- Access Audio Tools: Once your video is loaded, tap on the audio track at the bottom of the screen to access the audio editing tools.
- Isolate Background Music: Use the split or extract audio function to isolate the background music from the rest of the audio tracks.
- Remove Background Music: Delete or mute the isolated background music track. You can adjust the remaining audio levels to ensure clarity.
- Preview and Export: Preview the edited video to ensure the background music has been removed as desired. Once satisfied, export the video in your chosen format.
Spleeter by Deezer

Spleeter by Deezer is a powerful open-source tool designed to help users separate audio tracks with ease. It’s particularly popular for its ability to remove background music from videos, making it an invaluable resource for content creators, musicians, and audio engineers.
Whether you need to isolate vocals or extract specific audio elements, Spleeter offers a sophisticated solution that leverages advanced machine learning technology. This guide will explore how to remove background music from a video using Spleeter, highlighting its key features and providing step-by-step instructions.
Key Features:
- High-Quality Audio Separation: Spleeter provides exceptional audio separation quality, allowing users to isolate vocals and instruments accurately.
- Open-Source Accessibility: As an open-source tool, Spleeter is free to use and can be customized to fit specific audio processing needs.
- Multiple Model Options: Users can choose from different pre-trained models to separate audio into 2, 4, or 5 stems, offering flexibility in audio manipulation.
- Fast Processing: Spleeter’s efficient algorithms ensure quick audio separation, saving time during the editing process.
- Command-Line Interface: The tool can be easily integrated into various workflows through its command-line interface, making it suitable for both novice and advanced users.
- Cross-Platform Compatibility: Spleeter is compatible with multiple operating systems, including Windows, macOS, and Linux, ensuring broad usability.
Steps :
- Install Spleeter: First, ensure you have Python installed on your computer. Then, install Spleeter by running the command in your terminal or command prompt.
- Prepare Your Audio File: Extract the audio from your video file using a video editing tool or an online converter. Save the audio file in a compatible format, such as MP3 or WAV.
- Run Spleeter: Use Spleeter’s command-line interface to separate the audio. Navigate to the directory where your audio file is located and run the command to separate it into two stems (vocal and accompaniment).
- Locate the Separated Files:Once Spleeter finishes processing, navigate to the output directory you specified. You will find two files: one for the vocals and one for the accompaniment (background music).
- Remove Background Music:Use the separated vocals file in your video editing software. Import the vocals-only audio track and sync it with your video.
- Final Adjustments and Export:Make any necessary adjustments to the audio levels to ensure clarity and consistency.
- Export your final video with the clean, background music-free audio track.
By using Spleeter by Deezer, you can efficiently remove background music from video files, enhancing the audio quality of your content and providing a more professional finish. Whether you're a podcaster, YouTuber, or filmmaker, Spleeter's advanced capabilities can help you achieve the perfect sound balance in your projects.
iMovie
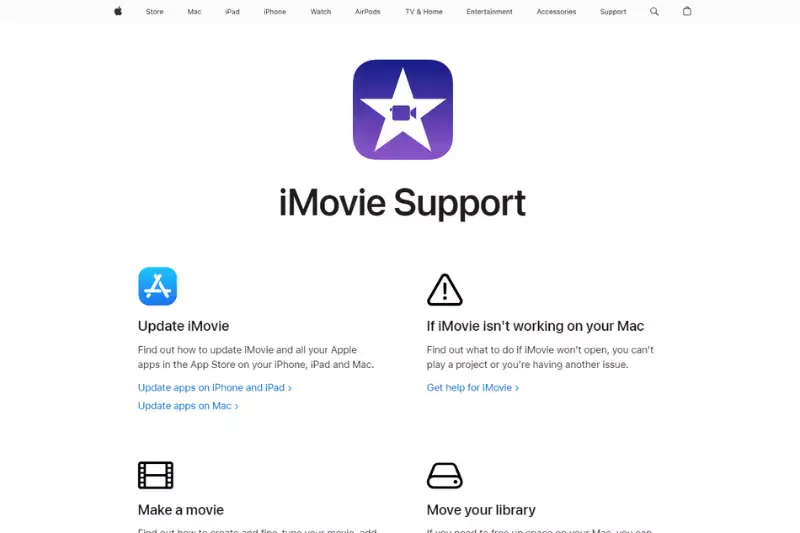
iMovie, a renowned video editing software developed by Apple, offers a seamless solution for removing background music from videos. With its user-friendly interface and powerful editing capabilities, iMovie empowers users to edit their videos effortlessly. Whether you're a novice or an experienced editor, iMovie provides the tools needed to achieve professional-quality results.
Best of all, it's available for free to Mac and iOS users, making it accessible to a wide audience. In this guide, we'll explore how to utilize iMovie's features to remove background music from your videos effectively, providing step-by-step instructions for a hassle-free editing experience.
Key Features:
- User-Friendly Interface: iMovie boasts a user-friendly interface that caters to both beginners and advanced users, making it easy to navigate through the editing process.
- Precise Editing Tools: The software provides precise editing tools, allowing users to pinpoint and remove background music with accuracy.
- Multitrack Editing: iMovie supports multitrack editing, enabling users to manipulate audio tracks independently for precise adjustments.
- Real-Time Preview: Users can preview their edits in real-time, ensuring seamless integration of audio changes without compromising video quality.
- Export Options: iMovie offers various export options, allowing users to save their edited videos in different formats and resolutions.
- Free Availability: iMovie is available for free to Mac and iOS users, offering an accessible solution for removing background music from videos without any additional cost.
Steps:
- Open iMovie and import the video file you wish to edit.
- Navigate to the timeline and select the audio track containing the background music.
- Right-click on the audio track and choose the option to delete or detach the audio.
- Confirm the deletion, and the background music will be removed from the video.
- Preview the edited video to ensure satisfactory results.
- Export the edited video in your desired format.
With iMovie's robust features and user-friendly interface, removing background music from videos has never been easier.
Vegas Pro
Vegas Pro is a renowned video editing software equipped with powerful features to seamlessly remove background music from videos. Trusted by professionals and amateurs alike, Vegas Pro offers an intuitive interface and robust editing tools, making it an ideal choice for achieving pristine audio quality in your videos.
With its advanced audio editing capabilities, users can easily isolate and eliminate background music while preserving the clarity of dialogue and other essential audio elements. Whether you're a seasoned editor or a novice, Vegas Pro empowers you to effortlessly remove background music from your videos, ensuring a polished and professional result every time.
Key Features:
- Precise Audio Editing: Vegas Pro offers precise control over audio tracks, allowing users to isolate and remove background music effectively.
- Real-time Audio Effects: Enjoy real-time audio effects processing to fine-tune the audio track to perfection.
- Multitrack Editing: Seamlessly edit multiple audio tracks simultaneously for efficient background music removal.
- Enhanced Audio Restoration: Utilise advanced audio restoration tools to clean up audio tracks and remove unwanted background noise.
- Customizable Filters and Plugins: Access a wide range of customizable filters and plugins to enhance audio editing capabilities further.
- Export Options: Vegas Pro supports various export formats, ensuring compatibility with different platforms and devices.
Steps:
- Import your video file into Vegas Pro's timeline.
- Navigate to the audio track containing the background music you wish to remove.
- Use the audio editing tools to isolate and select the background music.
- Apply the removal effect or delete the selected background music.
- Preview the edited video to ensure the desired result.
- Export the video in your preferred format.
With Vegas Pro, removing background music from videos becomes a seamless and efficient process, enabling users to achieve professional-quality results effortlessly.
Final Cut Pro

Final Cut Pro stands out as a top-tier video editing software renowned for its cutting-edge features, including its ability to seamlessly remove background music from videos. As a powerhouse tool in the realm of video editing, Final Cut Pro empowers users with intuitive controls and advanced functionalities to achieve impeccable results.
Its sophisticated audio editing capabilities make it the go-to solution for manipulating audio tracks, ensuring that users can effectively remove background music while preserving the integrity of the remaining audio elements, such as dialogue or sound effects.With Final Cut Pro, users have access to a comprehensive suite of tools designed to streamline the process of removing background music from videos.
Key Features:
- Advanced Audio Editing: Final Cut Pro provides advanced audio editing capabilities, allowing users to manipulate audio tracks with precision.
- Real-time Audio Effects: Enjoy real-time audio effects processing to enhance and fine-tune audio tracks.
- Multitrack Editing: Seamlessly edit multiple audio tracks simultaneously for efficient background music removal.
- Audio Enhancement Tools: Utilize a range of audio enhancement tools to clean up audio tracks and remove unwanted background noise.
- Customizable Filters and Effects: Access a vast library of customizable filters and effects to enhance audio editing capabilities further.
- Export Options: Final Cut Pro supports various export formats, ensuring compatibility with different platforms and devices.
Steps:
- Import the Video: Launch Final Cut Pro and import the video file from which you want to remove the background music.
- Audio Detach: Select the video clip in the timeline, right-click, and choose "Detach Audio" to separate the audio track from the video.
- Identify Background Music: Scrub through the audio waveform to identify segments representing the background music you want to remove.
- Split Audio: Use the blade tool to split the audio track at the beginning and end of the background music segments.
- Delete Background Music: Select the segments representing the background music and delete them from the audio track.
- Fine-Tune Edits: Adjust the remaining audio tracks to ensure smooth transitions and coherence between audio elements.
- Preview: Preview the video to ensure that the background music has been successfully removed without affecting other audio elements like dialogue or sound effects.
- Export: Once satisfied with the edits, export the video in your desired format, ensuring that the background music removal is retained.
By following these steps, you can effectively remove background music from your video using Final Cut Pro, thereby enhancing the overall quality and clarity of your content.
WavePad
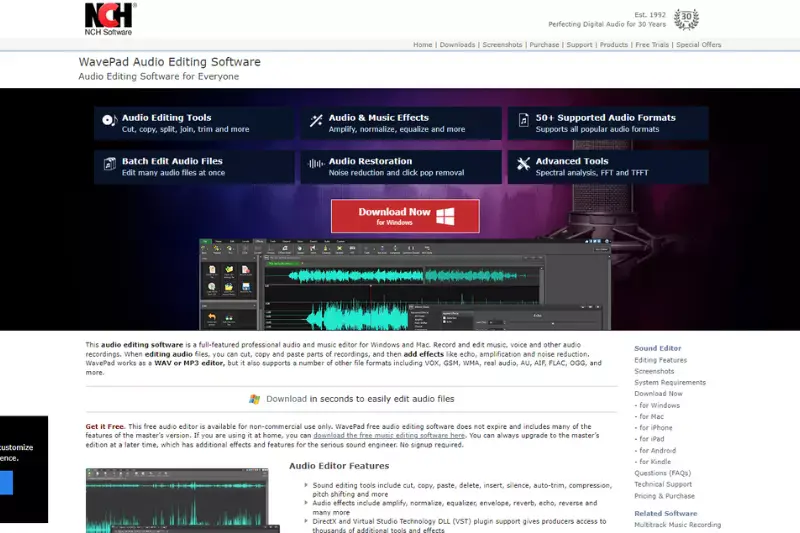
WavePad is a versatile audio editing software renowned for its intuitive interface and powerful features, making it an ideal choice for removing background music from videos. With WavePad, users can effortlessly achieve professional-grade results, whether they're editing audio tracks for personal or professional projects.
Its comprehensive toolkit and user-friendly design make it accessible to beginners and advanced users alike, offering an efficient solution for eliminating unwanted background music while preserving the integrity of other audio elements.
Key Features:
- Audio Editing Tools: WavePad offers a wide range of audio editing tools, including cutting, copying, and pasting, for precise control over audio tracks.
- Background Music Removal: Easily remove background music from videos without affecting other audio elements, such as dialogue or sound effects.
- Real-time Effects: Apply real-time audio effects, such as amplification, normalization, and equalization, to enhance audio quality and clarity.
- Multitrack Editing: Seamlessly edit multiple audio tracks simultaneously, allowing for efficient background music removal and audio manipulation.
- Noise Reduction: Utilize advanced noise reduction tools to clean up audio tracks and eliminate unwanted background noise.
- Export Options: WavePad supports various export formats, enabling users to save edited audio files in their preferred format for seamless integration into video editing software.
Steps:
- Open the desired video file in WavePad.
- Select the audio track containing the background music you wish to remove.
- Use WavePad's audio editing tools to isolate and select the background music.
- Apply the background music removal effect or delete the selected audio portion.
- Preview the edited audio to ensure the desired result.
- Save the edited audio file in your preferred format, ready for integration into your video editing project.
With its comprehensive features and user-friendly interface, WavePad offers an efficient solution for removing background music from videos, empowering users to achieve professional-quality results easily.
Shotcut
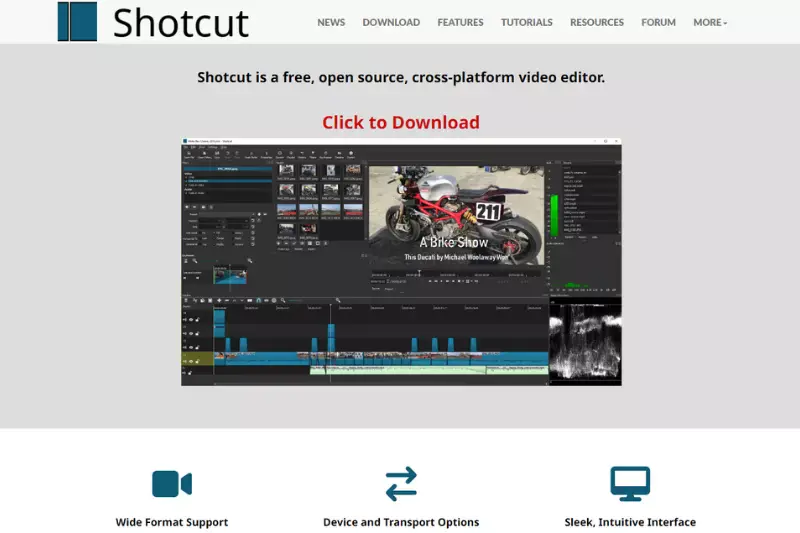
Shotcut stands as a dynamic video editing software renowned for its user-friendly interface and robust features, offering a seamless solution for removing background music from videos. Catering to both novice and expert editors, Shotcut provides an array of tools for precise audio manipulation, ensuring professional-grade outcomes without the complexity.
As a free and open-source platform, it presents an accessible option for individuals seeking to elevate their video content at no cost. With its versatility and intuitive design, Shotcut empowers users to achieve exceptional results in background music removal, enhancing the overall quality of their video productions effortlessly.
Key Features:
- Advanced Audio Editing: Shotcut offers advanced audio editing capabilities, allowing users to effectively isolate and remove background music.
- Real-time Audio Effects: Enjoy real-time audio effects processing to fine-tune the audio track and remove unwanted elements.
- Multitrack Editing: Seamlessly edit multiple audio tracks simultaneously for efficient background music removal.
- Customizable Filters: Access a variety of customizable filters and plugins to enhance audio editing flexibility.
- Export Options: Shotcut supports a wide range of export formats, ensuring compatibility with various platforms and devices.
- User-Friendly Interface: With its intuitive interface, Shotcut makes it easy for users to navigate and utilize its features effectively.
Steps:
- Import your video file into Shotcut's timeline.
- Navigate to the audio track containing the background music you wish to remove.
- Use the audio editing tools to isolate and select the background music.
- Apply the removal effect or delete the selected background music.
- Preview the edited video to ensure the desired result.
- Export the video in your preferred format.
With Shotcut, removing background music from videos becomes a seamless and efficient process, empowering users to enhance their video content effortlessly.
Kapwing

In the ever-evolving landscape of online video editing tools, Kapwing emerges as a versatile solution, offering users the ability to remove background music from videos with ease. With its intuitive interface and robust functionality, Kapwing caters to both amateur and professional video editors seeking seamless background music removal without the hassle.
Accessible directly from your web browser, Kapwing eliminates the need for software downloads or installations, making it a convenient choice for all. Discover how to remove background music from your videos effortlessly with Kapwing, ensuring compatibility with various devices and platforms, and enjoy the freedom of creating captivating content.
Key Features:
- Simplified Interface: Kapwing boasts a user-friendly interface designed for easy navigation and accessibility.
- Background Music Removal: Enjoy the convenience of removing background music from videos with just a few clicks.
- Cloud-based Platform: Access Kapwing's features directly from your web browser without the need for downloading or installing software.
- Multi-format Support: Kapwing supports a wide range of video formats, ensuring compatibility with various devices and platforms.
- Real-time Preview: Preview your edited videos in real-time to ensure the desired result before finalizing the changes.
- Free Online Access: Kapwing offers online access for free, allowing users to remove background music from videos without any subscription or payment.
Steps:
- Visit the Kapwing website and navigate to the Background Music Remover tool.
- Upload your video file containing the background music you wish to remove.
- Use the editing tools to select and isolate the background music from the video.
- Apply the background music removal effect to eliminate the unwanted audio.
- Preview the edited video to ensure the background music has been successfully removed.
- Once satisfied with the result, download the edited video or share it directly on social media platforms.
With Kapwing, removing background music from videos becomes a seamless process, allowing users to enhance the audio quality of their content effortlessly.
Movavi

Movavi is a versatile video editing software that provides a wide range of tools for both beginners and professionals. One of its standout features is the ability to remove background music from videos, allowing users to isolate dialogue or other audio elements effectively.
Whether you're a content creator looking to clean up your audio tracks or a filmmaker needing clear dialogue, Movavi offers a straightforward solution. This guide will introduce you to Movavi, highlight its key features, and provide step-by-step instructions on how to remove background music from a video.
Key Features:
- User-Friendly Interface: Movavi's intuitive interface makes it easy for users of all skill levels to navigate and utilize its features.
- Audio Editing Tools: The software includes comprehensive audio editing tools that allow for precise control over audio tracks.
- Noise Removal: Movavi can effectively reduce or eliminate background noise, enhancing the clarity of your audio.
- Multi-Track Editing: Users can work with multiple audio and video tracks simultaneously, providing flexibility in editing.
- Wide Format Support: Movavi supports a variety of audio and video formats, ensuring compatibility with most media files.
- Fast Processing: The software is optimized for fast rendering and processing, saving time during the editing process.
Steps:
Install and Launch Movavi:
- Download and install Movavi Video Editor from the official website.
- Launch the application on your computer.
Import Your Video:
- Click on the “Add Media Files” button to import the video from which you want to remove the background music.
- Drag and drop the video onto the timeline.
Separate Audio from Video:
Right-click on the video track in the timeline and select “Detach Audio.” This will create a separate audio track from the video.
Edit the Audio Track:
- Click on the separated audio track to select it.
- Use Movavi's audio editing tools to isolate and remove the background music. You can adjust the equalizer settings, apply noise reduction filters, or use the volume control to lower or mute the background music.
Replace or Enhance Audio:
If necessary, you can add a new audio track by importing it and aligning it with the video. Movavi allows you to layer multiple audio tracks and make precise adjustments.
Export the Edited Video:
- Once you are satisfied with the audio editing, click on the “Export” button.
- Choose the desired format and settings for your video, then click “Start” to export the final video.
By following these steps, you can effectively remove background music from your videos using Movavi. Whether you need to focus on dialogue, create a silent background, or enhance your video with new audio, Movavi's robust features make it a valuable tool for any video editing project.
Conclusion
Erase.bg provides a comprehensive guide on removing background music from videos using various tools, catering to diverse editing needs. Whether opting for online platforms like Kapwing or professional software like Vegas Pro, users have access to a range of options to achieve their desired results efficiently and effectively.
FAQ's
Can removing background music affect video quality?
No, removing background music specifically targets the audio track and does not impact the visual quality of the video.
Is it possible to remove music without affecting other audio components?
Yes, advanced tools can isolate and remove music while preserving dialogue, sound effects, and other audio elements.
Yes, advanced tools can isolate and remove music while preserving dialogue, sound effects, and other audio elements.
While professional software offers more control, there are many online tools and apps that can effectively remove background music for most needs.
Can copyright issues arise from removing background music?
Removing copyrighted music to avoid legal issues is a common practice. However, always ensure any replacement music is also copyright-compliant.
Is it possible to remove background music from any video?
While most videos can have their background music removed or reduced, the success rate and quality depend on the complexity of the audio mix.
Can I remove background music for free?
Yes, there are free tools available that can remove or significantly reduce background music from videos.
.webp)

.webp)

.webp)

.webp)
.webp)


