


Six Quick Steps For Better Photos in 2025


Photography has formed new means of education, history and a unique lifestyle. In an interview, Ernst Haas, the color filming photojournalist and pioneer, said, "There is only you and your camera.
The limitations in your photography are in yourself, for what we see is what we are." Photography has opened up a new facet of ideas with its creation, and it was apparent that this concept would forever change the world. Cameras make artists look farther, dream bingo, and make an image more significant, which will continue for centuries.
Photos preserve the memories of things and people one has previously met but I've forgotten over time. The camera acts as a save button for the eyes, as these pictures provide the feelings you once felt, beat sadness, happiness, or inspiration, which mixes cherish them once again.
These cameras have come under many questions regarding their possibility and advancement, which has led to much improvement. The quality of these cameras and those on a smartphone in this age of social media has improved not only in the standard two high resolution but also garden cleared, enough to be regarded as a professional grade quality.
One can share these images on social media with their loved ones, friends, and coworkers, customize them in photo-centric gifts, and create albums involving memories, giving one an apparent reason to get the best shot possible.
Earlier, taking a good photo was quite an intensive process. It was so because one was required to buy a fancy camera, purchase editing software for their desktop computer, and spend a lot of time and energy learning how to use them.
As technology advances, mobile devices and editing apps in them have made it relatively easy and possible to take quality photographs and edit them without many problems and proper knowledge, all from a single device. Below mentioned are six quick steps to make your photos better in 2025 -:
Lighting
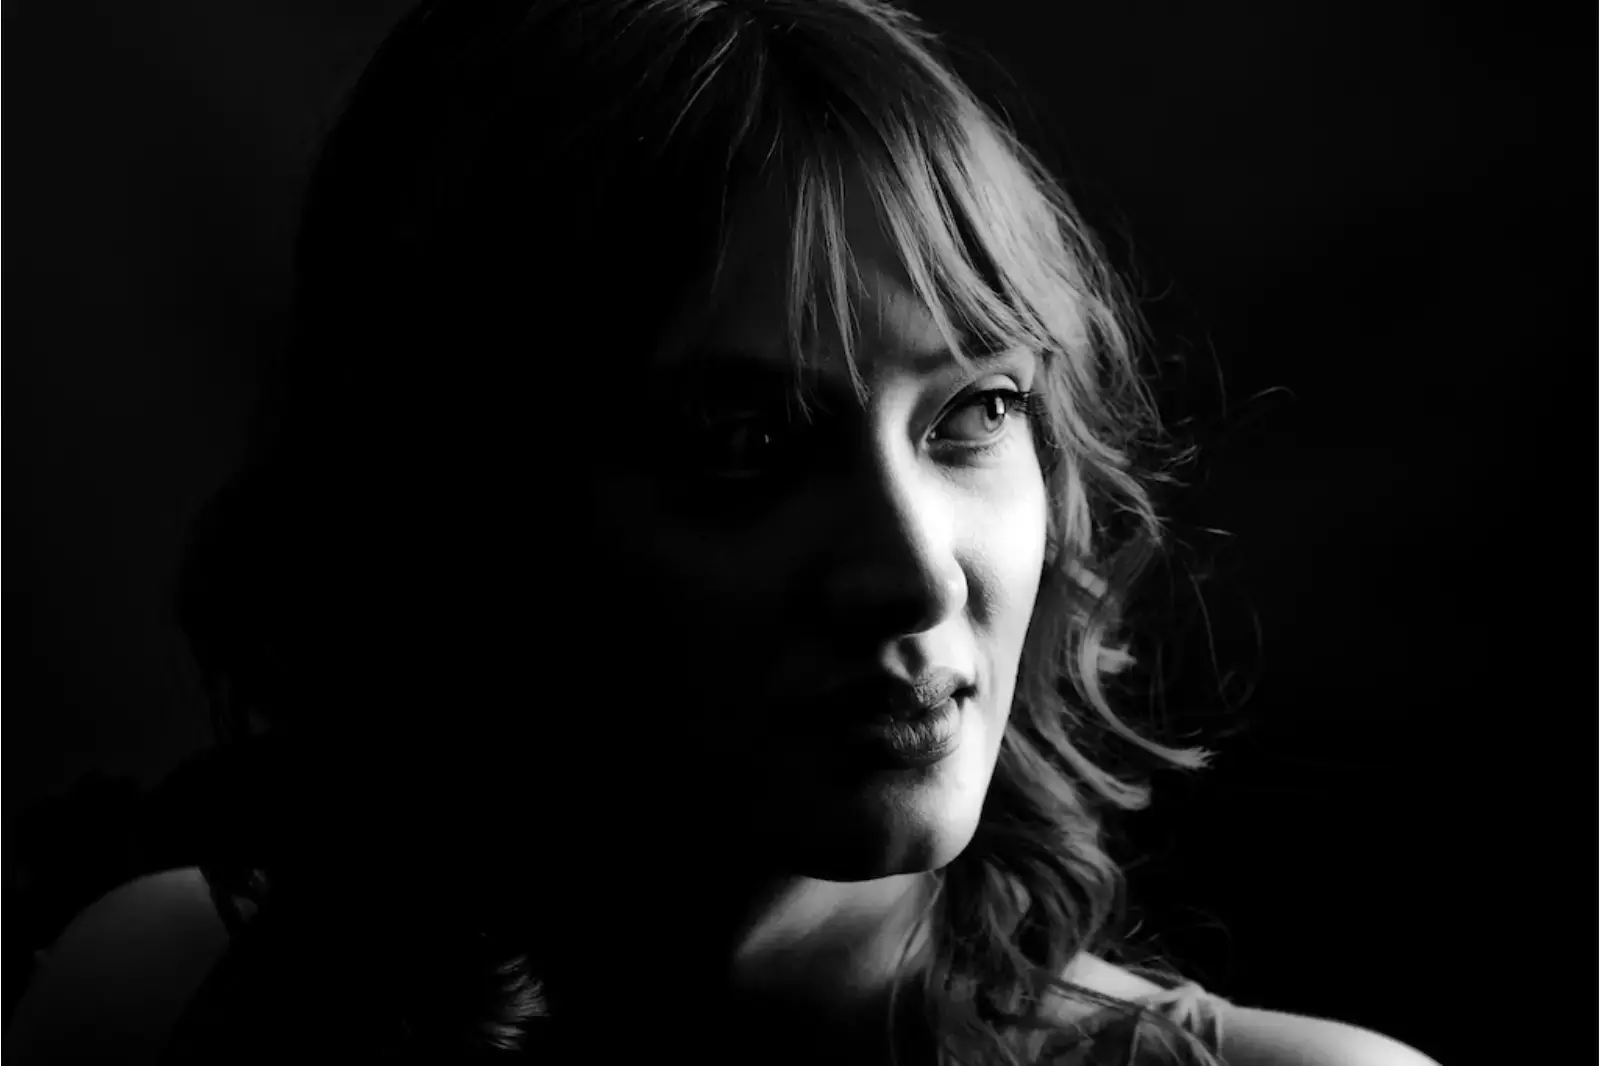
Lighting is one of the most superficial and essential differences between a decent photograph and a great one. A smartphone's flash of an LED light won't be considered a good idea, no matter the subject's pose.
The glaring light from the flashlight of a camera phone belonging to a single source will often give the photo a harsh and odd color look compared to diffused light from one or multiple sources.
Options available for original and artificial lighting
One should depend on more than an underpowered light to illuminate the subject properly. Other light sources could be used, be it the sun, indoor lights, or even candlelight, if the photograph needs to be more creative. If there is a loss of light, one could always use the flashlight of another smartphone as it could act as a consistent light source.
Short cut and budget- friendly style for shooting a hit in light feature
Beginners and people start clicking the pictures using a lighting rig, which might put a bit of pressure on your pocket. Instead of spending money on purchasing a lighting rig, one can put their focus on natural light. One can use natural light twice a day to click stunning pictures. Those are -: "the golden hour" or "magic hour," the last hour before sunset, and the first hour after sunrise.
Natural golden light
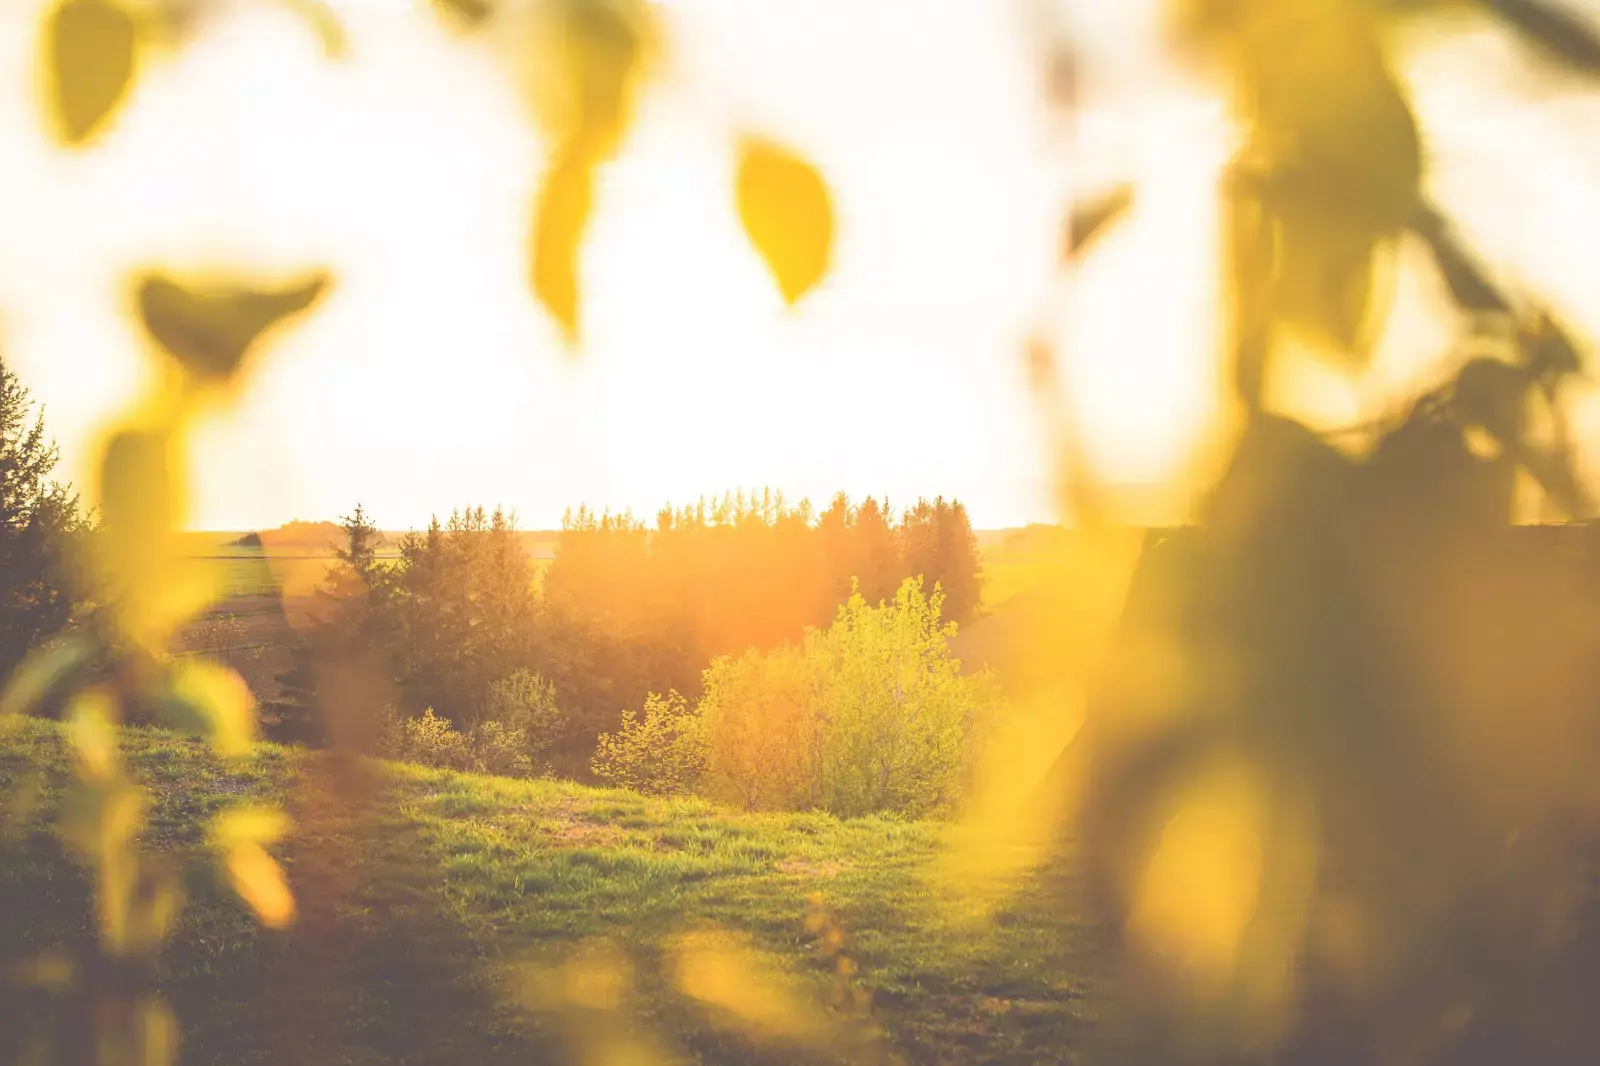
One can also use this sunlight to produce the natural golden light within these times. It is advisable because, during these times, it gets hard to overexpose or underexpose parts of an image, making it an ideal chance for a photo shoot.
Right Smartphone

Using a smartphone to click a photograph comes with a lot of challenges in itself. Finding a smartphone with features like a balanced flash for clicking pictures of the proper standard takes a lot of work. Most of the time, smartphone photos are overexposed, have negatively altered colors, and sometimes make human subjects look washed out. Some cameras in smartphones have flashes which often have some flaws.
Natural light, above all

One should take advantage of the sources of natural light that one can find, even when it gets dark. It allows one to play with shadows or create a silhouette with other ambient light sources like traffic and surrounding buildings.
Myth behind lighting

There is a lot of misunderstanding amongst budding photographers and beginners that using a flash during the nighttime or in a dimly lit place will improve a photograph, but that is not the case. Dark shots often reveal quite a sharper contrast against the phone's flash, which sometimes can make any flash look much more invasive and uneven.
Usefulness of flash
In already well-lit spaces, a flash can be helpful to soften some dark shadows beneath or behind the main subject. To frame a shot, check the ground or against the vertical surfaces to remove any existing dark shadows.
If it exists, one can flip on the flash manually in the camera app, as setting the smartphone's camera flash to auto does not guarantee that the phone will notice the shadows that need removal. The flash should be essential for enhancing or hiding certain lines and features during product photography.
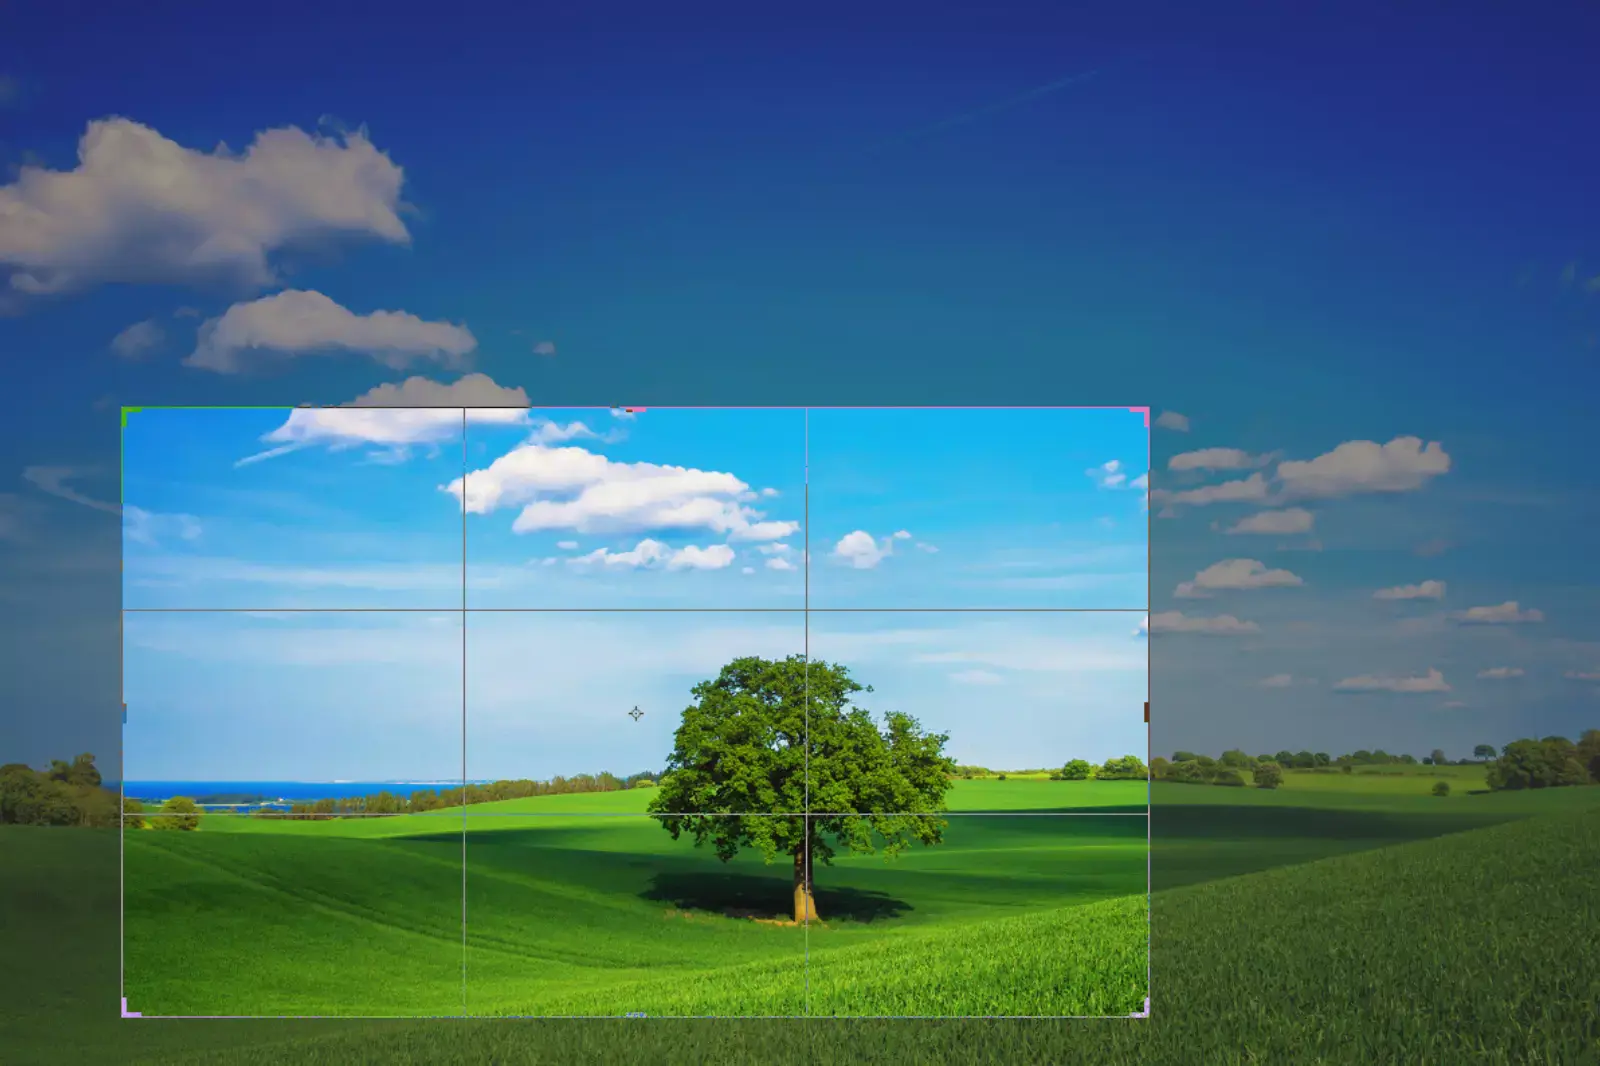
Learn the Rule of Thirds
The rule of thirds comes under the essential photography technique. It applies to any object to improve the composition and balance of the subjects—the placement of the subject of the photograph at the intersection of these lines. One should apply this rule carefully as it is a handy one that would help produce a pleasing photograph and is a starting point for any composition.
The rule of thirds involves dividing the image using two vertical lines and two horizontal lines. Then, one can position the essential elements in the scene along those lines or at the point where they meet.
The main idea behind this is that an off-centre composition seems more pleasant to the eye and feels more natural than one where the subject is placed right in the middle of the frame. This method also encourages creative use of the negative space, i.e., the empty areas around the subject.
It Is much easier to use this rule of thirds. The right way to use it is -:
1. When framing a photo, one should imagine the scene divided into nine equal squares. Keep in mind the elements of pictures that are most important, and then try to position them at or near the lines and the grid intersection. The perfectly lined-up method is essential as long as they're close.
2. One might have to move around to get the best composition. It will require one to give careful thought to the shot. It is an excellent habit to determine whether one uses this rule of thirds.
3. To help the users, cameras sometimes have a setting that overlaps a rule of thirds grid onto your photo. It leaves behind all the guesswork and makes the positioning even more accurate.
4. When clicking a picture of moving objects, position them as expected, but one also needs to be attentive to the direction they are moving. As a general rule, one should leave more space in front of them than behind to show where they are going.
One can also apply the rule of thirds to existing photos simply by cropping them. Through this, one can reposition the essential subjects in the image, moving them into more desirable positions. Here, re-cropping to use the rule of thirds can improve composition. One can also use software like Photoshop and Lightroom as they have built-in "crop guide overlays," which include a rule of thirds option.
It places a rule of thirds grid on the top of the image as one crops it, allowing one to get the positioning spot on. The rule of thirds only applies in some situations, and sometimes breaking it can result in a much more eye-catching and exciting photo. Even if they go against the rules, experimenting and testing out different compositions could create another photograph.
However, one should learn to use the rule of thirds effectively before breaking it. That way, one can be sure that what they are doing is to get a better composition rather than just for the sake of it.
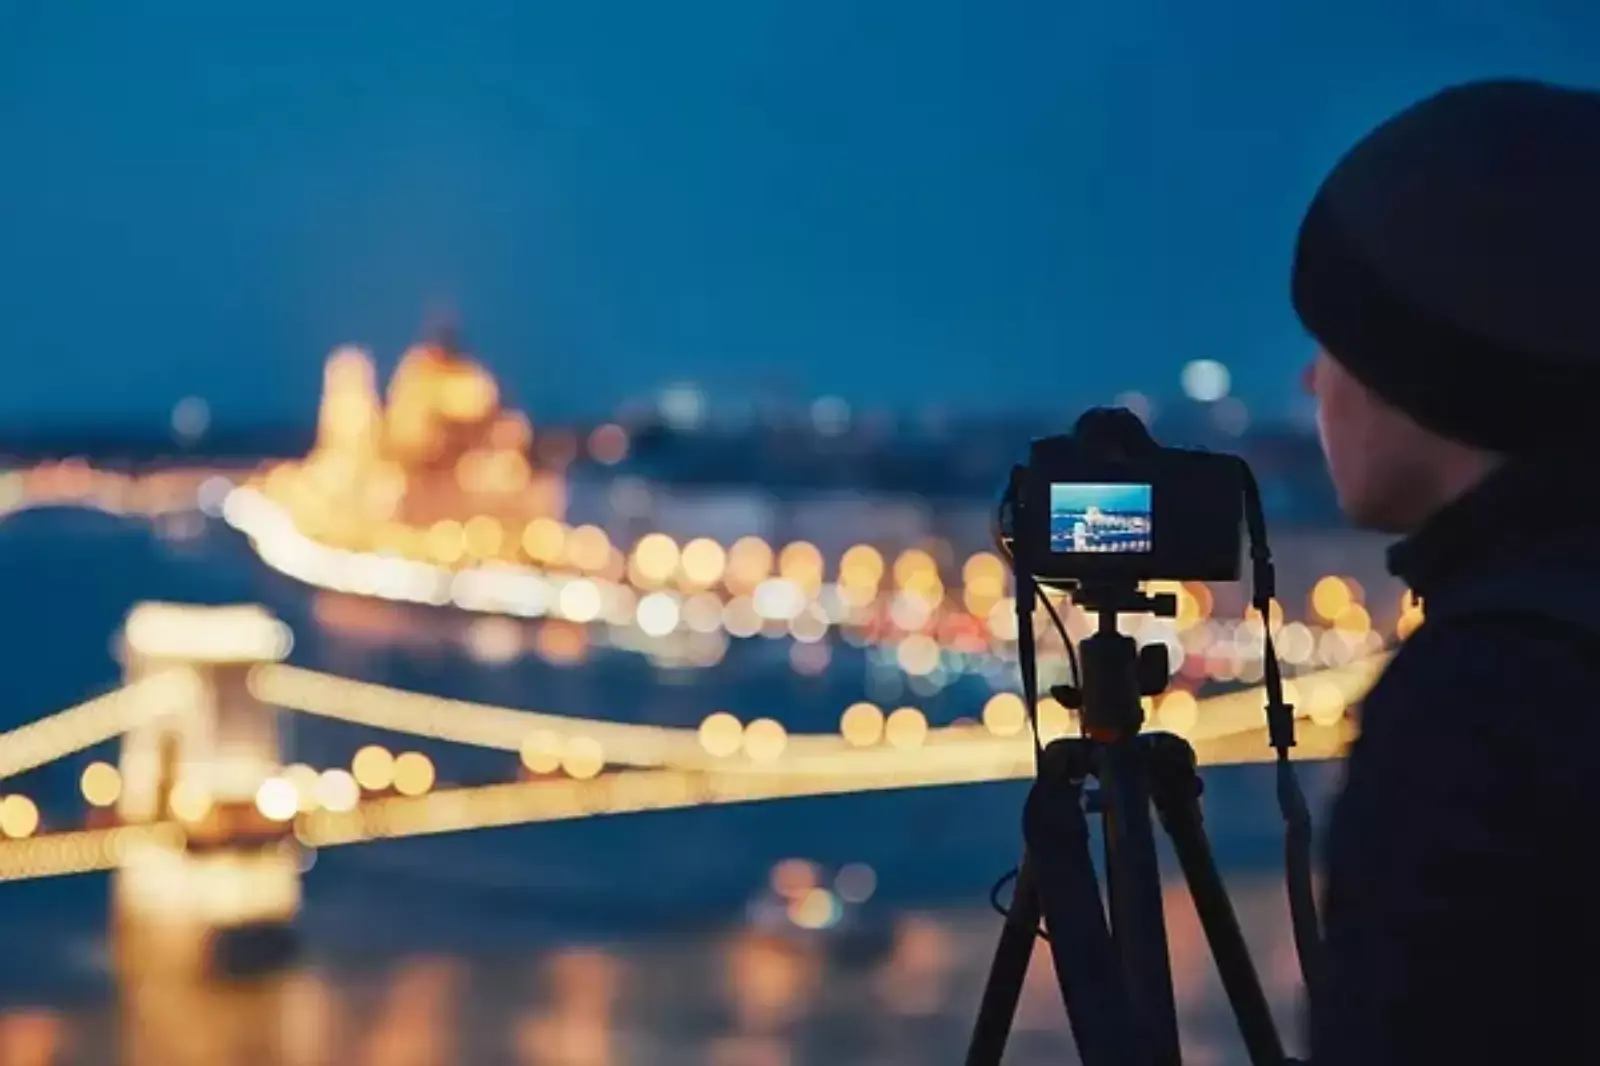
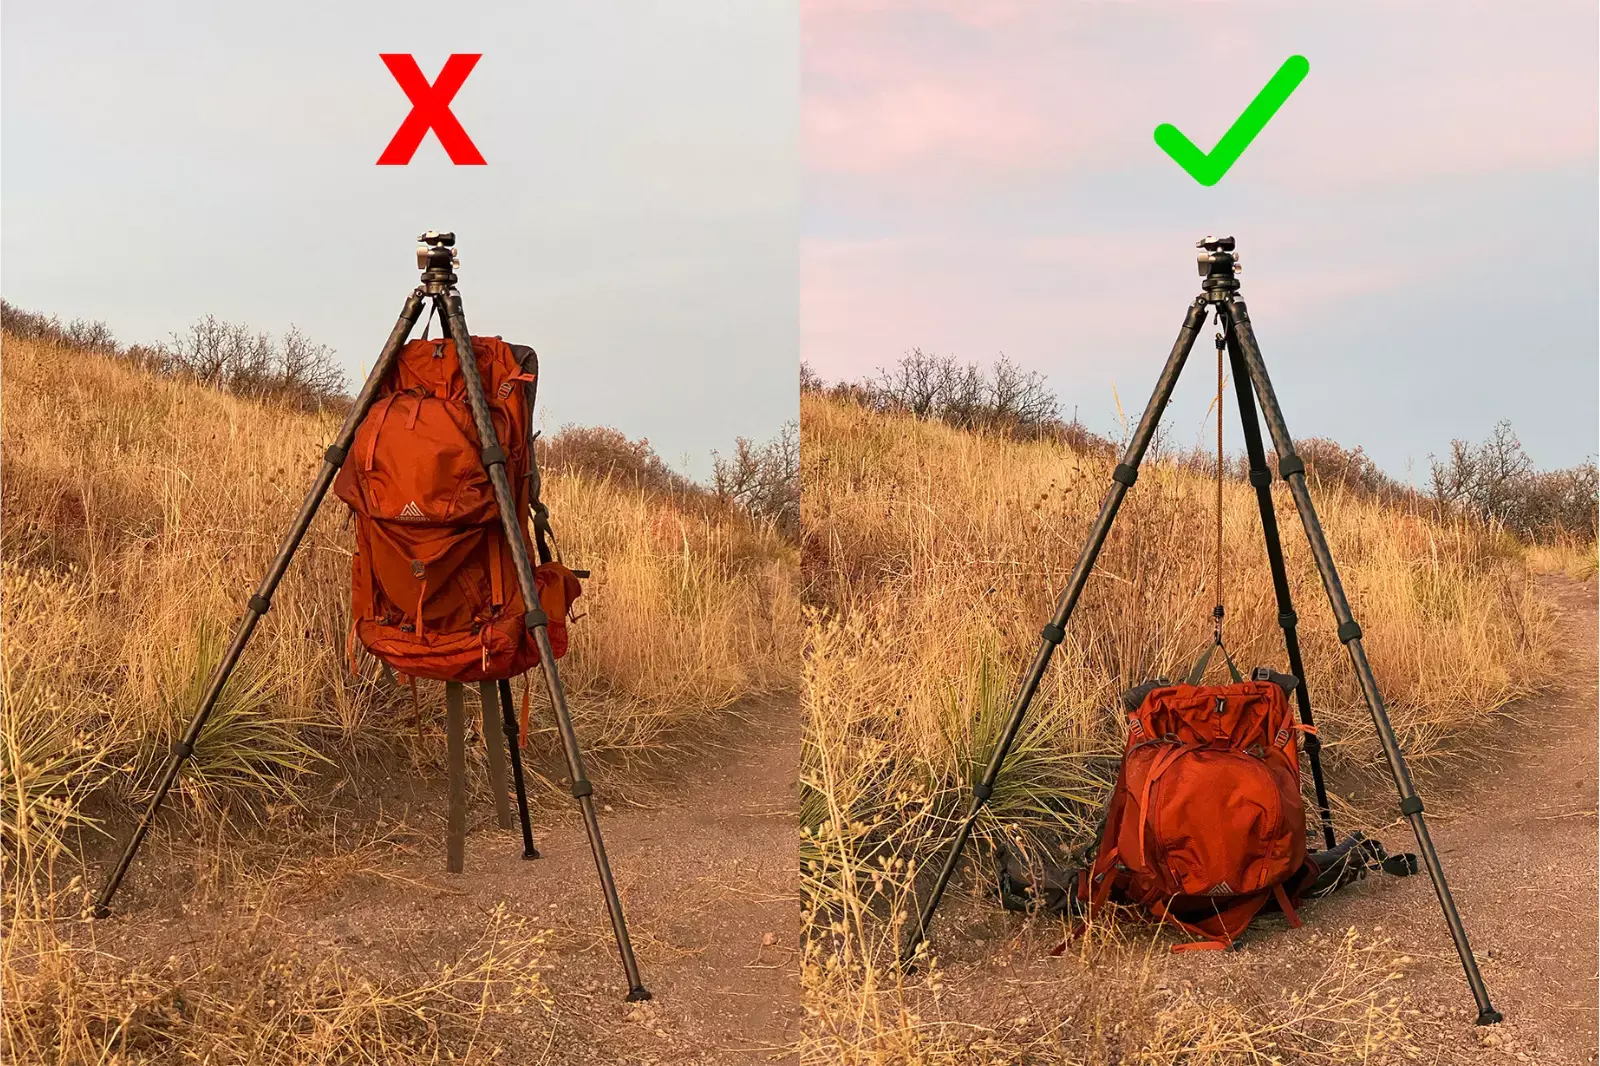
Steady yourself or use a Tripod
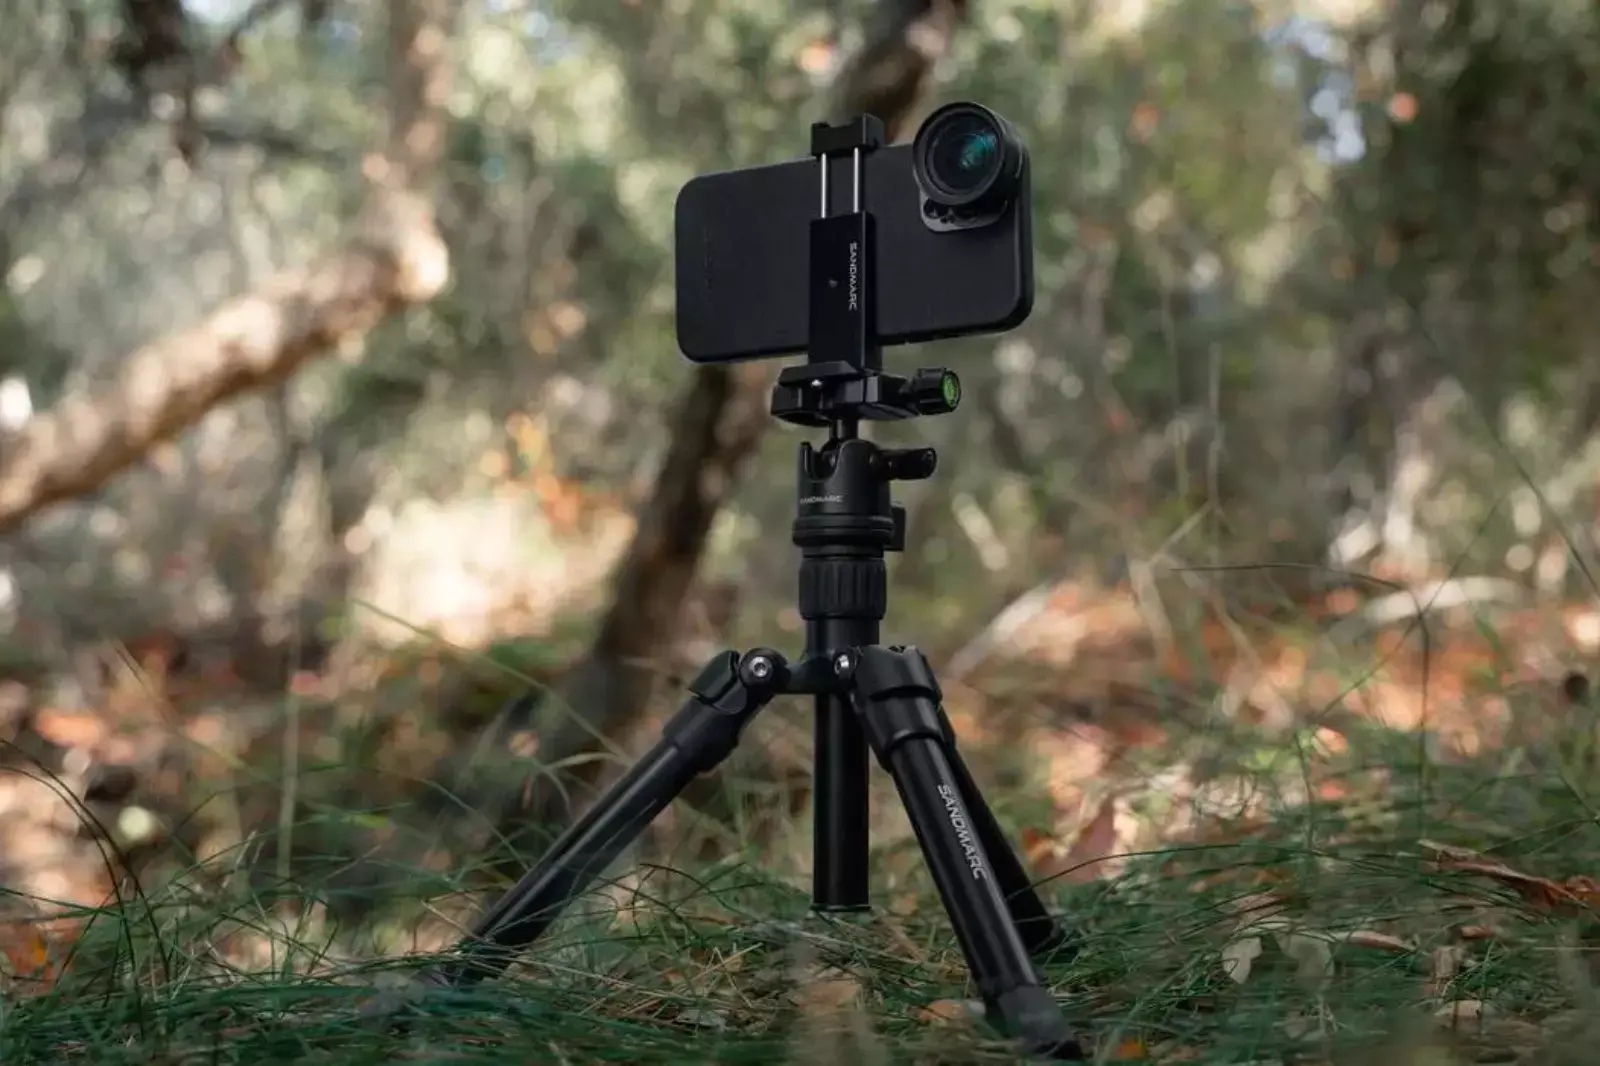
Sometimes while taking shots of the city skyline, it looks a little off-kilter, or the images during sunset seem a bit blurry. To prevent this, one should familiarise themselves with photography's most helpful tool, i.e., the tripod. "A good tripod is essential, but for smartphone photographers, it is usually left out," says Morgado.
A steady hand is always more advisable than a shaky one, but it can only match a tripod's versatility when putting a creative spin on photos. It gives one a fantastic range of new techniques and photography styles, including long-exposures, low-light photography, light painting, time-lapse, and many other uses.
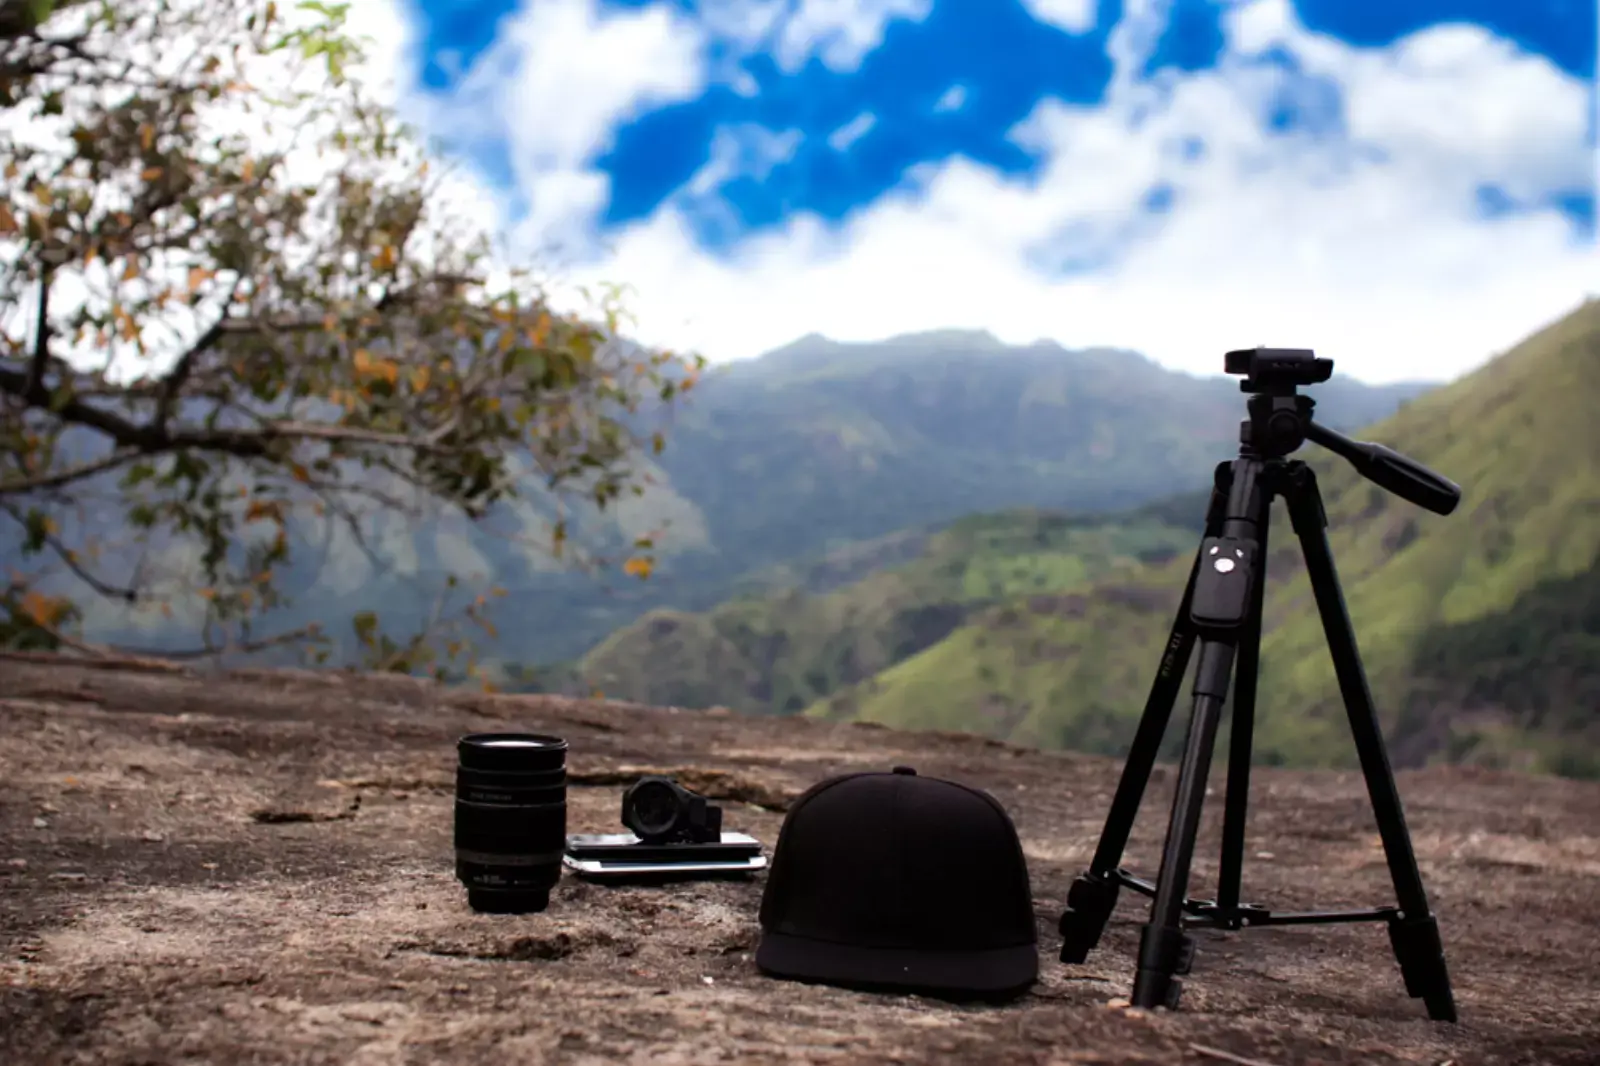
For smartphone photography, pocket-size tripods are available, which are perfect as they are simple to use. These tripods are often device-agnostic, meaning one can use them with almost any phone. Smartphone cases with built-in mounting threads are also available for purchase which can be stuck on more professional tripods or other camera accessories like shoulder straps.
Mobile devices help to snap any photo on the spot but the most accessible way to ensure a balanced shot level while shooting is simply by using a tripod. One can use a tripod to take a picture with oneself and not just take a typical selfie with an extended arm.
Portable tripods allow one to mount a smartphone for quick hands-free shots without carrying any heavy equipment while taking it. Most of these mobile tripods are barely more significant than the mobile device, and one can bend them to any angle. A tripod is a vital part of photography to improve compositions and give one's photos a creative edge. A few advantages of using a tripod are-:
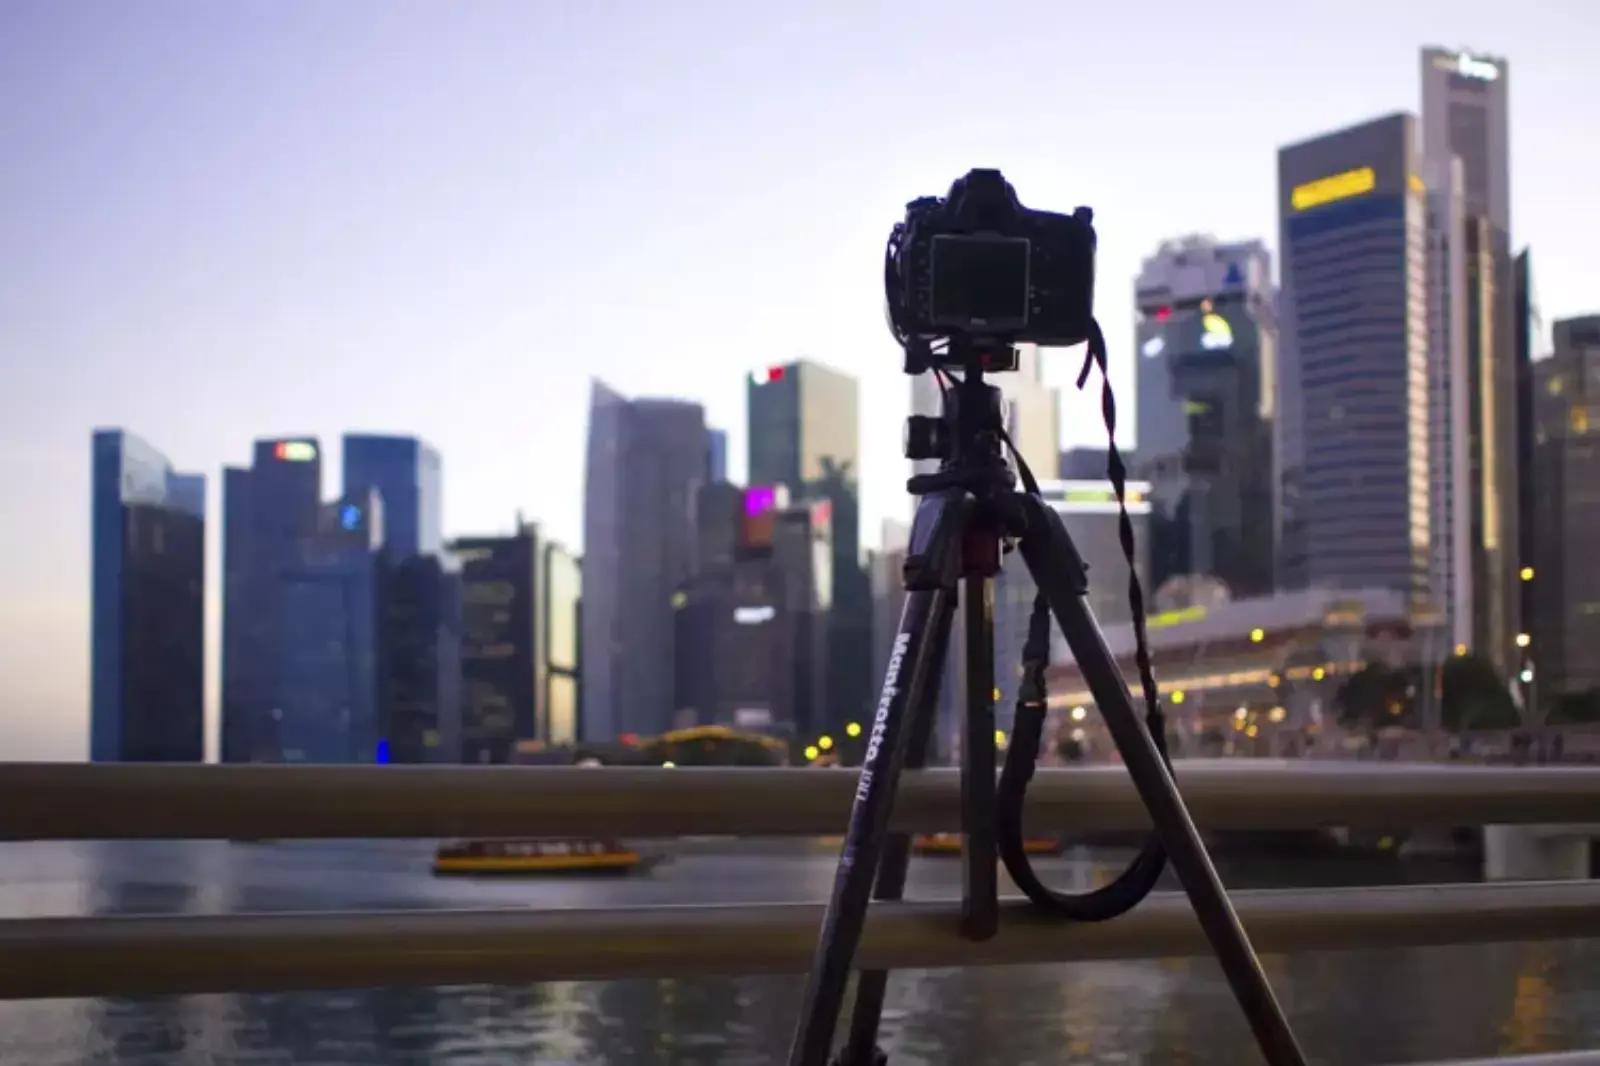
1. A tripod lets you photograph in low light
To click photographs in low light, one needs a tripod hundred percent. Without a tripod, photos might be horribly blurred or unpleasantly noisy. But with a tripod, one can slow the shutter speed to a few seconds or even minutes and still get a sharp result. Landscape photography, astrophotography, travel photography, and architectural or real estate photography are some places where tripods are helpful.
2. A tripod lets you capture long exposures
One uses a tripod to avoid a lot of blurs to click photographs with long exposures. The tripod will keep the camera still, even as the object moves around the frame. This way, one can get a captivating mix of sharp, stationary objects and blurry and moving subjects.
3. A tripod offers improved stability
After mounting the camera to a tripod, the frame won't change. It is vital for a couple of reasons. First, one can spend extra time evaluating and considering the focus point if they freeze the frame. Second, a rigid frame lets one work with advanced techniques such as high dynamic range imaging and focus stacking, which requires multiple shots of the same subject.
Plus, a stable tripod is usually helpful for planning during action photography. One can easily follow the subject as they move past, whereas holding by hand can be much shakier and jerkier.
4. A tripod promises sharper images
Beginner photographers often end up with soft images and blame everything else instead of using a tripod. The main problem isn't the equipment but simply a too-slow shutter speed combined with the shaky foundation, which one can solve with a tripod.
5. A tripod slows you down
A tripod takes time to set up to extend the legs and position them exactly as one wants. It takes time to place the camera and lock the tripod head before shooting. Shooting slowly is considered a good thing; the slower one goes, the more time one spends thinking about the compositional light. Even though they take fewer shots, these shots are more powerful, better thought out, and more artistic. Slowly shooting is a good thing; a tripod helps one do it.
6. A tripod helps you freeman find shorts with ease-
After mounting the camera on a tripod, it becomes easier to make subtle changes to the framing. One can quickly pan the tripod head in the desired direction without worrying about losing the entire composition. One can also shift down the tripod head to emphasize the foreground shortly.
One can also use a tripod to find new compositions. After finding an excellent composition, one can slowly pan the camera in every direction, looking through the viewfinder for powerful scenes. The tripod will stop one from feeling overwhelmed as they will be limited in the camera movement.
Play with Reflections and different Perspectives
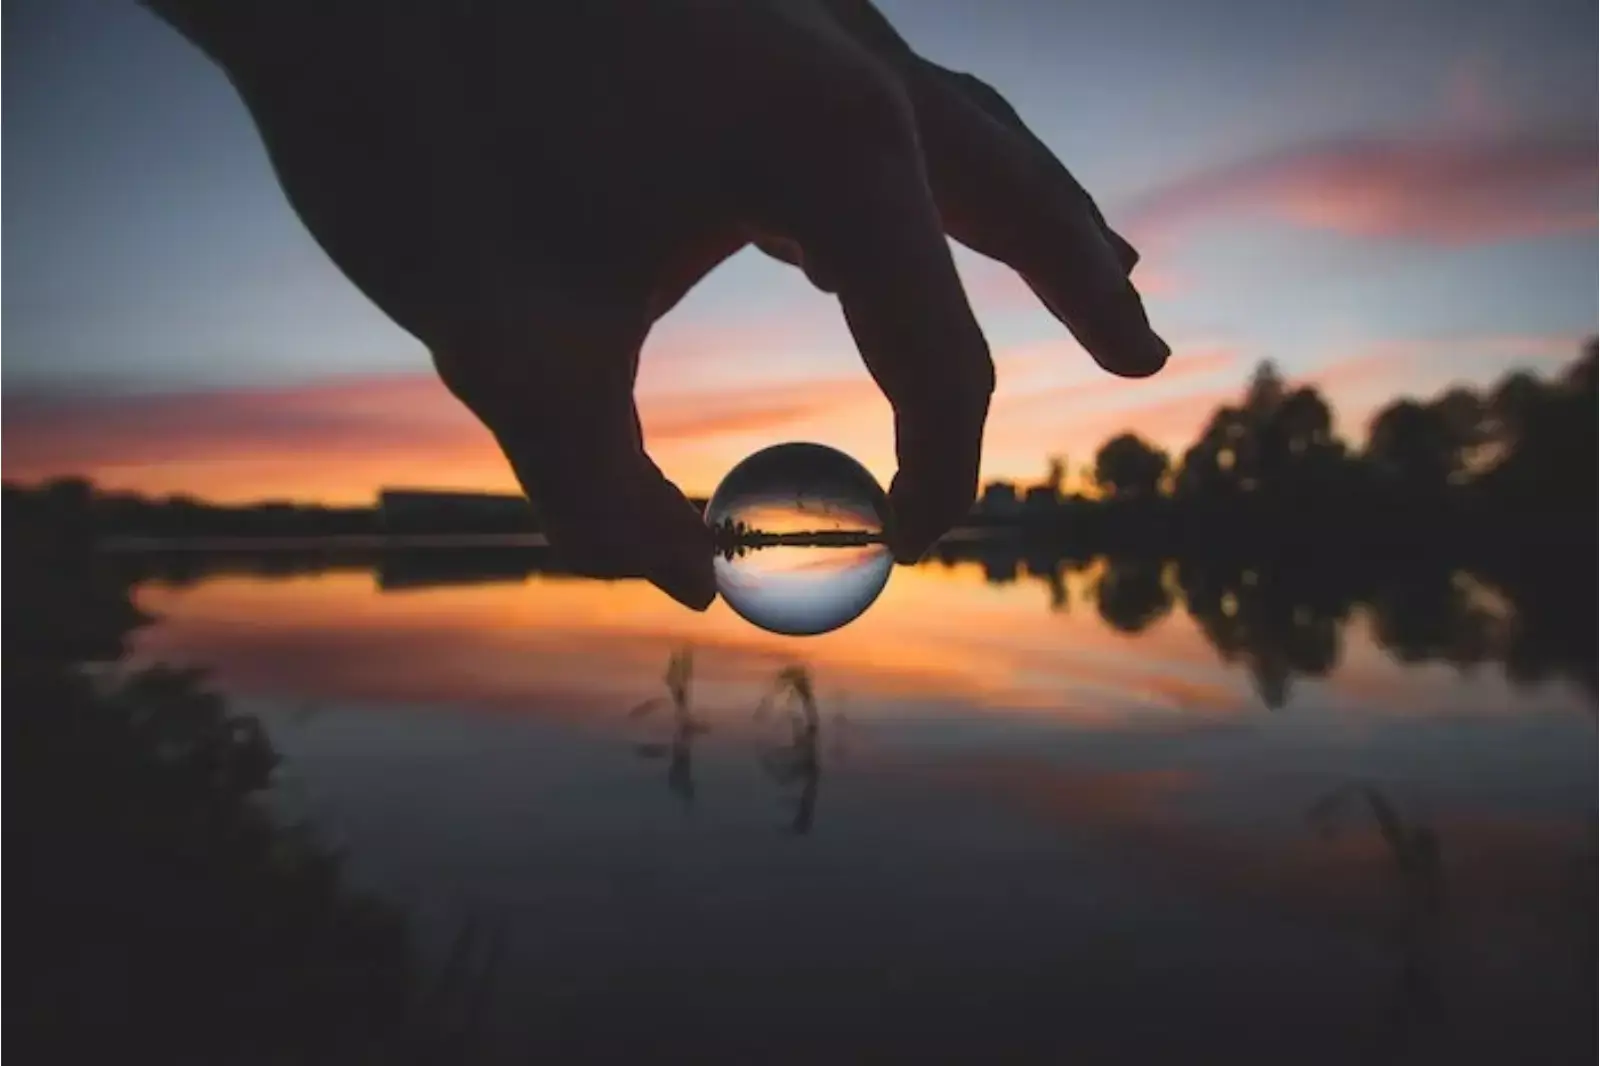
Every eye draws to reflections, so one should look for opportunities to play with them in photos. Several places to find reflections could be puddles, larger bodies of water, mirrors, glasses, metallic surfaces, and much more. Reflection photos refer to any shot that uses a reflective surface. Landscape photography, with the mountain duplicated in the still water of a lake, is reflection photography.
An image of a green area captured on the shiny surface of a skyscraper is a reflection shot, as is the same city skyline captured from a puddle on a footpath. Even a self-portrait snapped in a shop window is a type of reflective photography.
"Reflection photography is about the ability to look at an image differently. Seeing a reflection in the water appeals to me. It pulls me in. It makes me see this beautiful image twice," photographer Patrick Koetzle says. Beautiful reflections can exist anywhere. One needs to train their eyes and be aware of the surroundings to find reflective surfaces to use in their shots. It is impossible to move reflective surfaces, like lakes, puddles, rivers, or windows.
So that means one will have to move around to find the right angles. As one moves around their reflective source, they should adjust the composition. One should try their shot which objects in the foreground, center a subject in the reflection of a lake or use the rule of thirds to position a building on one side of a puddle's reflection.
While clicking photographs, one might have to squat a few inches or adjust their body in a weird position. Don't be afraid, as it is a small price one has to pay for a breathtaking shot. When it comes to photography, timing is a factor. Specific factors to keep in mind while clicking reflective photographs are -:
1. Weather-
One can't control the weather but can set themselves up for success with a good plan. Wind and anything else can upset the smooth surfaces of lakes and ponds, So to not have a problem, one is to go for this shot in the early morning when it is much calmer. The same goes for clicking photographs of mountains and trees. One should remember to check the weather report for rain as well.
2. Lighting-
Flat, reflective surfaces can be subject to a midday glare from the sun. A great time in the day to get good light without the glow would be when the light is diffused around sunrise and shut down, and also during the 'golden hour.'
3. Location-
Sometimes, getting the right angle on a building or a mountain that reflects a specific body of water can be a lot of work. One can save time and hassle with little research. Finding the right timing and angles to snap great reflections may be easy for locations one is familiar with. But when natural lighting windows are limited, one can miss the perfect moment without some preliminary research.
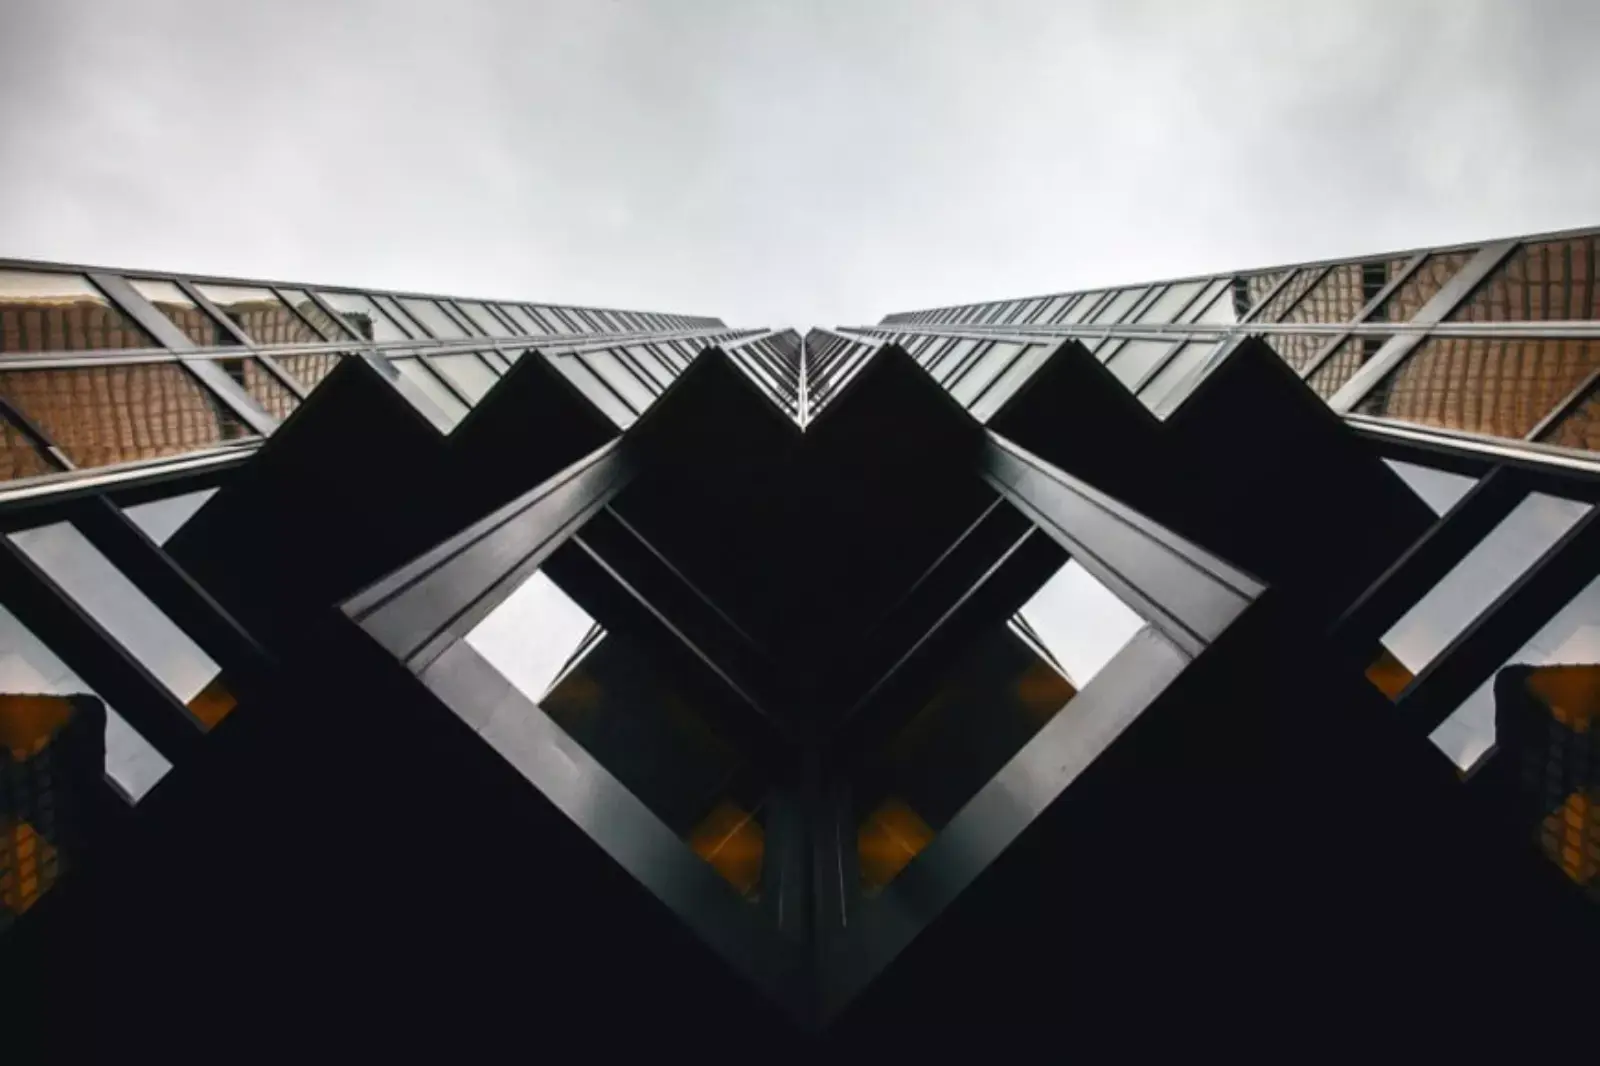
A photograph taken from an unexpected and unique angle stands out as it develops an illusion of depth or height with the subjects. In photography, depth and perspective play a prominent role. While some say, photography is a two-dimensional platform, here, adding depth and perspective to a shot directly helps the viewers to interpret the image better.
Remember, photography is very much an illusion. It is all about recreating a three-dimensional world in a flat two-dimensional image. One can achieve it by using depth scale to give photographs a sense of perspective. A good composition-filled photo involves the challenge of translating a complex scene into a two-dimensional image.
When our eyes see things, the brain automatically determines the size based on scale and the known length of objects in the scene. From a distance, everything looks smaller. To add size sense to a photograph, one can photograph a person next to a huge waterfall or a mountain to show how big the object is. If one feels that their photograph needs to be more exciting and exciting, it may be time for a change in perspective.
The clicking of most images is often from a high level or a tripod level. A simple alteration of view can dramatically impact the depth of a photograph, helping to bring it to life. One should take photos at different heights. Getting low to the ground to capture some interesting foreground in the composition or trying to compose a shot by stepping to the side of the scene could be helpful.
Getting low and angling your camera up or experimenting with photographing through a 'bug's eye view' by zooming in on things on the ground. One could improve one's composition if one wants to move to the side or adjust their angle, focal length, or position. It will lead to unique and powerful images.
Use Leading lines, Symmetry, and Repetitive Patterns
Some photographs have a line that attracts viewers toward a specific part of the frame. These are called leading lines. They can be straight or circular, like staircases, common buildings, roads, train tracks, or paths through the woods. Leading lines are great tools for creating depth in an image.
Leading lines is an image composition technique that can create powerful and impactful photographs. Using this technique can be helpful. Whenever people look at a picture, their eyes naturally shift to its lines. We instinctively follow these lines to see where they go. These lines lead a gaze towards a particular subject.
Finding leading lines to use in shots should not be too hard as they're everywhere, from a sidewalk leading towards a road or a pencil lying on a desk pointing towards the blackboard or the edge of a kitchen counter. It's easy to find them in every place around us. One can start looking for these lines nearby to help them practice.
Some places to look could be roads, windowpanes, buildings, doorways, bridges, shorelines, train tracks, waves, and other places. Once the habit of looking for these lines develops, one can't stop seeing leading lines whenever they start setting up their shots.
In leading line photography, the subject is always the essential aspect of the image. One is to make sure that one has the absolute most significant weight. One can use several types of lines in their leading lines photography to convey different moods and emotions to the viewer. Other types of leading lines are Horizontal leading lines, vertical leading lines, diagonal leading lines, implied leading lines, and curved leading lines.
Photography's symmetry is an awake sense of harmonious, beautiful balance and proportion. Pictures with symmetry can be pleasing to the eye. It is one of the simplest and most compelling ways to click a photograph. In photography, symmetry is nothing but mirror images of a single image divided into two equal parts.
It's different from reflection photographs, as symmetry could be found anyway and doesn't need to have a reflective surface as a necessity. Three types of symmetry are expected in a photographic composition. They depend on the points where the axis of symmetry occurs. They are Horizontal symmetry, Vertical symmetry, and Radial symmetry.
Repetitive patterns could appear when solid graphic elements are repeated over and over, like geometric shapes, forms, lines, and colors, as they are very pleasing to the eyes. The creation of striking images functions by using patterns that create visual impact by photographing something beautiful.
Repetition in photography is a simple method to speak through the image. For example, one way to do so is by following the imaginary line created by repeating an element or a color. One has two choices to use repetitive patterns in their photography: to either emphasize repeating the pattern or break it.
For example, one can fill the frame with a repetitive pattern. It creates an impression of a large size and numbers. Here, one tries to make the repeating pattern burst out from the edges as if there's more, much more, than what one's lens could contain.
The other way to go is to break the pattern. Breaking the pattern can also involve removing one repeating subject. Just make sure the removal is noticeable. Pay special attention to where they're breaking the pattern in the frame.
Don't be afraid to Edit with Erase.bg - the Simplest and Fun-Loving Way
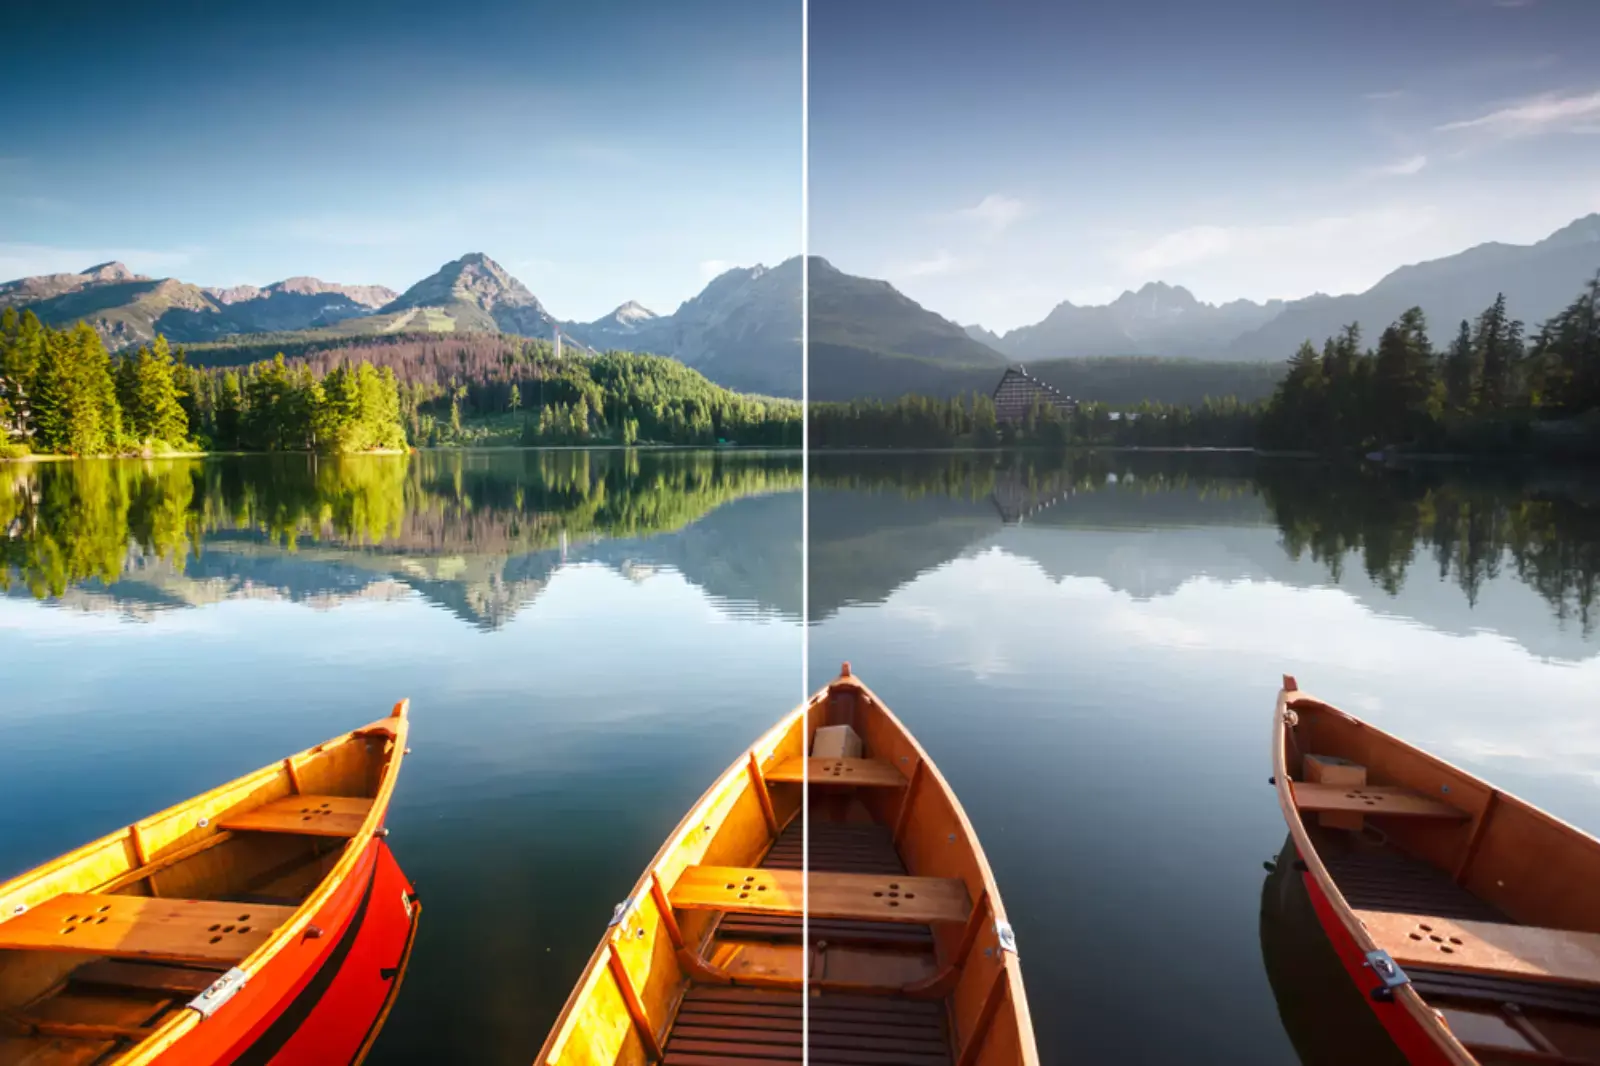
The last step in making the photos better is editing. Composing and taking photographs was the first step that made it visually compelling. Editing is the next step which is also quite critical. One of the valuable photographic tools in this step is the usage of filters. Filters are used mainly for two reasons i.e., For a photographer, editing is crucial as it can transform an ordinary photo into an extraordinary one.
Editing can assist one in standing out from their competitors. Editing is the act of altering an image using different methods and tools. For example, some photo editing techniques function manually, while others use automated software. A few reasons why editing is necessary are as follows-:
1. Changing the background
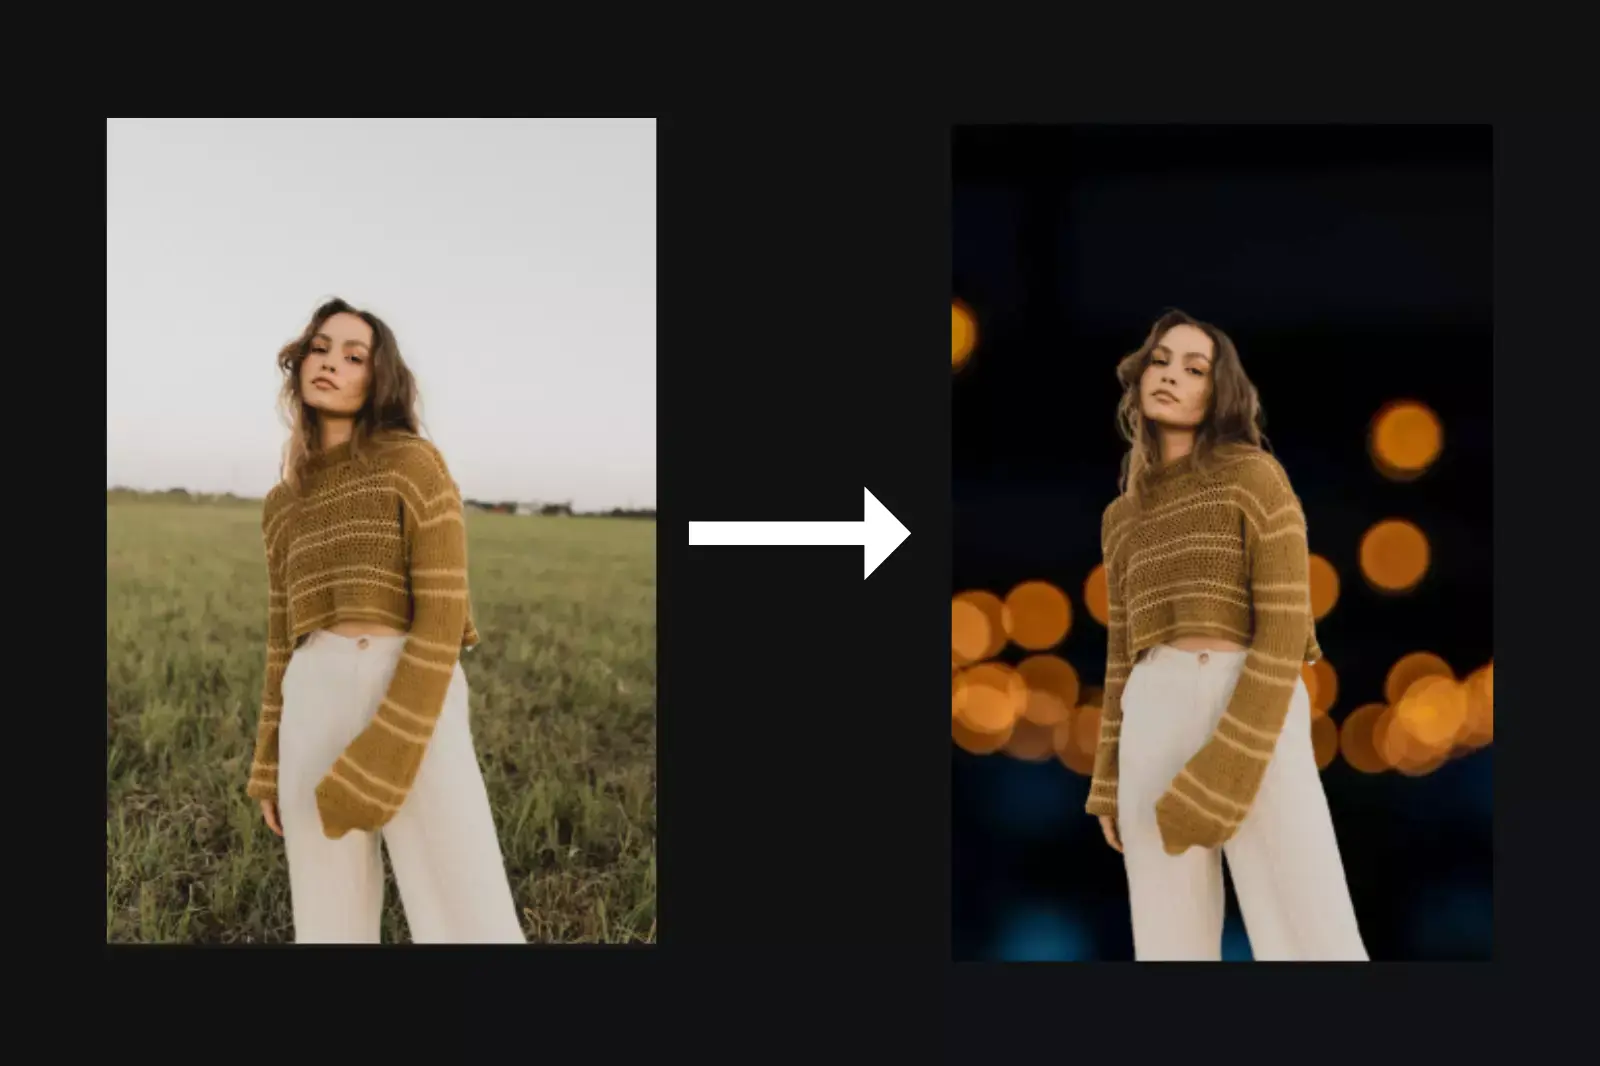
Sometimes, after taking incredible photos, one might realize the background could be more eye-catching and as appealing as expected. There can be an unnecessary object, or the background color could be less appealing. The only way to improve the image is by changing the background and adding an attractive one. One needs to get it right at all costs, as the background of a picture is very important.
2. Editing will help in creating a new style
The best way to improve a photo and leave a stamp on the photo is through editing. One can develop an editing style that makes the image unique and acts like a signature mark. It is an excellent way to brand oneself, especially when starting as a photographer. Sometimes it is safe to experiment with a few images until one finds their editing style, after which one should edit the photos.
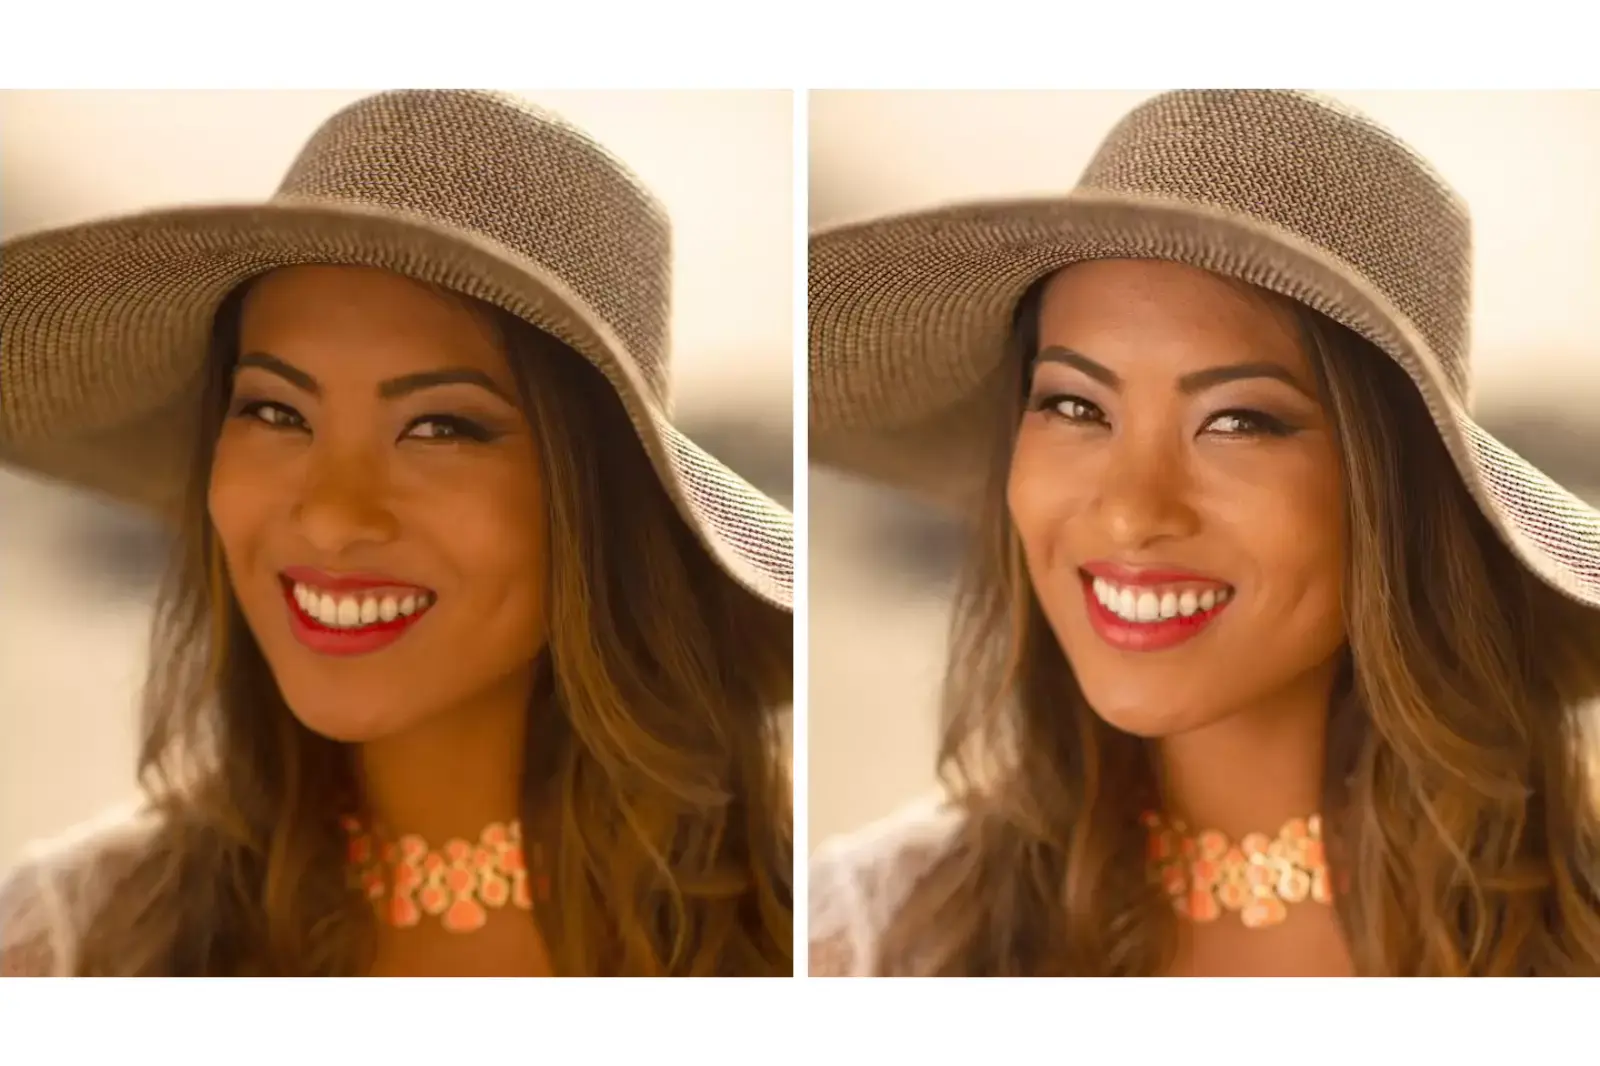
3. Colour correction
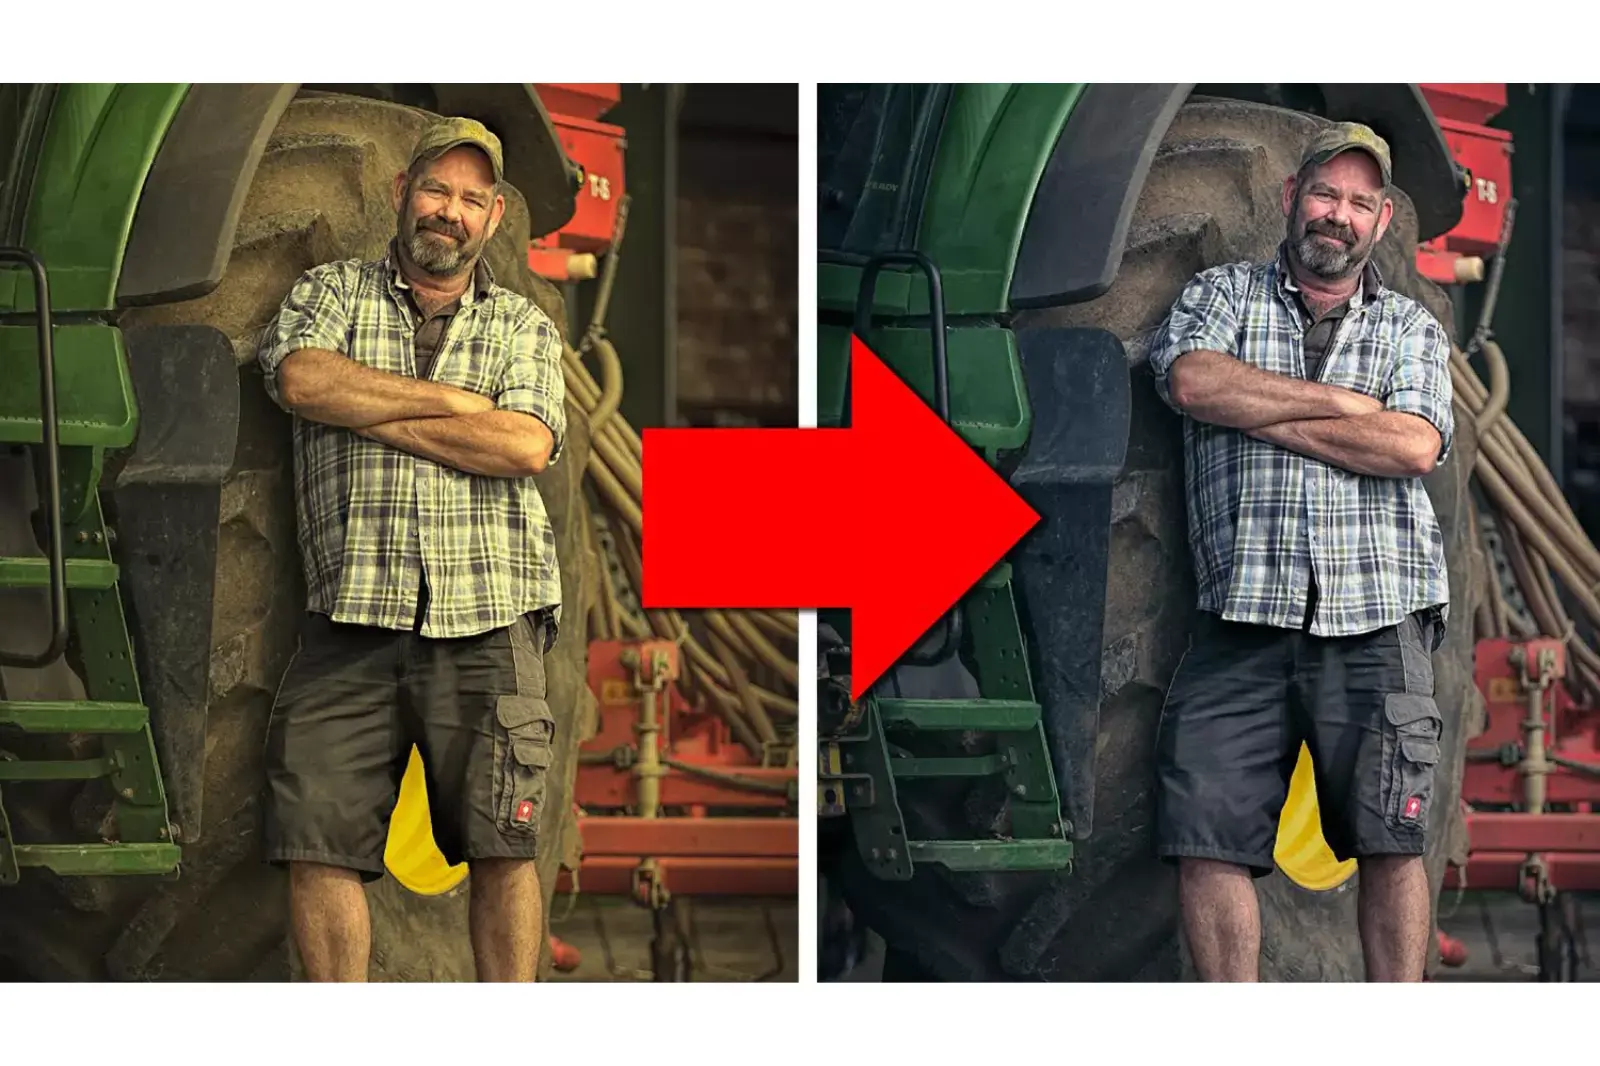
During a photo shoot, one might not get the time to correct every photo's lighting. Lighting will affect the colors of the image, which one might realize later while going through the pictures. Sometimes due to unforeseen circumstances, like bad lighting, it might have faded colors or be different from the original, for which one would have to do some editing.
This kind of editing, where the colors need to be corrected to make it more apt and visible, is regarded as color correction. Correcting colors is also an excellent way to make the picture more special. Using this process, one could get rid of certain aspects of the image, like unwanted hair and faded shirt color, or edit some photos that look too dull due to the unavailability of proper lighting.
4. Retouching
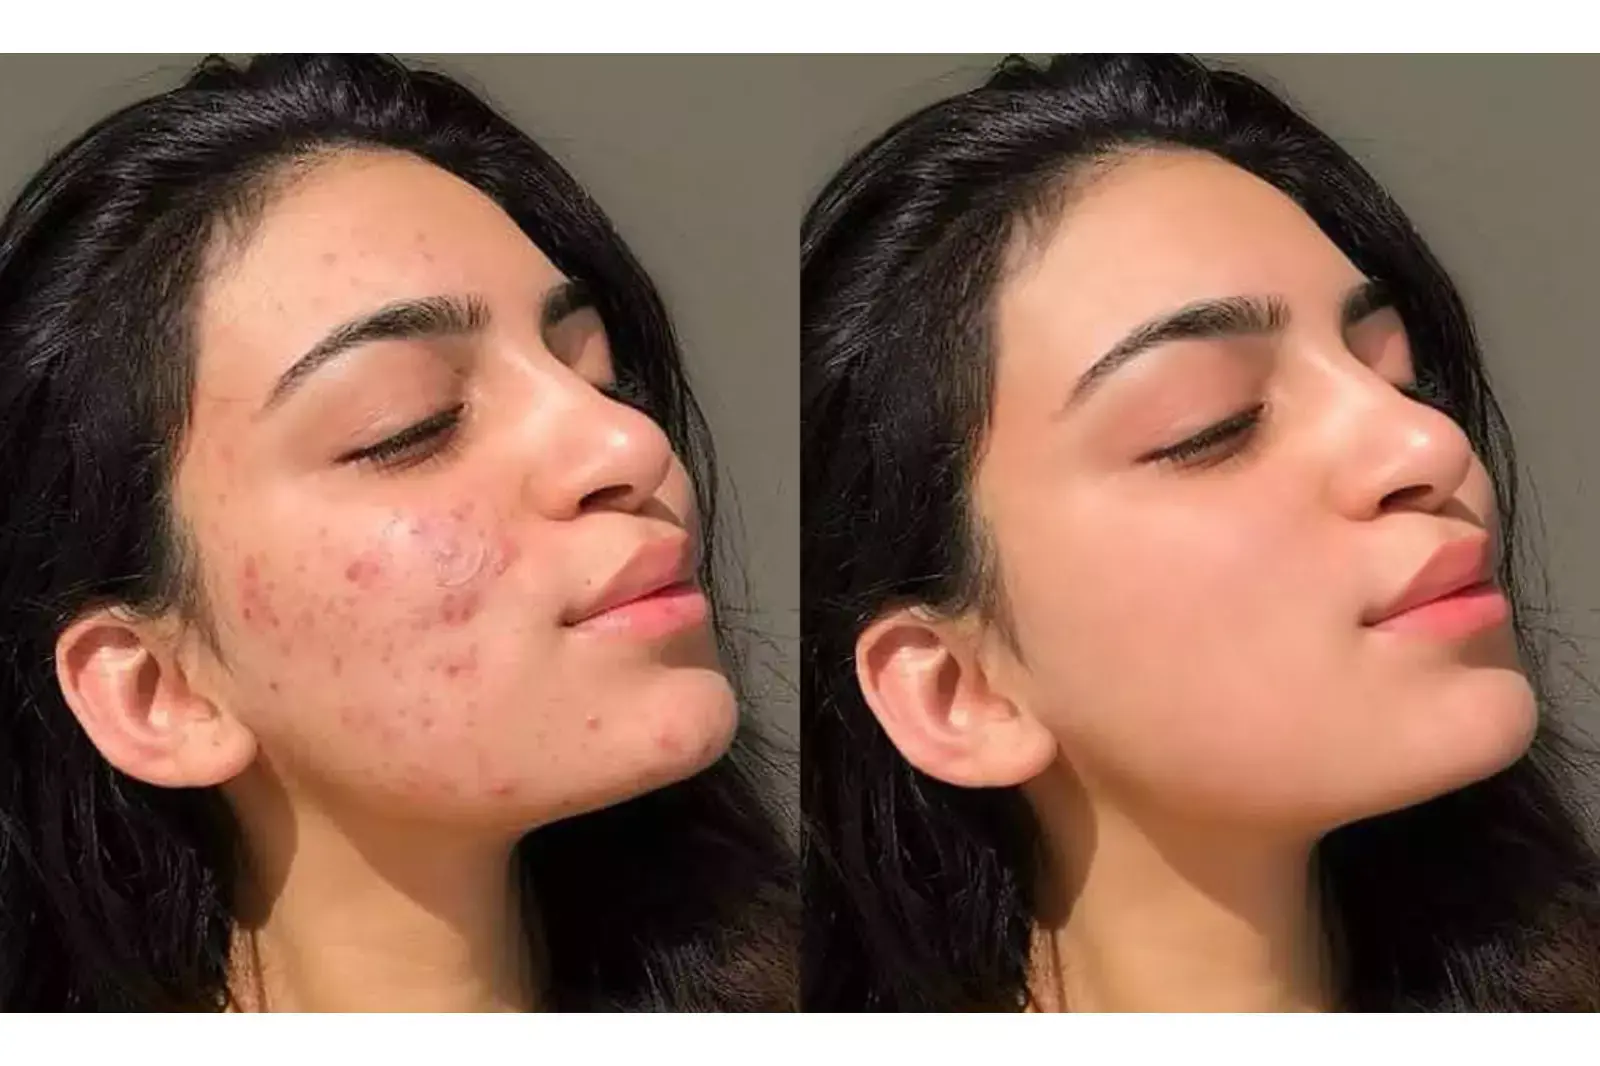
Photo retouching is fundamental, especially when one is working with a model. Most of the time, Perfect model images don't exist like the ones on billboards, as it demands a process of editing called retouching.
Using retouch, one can get rid of wrinkles, acne, or any blemishes that might degrade the image. One can also entirely transform the general appearance of the person or object in the picture.
5. Cropping
Cropping is removing unrequired parts of the image or 'cutting the edges of the photos. One can use cropping to get rid of unwanted content from the image. Cropping is the best solution if one finds out things in the image that was not supposed to be there or even if one wants to get rid of someone in the group photo. It is also best to emphasize the person or item on the image by cropping the unnecessary distractions. It is easy to carry out as no advanced skills are required to crop a photograph.
6. Editing for contrast and brightness
The importance of contrast and brightness adjustments are necessary for any image as one wants photographs to deliver perfection. Using images that appear too dark or too bright might not be the right ones. Manipulating contrast in photos is crucial as one might need a little knowledge about tone and matching different colors. Creating a good image with the proper contrast and brightness is possible.
7. Image masking
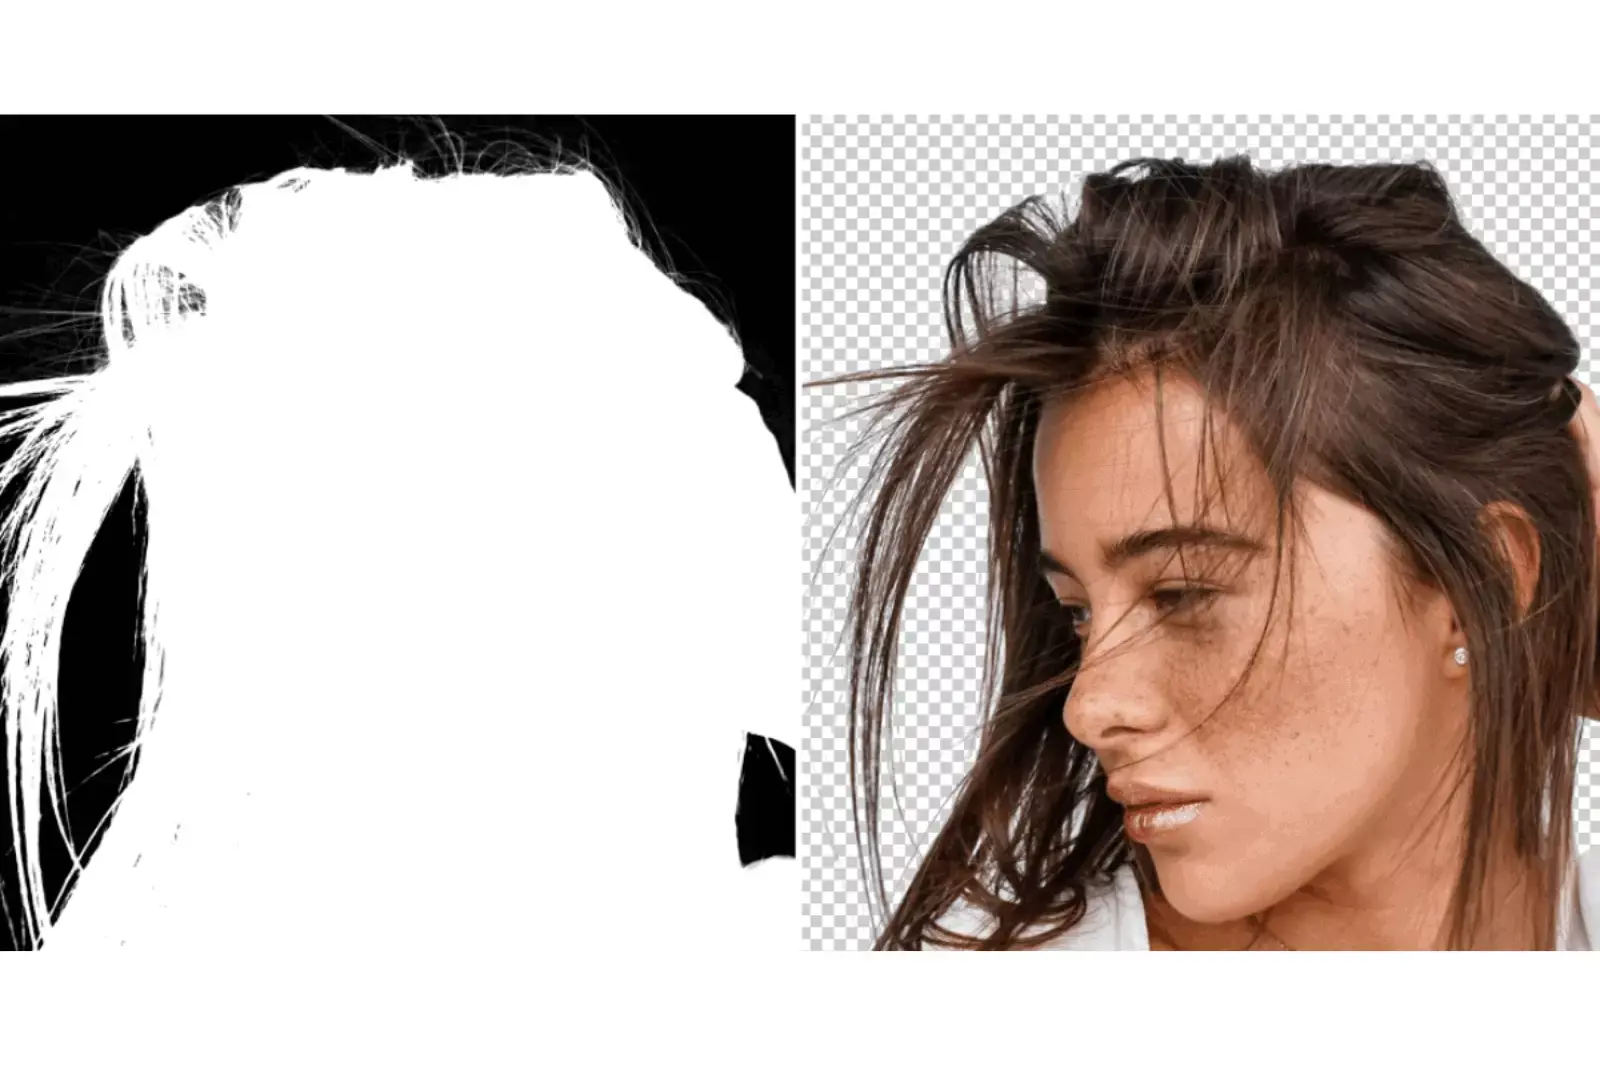
It is crucial for any photographer, without which one can mess up the whole image. One can use it to protect certain items in the picture from any alterations while making changes to the photo.
Through this process of editing, one will preserve parts of the image that are satisfactory while correcting those that are not. Without image masking, one might destroy several good photos while trying to edit them.
8. Creating shadows

Clicking pictures in a poorly lit room for a photo shoot is quite a bad experience for photographers. If one can master using shadows, one can get some creative portraits, primarily black and white ones. Shadows also contrast a photo that could otherwise be the same plane.
A dark picture couldn't create a much-needed contrast and highlight the image's lighter part. It also will save you from lighting the dim room with your camera flash like a firework display.
9. Restoring images
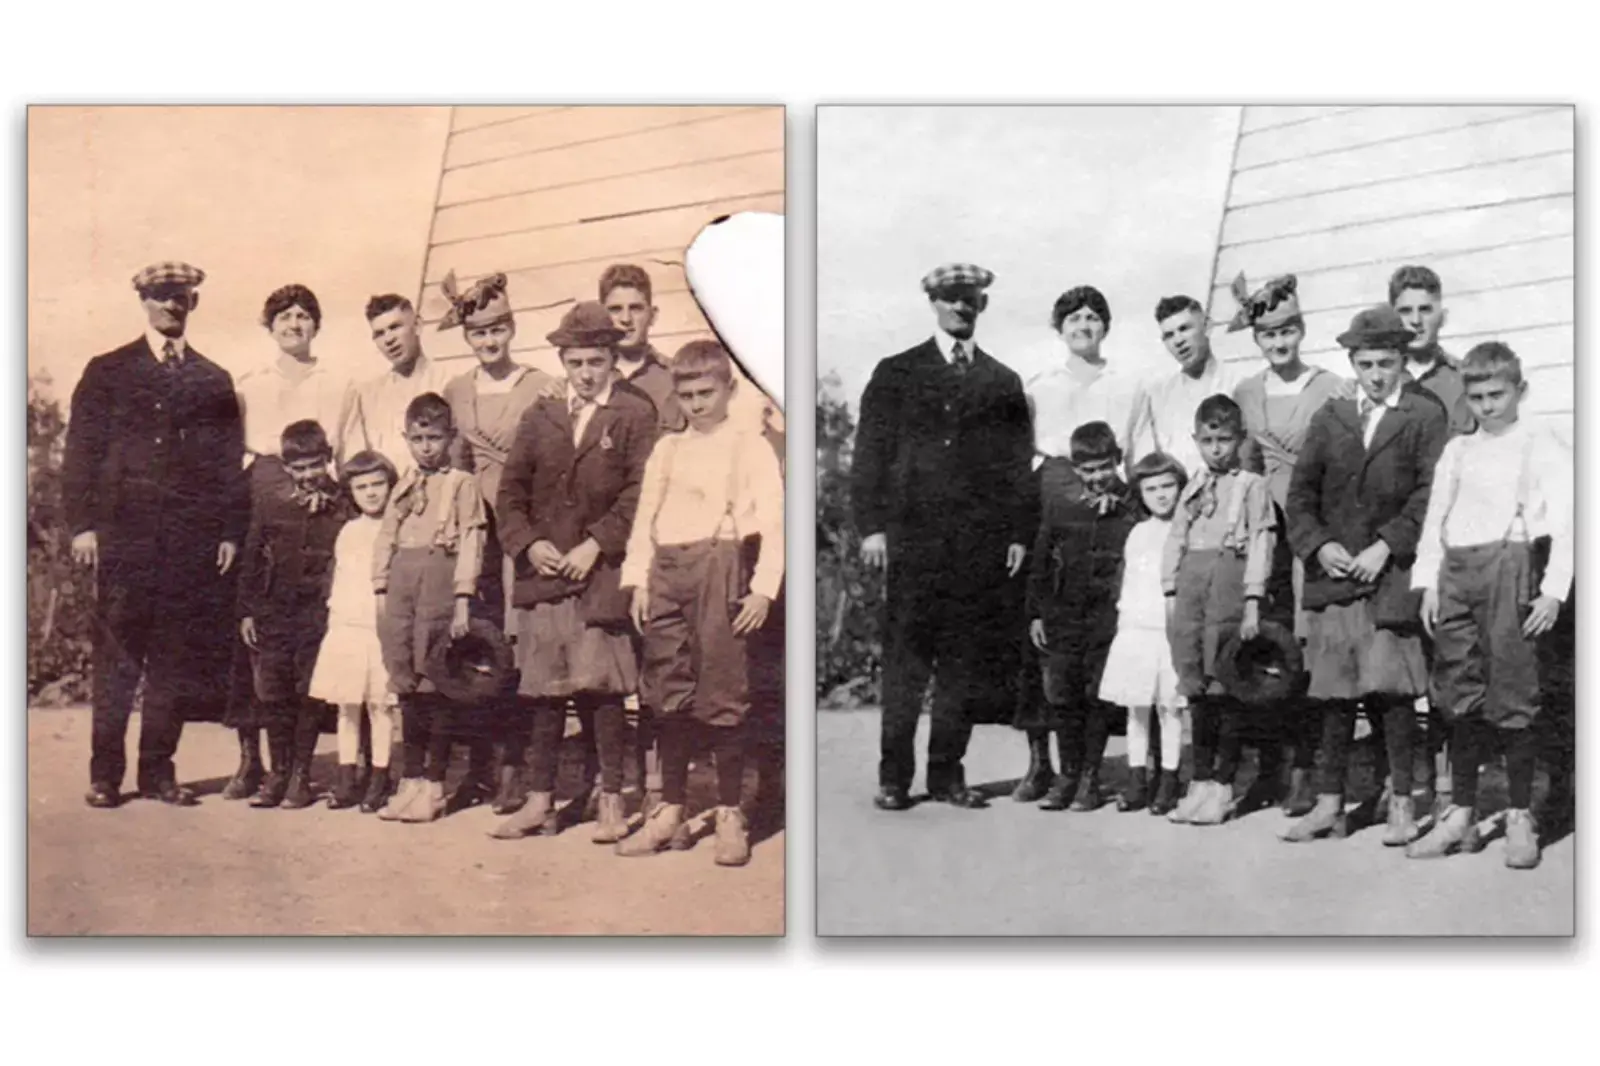
Sometimes, one wants to make old photos feel new and appealing without editing skills. It's not possible to do that. This editing skill is relatively easy to learn and recreate different images for the better.
Photo restoration is standard, and one should know this skill if they're serious about photography. With erase.bg you will find all these editing an easy thing to do! Create your masterpiece today.
FAQ's
How can I make my pictures look better fast?
One quick way to make your pictures look better is to adjust the brightness, contrast, and saturation levels. You can also try using filters or presets to add some style and enhance the overall look.
How do I make better photos?
To make better photos, you can focus on factors such as lighting, composition, exposure, and post-processing techniques. Practicing and experimenting with these elements can help improve your photography skills.
What is the golden rule of photography?
The golden rule of photography is the "rule of thirds," which suggests dividing the image into thirds horizontally and vertically, placing the subject at the intersections of the lines for a more balanced composition.
What makes photos look better?
Many factors can make a photo look better, including good lighting, proper composition, sharp focus, and effective use of color and contrast. Additionally, post-processing techniques such as adjusting brightness and contrast, cropping, and removing unwanted elements can also improve the overall appearance of a photo.
Is Photoshop easy for beginners?
Photoshop can be quite complex and overwhelming for beginners due to its vast array of features and tools. However, with some practice and dedication, beginners can learn to use Photoshop effectively.
Why do DSLR photos look good?
DSLR photos tend to look good due to their larger sensors, which allow for better depth of field and more detail. Additionally, the ability to use different lenses with varying focal lengths and aperture settings provides greater creative control over the final image.
.webp)

.webp)

.webp)

.webp)
.webp)


