


How to Change the Background in iMovie without a Green Screen?


Creating engaging and visually appealing videos has always been challenging, thanks to the array of tools available to modern content creators. One such tool, iMovie, stands out for its versatility and ease of use, especially for iPhone users. Whether you're capturing life's precious moments, crafting promotional content, or simply recording memorable events, altering video backgrounds can significantly enhance the impact of your content.
But what if you don't have access to a green screen or are looking for more straightforward solutions? This article will explore how you can change video backgrounds on your iPhone using iMovie without the need for a green screen setup. We'll delve into how you can change background colors, remove backgrounds, and even superimpose your videos over different backdrops to create that perfect scene.
Understanding how to manipulate video backgrounds opens up a world of creativity, allowing you to transform ordinary videos into captivating pieces of art. Whether you're a seasoned content creator or just starting out, mastering these techniques in iMovie can help you make your videos stand out. So let's dive into the world of iMovie and discover how to creatively alter video backgrounds to give your content that extra flair.
What is iMovie?
iMovie is a video editing software application developed by Apple Inc. for macOS, iOS, and iPadOS devices. It's part of the iLife suite of digital media creation applications, which also includes GarageBand and iPhoto. iMovie is designed to be user-friendly and accessible to users who may not have extensive video editing experience, making it a popular choice for personal, educational, and low-scale professional video editing tasks.
Key features of iMovie include:
- User-Friendly Interface: iMovie boasts a simple and intuitive interface, allowing users to easily navigate and edit their videos. Its drag-and-drop functionality makes it straightforward to add video clips, images, and music to projects.
- Themes and Templates: iMovie offers a variety of pre-set themes and templates, which include transitions and titles, helping users quickly create polished and cohesive videos.
- Video Editing Tools: The software provides basic to intermediate video editing tools, including trimming, splitting, and speed adjustments. Users can also apply filters, effects, and color correction to enhance their videos.
- Audio Editing: iMovie allows for the integration and editing of audio tracks. Users can add background music, sound effects, and voiceovers, with the ability to adjust volume levels and apply audio effects.
- Green Screen Effects: One of the more advanced features of iMovie is its green screen (or chroma key) capability, enabling users to change backgrounds or superimpose content over different scenes.
- Sharing and Exporting: After editing, users can easily share their creations directly from iMovie to social media platforms or export their videos in various resolutions and formats suitable for different devices and purposes.
- Cross-Device Compatibility: With iMovie available on Mac, iPhone, and iPad, users can start editing on one device and continue on another, offering flexibility and convenience.
iMovie is particularly popular among Apple device users due to its seamless integration with the Apple ecosystem, ease of use, and the fact that it comes pre-installed on new Macs and is freely available on the App Store for iOS and iPad devices.
Mastering the Art of Background Transformation in iMovie: A Guide for Video Enthusiasts
Welcome to the world of creative video editing, where transforming your video's backdrop is just a few taps away! iMovie, Apple's signature video editing app, has been a game changer for video enthusiasts of all skill levels. Whether you're just starting out or have been editing videos for years, iMovie's user-friendly interface, combined with its robust features, makes it a go-to choice for crafting professional-looking videos.
Today, we're diving into one of iMovie's most exciting capabilities – changing video backgrounds. This feature opens up endless possibilities for storytelling, allowing you to transport your subjects to new worlds or simply enhance the visual appeal of your content.
With iMovie's latest version, 10.2.4, readily available on the App Store for iPhone users, stepping into the realm of advanced video editing has never been easier. Let's embark on this journey to unleash your creative potential and transform your videos into captivating masterpieces.
How to add Video Backgrounds with iMovie?
Diving into video editing can transform an ordinary clip into a captivating story. Using iMovie on your iPhone, you can effortlessly add dynamic backgrounds to your videos, elevating their visual appeal. This guide will walk you through the simple steps to change backgrounds in iMovie, enhancing your videos with minimal effort. Mastering iMovie's background features can make all the difference for personal enjoyment or professional presentation.
- Open up iMovie: Start by launching the iMovie app on your iPhone. It's a user-friendly video editing app from Apple, ideal for both beginners and seasoned creators.
- Choose 'Movie': Upon opening iMovie, select the 'Movie' option. This choice allows you to create a new movie project, giving you access to editing tools.
- Selecting the Background: Before adding your main video, you need to choose a background. Tap on 'Back' and then 'Backgrounds'. iMovie offers a variety of background options including solid colors, gradients, and patterns. Alternatively, you can use an image or video from your own gallery as the background. This step sets the stage for your video, so choose a background that complements your main content.
- Create the Movie: After selecting your background, tap on 'Create movie'. This action places your chosen background into the timeline, which is the space where you'll edit your video.
- Adjusting the Background Duration: Drag the edges of the background clip on the timeline to extend its duration. It’s important to ensure that the background spans the entire length of your video to maintain consistency.
- Adding the Main Video: Now it’s time to add your main video. Click the '+' icon, then select 'Video' and choose the video clip you wish to use. This step layers your primary video over the background you've set.
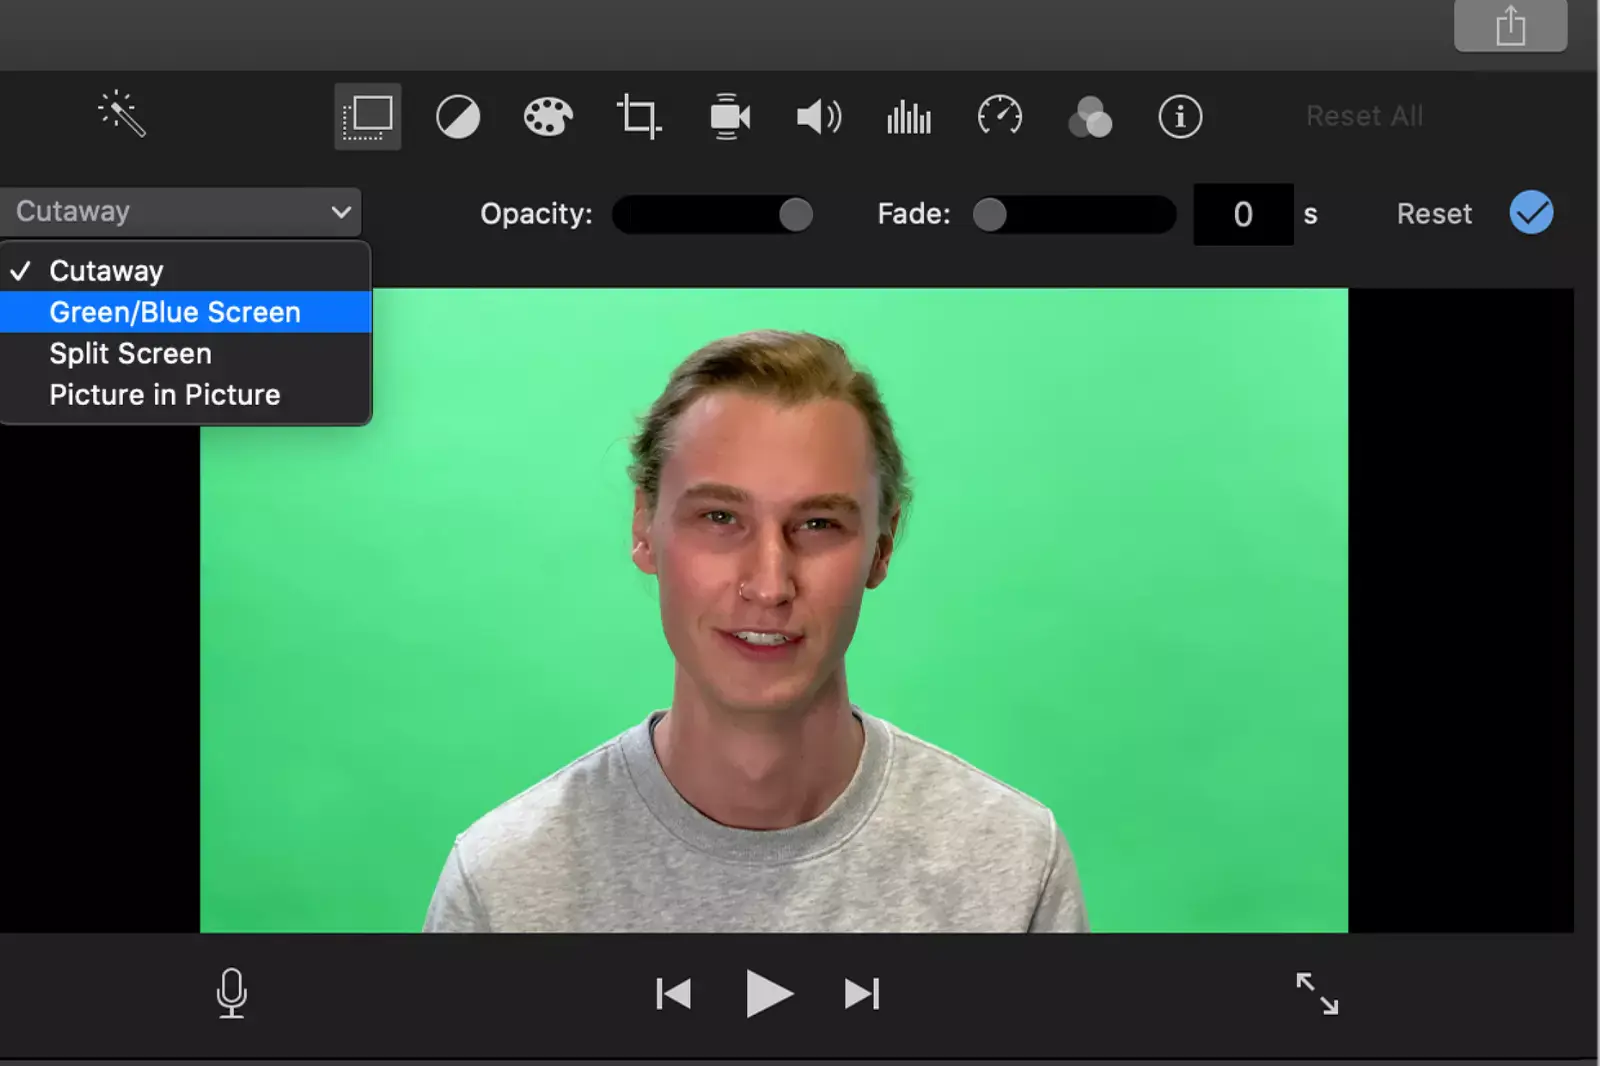
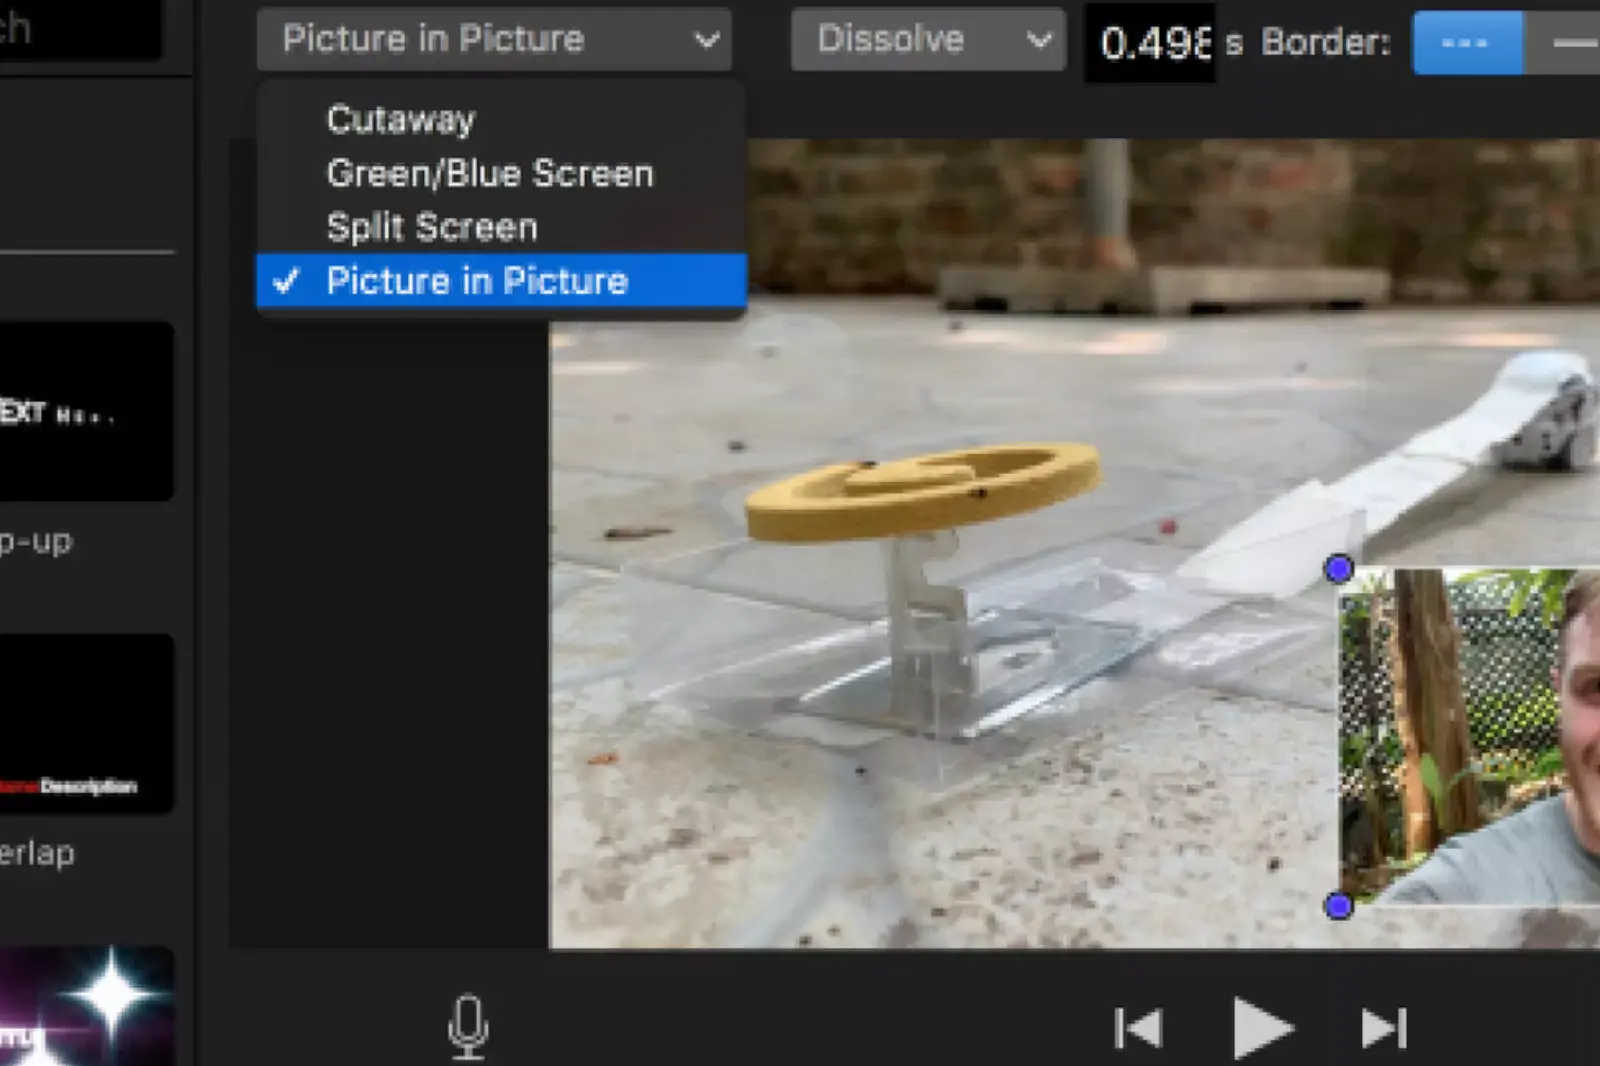
- Applying Green/Blue Screen Effect: Tap on the '…' (more options) button and choose 'Green/Blue screen'. This option is crucial for making your selected background appear behind the subjects in your main video. It works best if your video was shot against a green or blue backdrop, as these colors are easier to key out.
- Preview Your Video: Hit 'Play' to preview the video. This step is essential to ensure that the background and your video are seamlessly integrated.
- Disable 'Ken Burns' Effect: To avoid any unwanted transitions or glitches, it’s a good idea to disable the 'Ken Burns' effect. This effect automatically adds panning and zooming, which might not be desirable for your project. Disabling it ensures a smooth, static background.
- Cropping for Fit: If necessary, you can crop the sides of your video in iMovie. This adjustment ensures that your video fits well with the background, especially if they are of different dimensions. Proper alignment and sizing are key to making your video look professional.
By following these steps, you can effectively add and adjust video backgrounds in iMovie, enhancing your videos' visual appeal and storytelling power. Remember, the key to a great video is the content and how it's presented. With iMovie, you have a powerful tool to make your videos stand out.
Use the green-screen effect in iMovie on iPhone or iPad
Using the green-screen effect in iMovie on an iPhone or iPad allows you to create visually stunning videos by superimposing subjects over different backgrounds. Here’s a step-by-step guide on how to do it:
- Add Background to Timeline: Start your project and add the background video clip or still image to the timeline. This background will be what appears behind your green-screen footage.
- Locate the Playhead: Scroll through the timeline until the playhead (a white vertical line) is over the background clip. This step ensures that you are adding your green-screen clip at the correct point in your video.
- Add Green-Screen Clip: Tap the 'Add Media' button, then choose a category (like 'Video', 'Photos', etc.) from the list. Next, select the green-screen clip you want to use.
- Apply Green/Blue Screen Effect: After selecting your green-screen clip, tap the 'More' button (often displayed as three dots or a plus sign), then select 'Green/Blue Screen'. This action places your green-screen clip in the timeline above the background clip.
- Remove Green/Blue Background: In the viewer, you will have the option to remove the green or blue background automatically. Tap 'Auto' for automatic removal. Alternatively, you can manually tap the specific color in the clip in the viewer to remove it.
- Match Clip Lengths: Trim and adjust your background clip to match the length of your green-screen clip. Since the clips are connected, they will move together when you rearrange them in the timeline, ensuring synchronization.
- Adjust the Green-Screen Effect: Once the green-screen effect is applied, you can make further adjustments. Tap the green-screen clip in the timeline to select it. Then, you can:
- Adjust Strength: Tap the 'Adjust' button and drag the 'Strength' slider to change the amount of green or blue removed from the clip.
- Crop the Clip: To crop parts of the green-screen clip, tap the 'Mask' button, then drag the corners of the clip. This is useful for removing unwanted edges or focusing on a specific clip part.
These steps allow you to effectively use the green-screen effect in iMovie on your iPhone or iPad, enabling you to blend different video elements for a compelling final product creatively. Remember, the key to a great green-screen effect is good lighting and a solid-colored background (preferably green or blue) to ensure a clean and easy removal of the background color.
Use the green-screen effect in iMovie on Mac.
Using the green-screen effect in iMovie on a Mac is a powerful way to create visually dynamic videos. Here's how to do it:
- Add Background to Timeline: First, open your project in iMovie. Then, add the background video clip or a still image to your project's timeline. This background will be what's visible behind the green-screen clip.
- Add Green-Screen Clip: Next, add your green-screen clip to the timeline, placing it above the background clip. Ensure that the green-screen clip is positioned correctly in relation to the background clip.
- Match Clip Lengths: It’s important to ensure that the lengths of the green-screen clip and the background clip match. Trim and move the background clip to align with the green-screen clip. In iMovie, these clips will be connected, which means they will move together if you rearrange anything in the timeline.
- Access Video Overlay Controls: If the video overlay controls are not visible, click the 'Video Overlay Settings' button (located above the viewer). This button may look like a small rectangle with two triangles inside it.
- Apply Green/Blue Screen Effect: From the pop-up menu that appears after clicking the 'Video Overlay Settings' button, choose 'Green/Blue Screen'. This will apply the effect to your green-screen clip.
- Automatic Background Removal: iMovie will automatically remove the green or blue color from your green-screen clip, revealing the background clip behind your subjects.
- Adjusting the Effect: The color iMovie removes is based on the dominant color in the frame under the playhead when you apply the Green/Blue Screen effect. If the frame below the playhead isn’t representative of the rest of the clip (e.g., if the green screen isn't uniform), you might need to reposition the playhead and reapply the effect for better results.
Remember, for the best green-screen effect, your green-screen footage should be well-lit and the green or blue background should be evenly colored and well-defined. This ensures that iMovie can accurately remove the background without leaving any residue or artifacts. By following these steps, you can create professional-looking videos with custom backgrounds using iMovie on your Mac.
Adjust the green-screen effect on Mac
Adjusting the green-screen effect in iMovie on a Mac allows for more precise control over how your final video looks. Here's how to fine-tune this effect:
- Select Green-Screen Clip: First, in your project's timeline, select the green-screen clip you want to adjust. This is the clip where you've already applied the green-screen effect.
- Access Video Overlay Settings: Click the 'Video Overlay Settings' button. This button is usually found above the viewer and may resemble a small rectangle with two triangles. Clicking this will open the controls you need to adjust the green-screen effect.
- Adjust Softness: To modify how smoothly the green-screen clip transitions into the background, use the 'Softness' control. Dragging this control can help blend the edges of your subject with the background more naturally. This is particularly useful if you're noticing harsh edges or if the green-screen isn’t perfectly uniform.
- Isolate Areas with Crop: If you need to focus on a specific area of your green-screen clip, click the 'Crop' button and then adjust the corners of the frame in the viewer. This can be useful for eliminating unwanted areas from the edges of your clip.
- Masking with Clean-Up: For more precise control over which areas of your green-screen clip are visible, use the 'Clean-Up' button. After clicking this, you can drag across the clip in the viewer to selectively remove or retain parts of the green-screen. This feature is handy for dealing with imperfections in the green-screen backdrop or for creative effects.
How to Change Video Background without Green Screen on iMovie?
Changing the video background in iMovie without using a green screen can be a bit challenging since iMovie is primarily designed to work with green or blue screens for background replacement. However, you can still creatively work around this limitation. Here's how you can approach it:
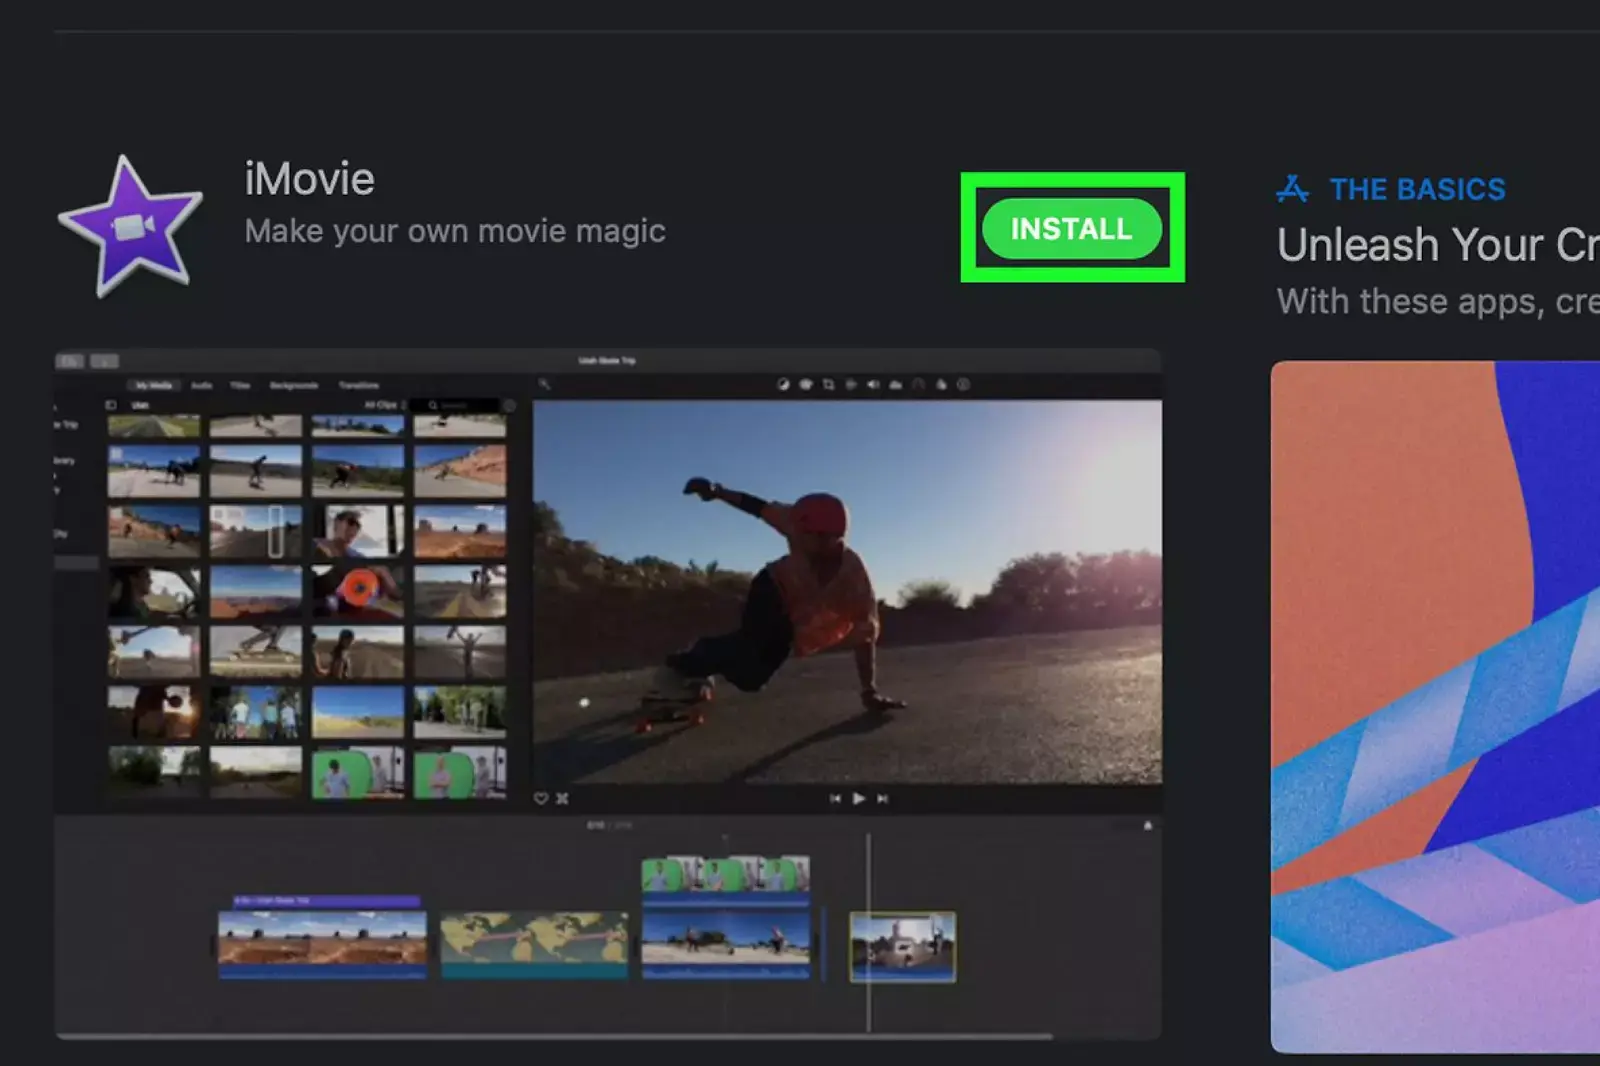
Step 1 - Install iMovie: If you haven't already, visit the official website of iMovie or the App Store to download and install iMovie on your system (Mac, iPhone, or iPad).
Step 2 - Select a New Background: Open iMovie and start a new project. Go to the 'Backgrounds' tab and select a background. This new background will replace the original background in your video. iMovie offers a variety of backgrounds including solid colors, patterns, and more.
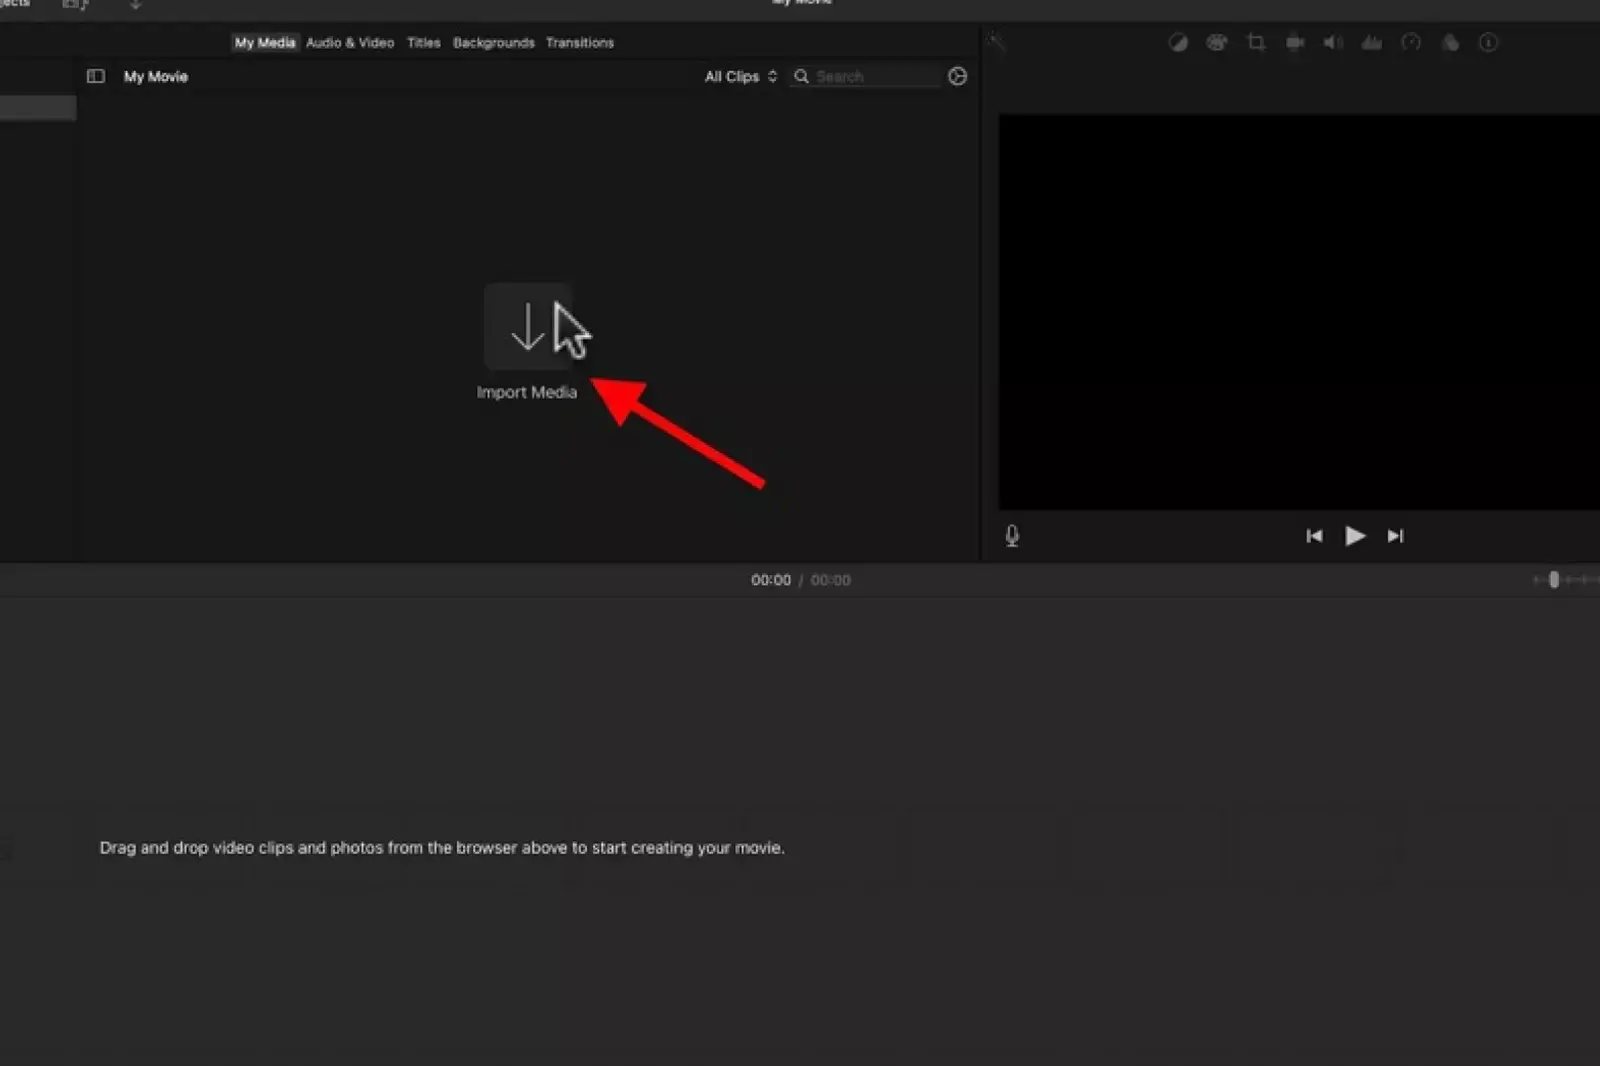
Step 3 - Import Your Video: Navigate to the 'My Media' tab. Here, import the video you want to edit. Ideally, this video should have a plain background, preferably in a solid color that is distinct from the subjects in the video. Drag this video above the background layer you just chose in your iMovie timeline.
Step 4 - Access Video Overlay Settings: In the top right-hand corner of the iMovie interface, find the 'Video Overlay Settings'. This option allows you to manipulate how your video interacts with the background layer.
Step 5 - Apply Green/Blue Screen Effect: Even though your video doesn't have a green or blue screen, try selecting the 'Green/Blue Screen' option. iMovie will attempt to remove a color from your video, thinking it's a green or blue screen. The effectiveness of this step greatly depends on your video's original background color and lighting.
Adjust and Edit: After applying the green/blue screen effect, you may need to make adjustments. This can include cropping, color correction, and other edits to make the new background blend more seamlessly with your main video.
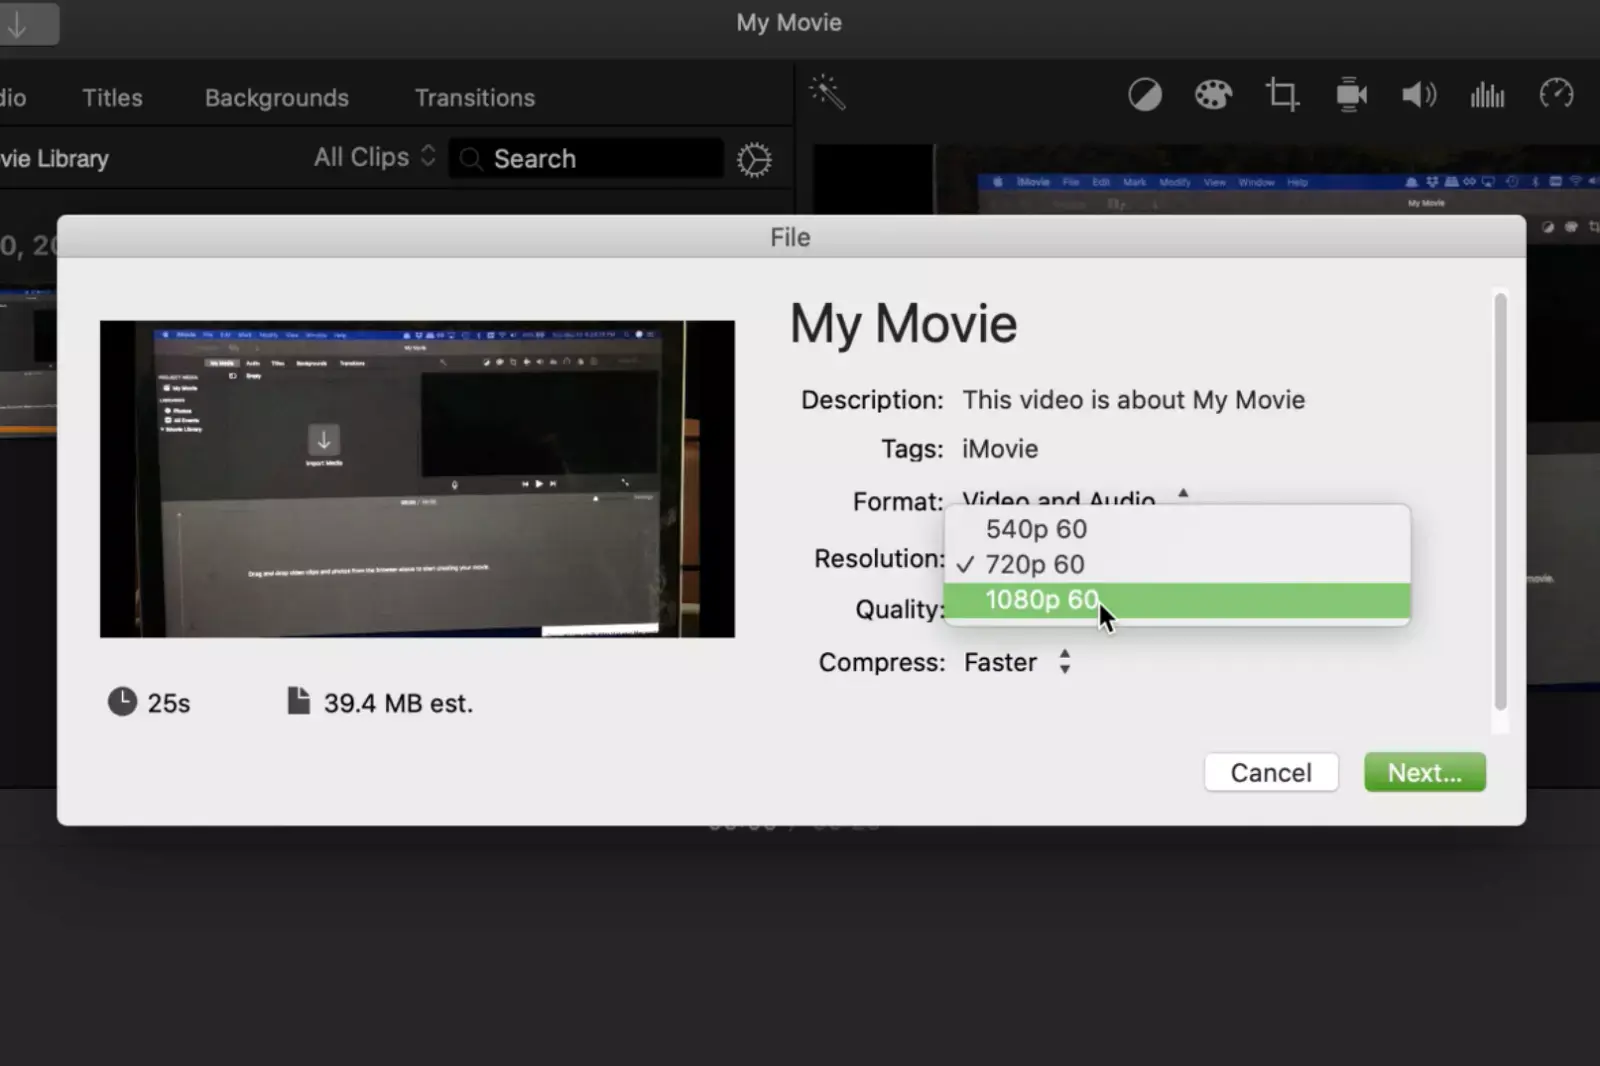
Export the Video: Once you’re satisfied with how your video looks, export it to your preferred location on your PC or device.
Keep in mind that this method may not work as seamlessly as it would with a proper green or blue screen, and the results can vary greatly depending on the original video's background. For best results, try to use a video with as plain and uniform a background as possible, and expect to spend some time tweaking the settings to get the best possible outcome.
Conclusion:
Changing video backgrounds in iMovie can be a creative and fun way to enhance your video projects. While using a green or blue screen provides the most seamless results, you can still experiment with different backgrounds, even without a green screen.
With practice and patience, iMovie's tools offer a range of possibilities to transform your videos, making them more engaging and professional-looking. Embrace the learning curve and explore the endless creative potential that iMovie offers!
FAQ's
Can I change video backgrounds in iMovie without a green screen?
While challenging, it's possible with a uniform, solid-colored background and careful editing.
Does iMovie support 4K video editing?
Yes, iMovie supports editing 4K videos, allowing for high-resolution project creation.
Can I add my own music to iMovie projects?
Absolutely, iMovie allows you to add custom music tracks to your video projects.
Is iMovie free for iPhone and Mac users?
Yes, iMovie is free for all iPhone and Mac users, available on the App Store.
Can I export videos from iMovie to social platforms?
Yes, iMovie provides options to directly export and share videos on various social media platforms.
Does iMovie allow voiceover recording?
Yes, you can record voiceovers directly in iMovie to add narration to your videos.
.webp)

.webp)

.webp)

.webp)
.webp)


