


How to Make a Transparent Background in Google Slides?


Are you tired of struggling with opaque backgrounds in your Google Slides presentations? Say goodbye to the frustration and hello to seamless transparency with our comprehensive guide on how to make the background transparent in Google Slides. Whether you're a seasoned presenter or a novice, mastering this technique will elevate your slides to a whole new level of professionalism and clarity.
In this blog post, we'll walk you through the step-by-step process of achieving a transparent background in Google Slides. From selecting the perfect image to adjusting transparency levels, we'll cover everything you need to know to make your presentations stand out. No more compromising on visual appeal – with our easy-to-follow instructions, you'll be able to create stunning slides that capture your audience's attention from start to finish.
So why settle for dull, uninspiring slides when you can transform them into engaging works of art? Join us as we dive into the world of transparent backgrounds in Google Slides and unlock the full potential of your presentations. With our expert tips and tricks, you'll be well on your way to creating slides that leave a lasting impression on your audience. Get ready to make a statement with your presentations the transparent background revolution starts here.
What is Google Slides?
Google Slides is a versatile, cloud-based presentation software developed by Google. It allows users to create, edit, and collaborate on presentations from any device with internet access. As part of the Google Workspace suite, it integrates seamlessly with other Google apps like Google Drive, Docs, and Sheets, making it an efficient tool for both personal and professional use.
One of Google Slides' standout features is its collaborative nature. Multiple users can work on a single presentation simultaneously, with real-time updates and the ability to leave comments and suggestions. This makes it ideal for team projects and remote work environments.
Google Slides supports a variety of media, including text, images, videos, and charts, allowing users to create engaging and dynamic presentations. It also offers a range of templates and customization options, catering to different design preferences and presentation needs. Overall, Google Slides is a powerful and accessible tool for creating impactful presentations.
Why is it Important to have a Transparent Background?
The importance of transparent backgrounds lies in their ability to enhance visual communication. By eliminating distracting elements, transparent backgrounds allow the main subject to stand out, making messages more straightforward and impactful. Whether in presentations, graphics, or images, transparency lends versatility and professionalism, enabling seamless integration into various contexts.
It promotes consistency and Harmony, ensuring that content harmonises with its surroundings while maintaining focus on the key elements. This adaptability fosters creativity and aesthetic appeal, enhancing the overall design quality. Transparent backgrounds also facilitate brand consistency, enabling logos and graphics to maintain their integrity across different platforms.
Moreover, they contribute to a polished and modern aesthetic, aligning with contemporary design trends. In essence, transparent backgrounds are not merely visual assets but potent tools that elevate visual communication's effectiveness and aesthetic appeal.
Background Transparent in Google Slides
Making a background transparent in Google Slides is crucial for creating professional presentations. By following simple steps, you can ensure that your images stand out effectively. With our comprehensive guide, you'll learn the essential techniques to remove backgrounds seamlessly, enhancing the visual appeal of your slides.
Whether you're a student, professional, or educator, mastering this skill can elevate the quality of your presentations. Unlock the potential of Google Slides by mastering the art of transparency, allowing your content to shine and captivate your audience effortlessly.
Backgrounds on Google Slides
After inserting an image into Google Slides, it typically appears with a default white background. However, the background of the image itself may not always align with the slide's background colour or design. Consequently, the image may stand out awkwardly or appear disconnected from the slide's content.
To address this, users often seek ways to make the image background transparent, allowing it to blend seamlessly with the slide's background or surrounding elements. This enhances visual coherence and ensures that the image complements the overall aesthetic and messaging of the presentation.
How to Make a Transparent Background in Google Slides?
Creating a transparent background in Google Slides can enhance the visual appeal of your presentations, allowing your content to stand out more effectively. While Google Slides doesn't offer a direct feature to make backgrounds transparent, you can achieve this effect by following a few simple steps:
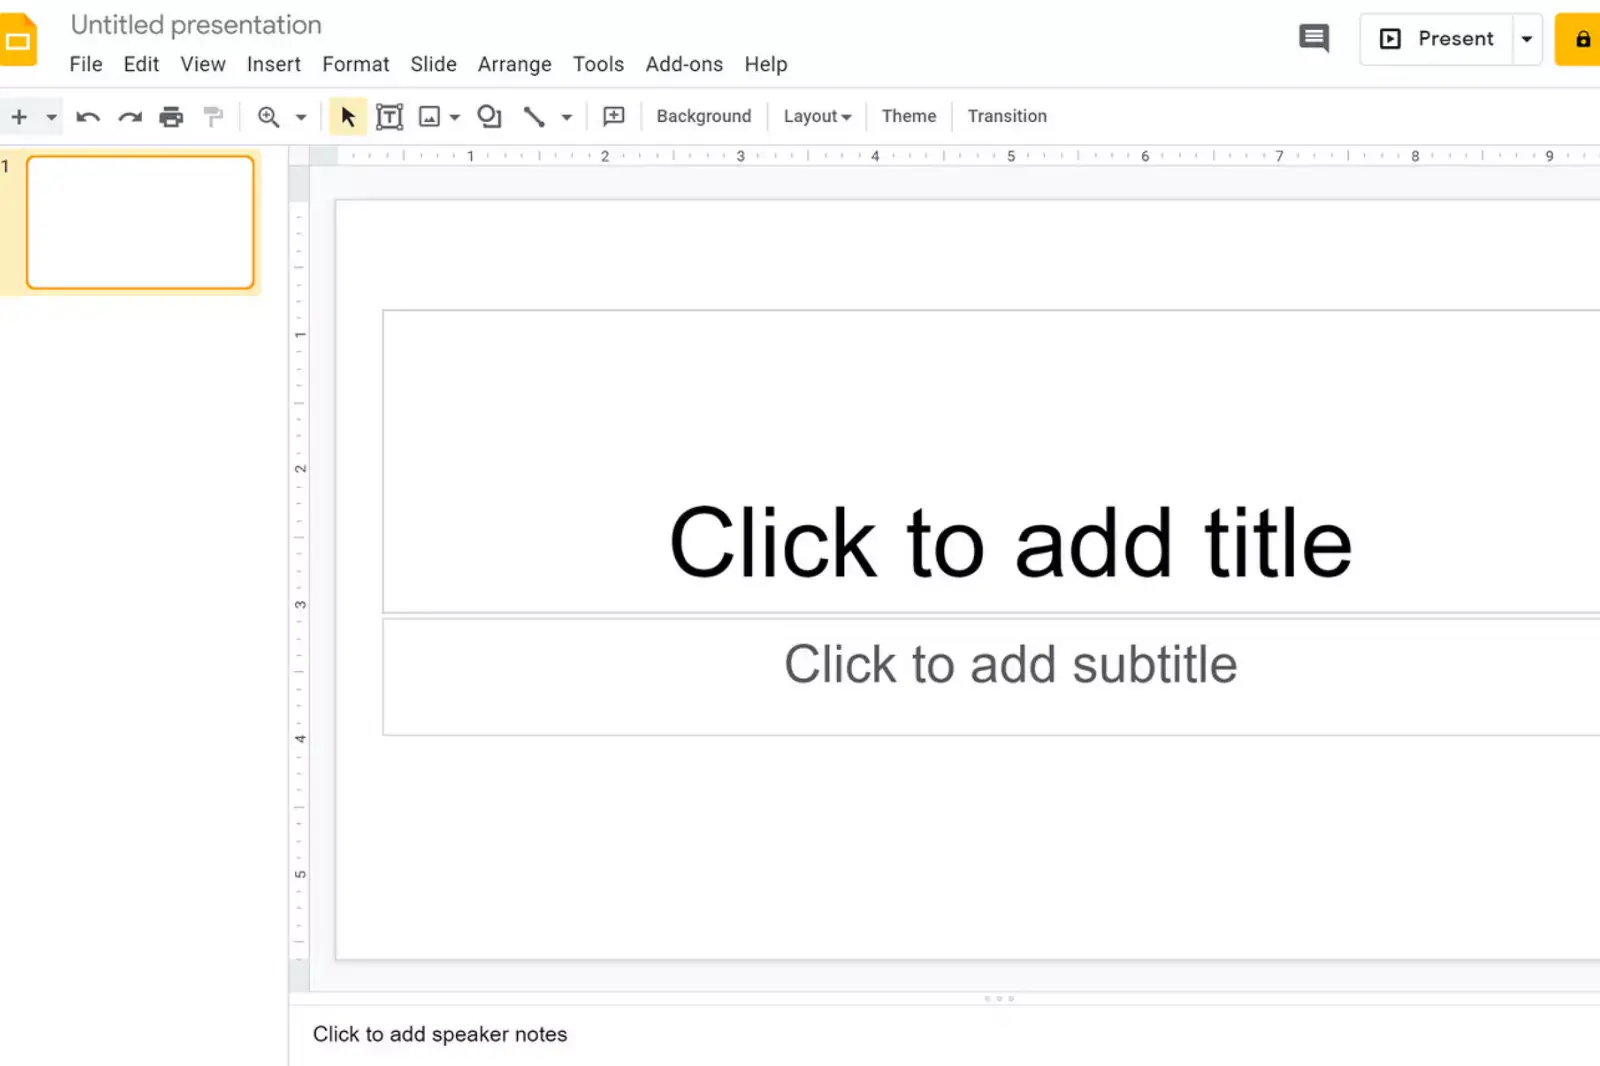
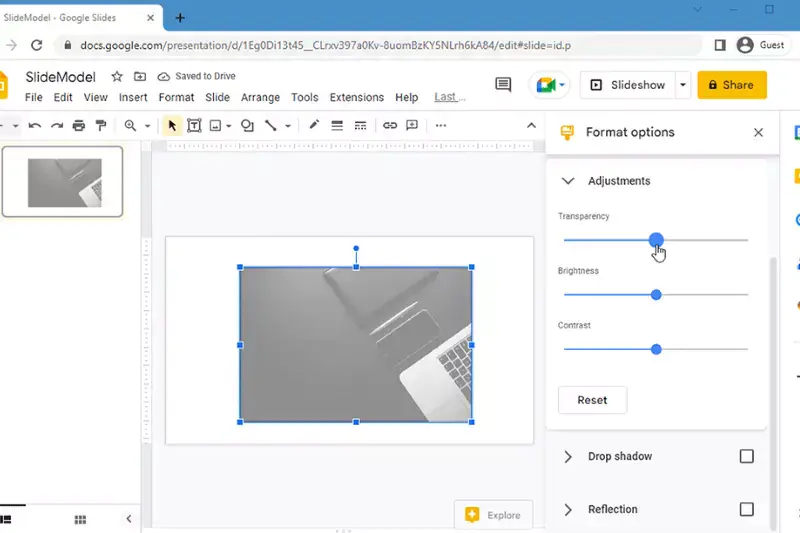
Step 1 - Open the document on Google Slides.
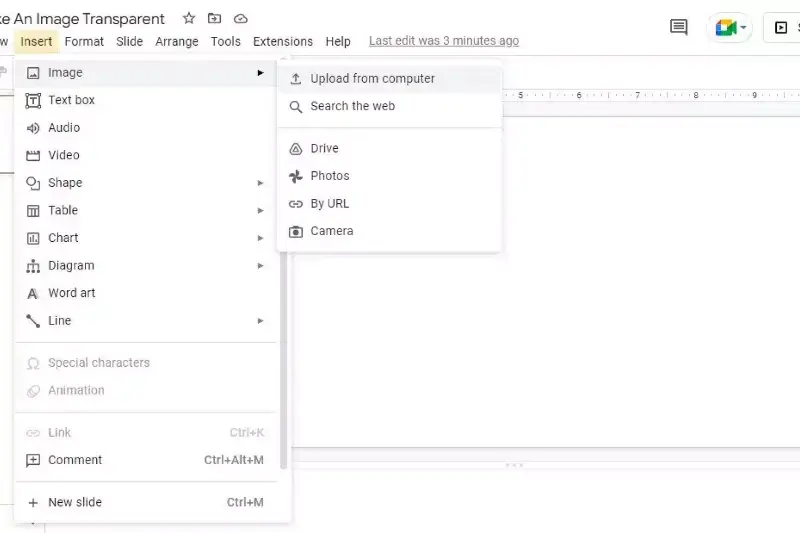
Step 2 - Select images whose background you want to make transparent. Search for the options bar and click on the insert command if your photo still needs to be uploaded to this tool. Once you do this, it will automatically get selected, and its border will turn blue.
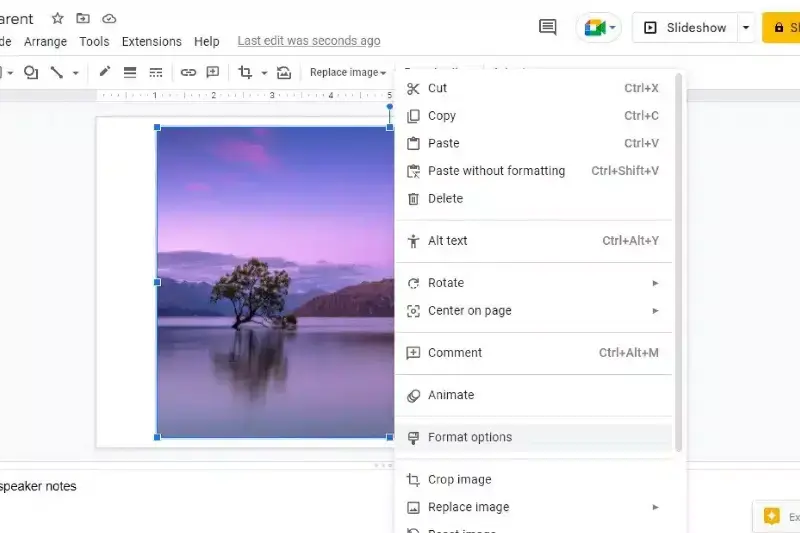
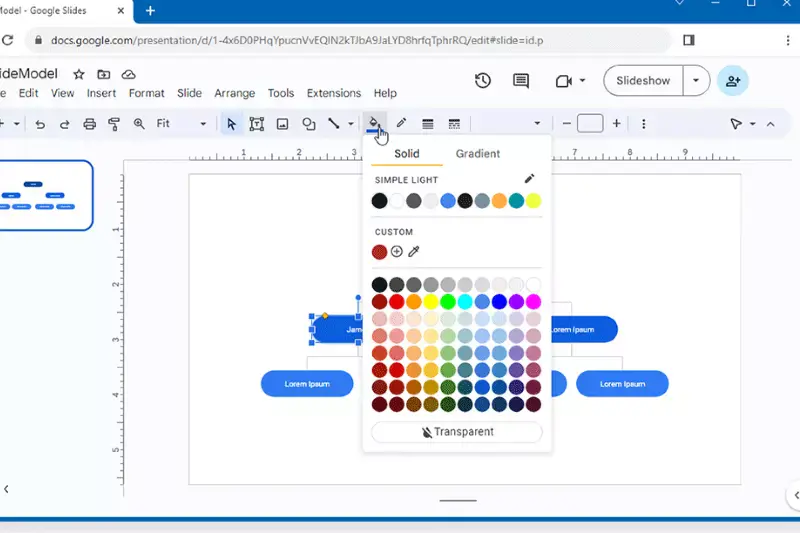
Step 3 - Then right-click on the image to see various options. When selecting an object, click the Format options icon from a toolbar above the document. Google Slides on the right side would generate an options bar.
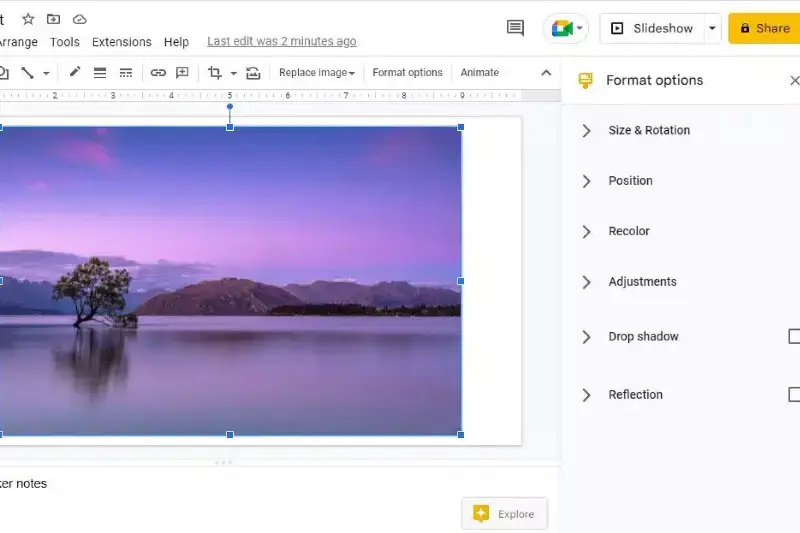
Step 4 - On searching the drop-down menu, one would find the Transparency option at the bottom of the Format options menu.
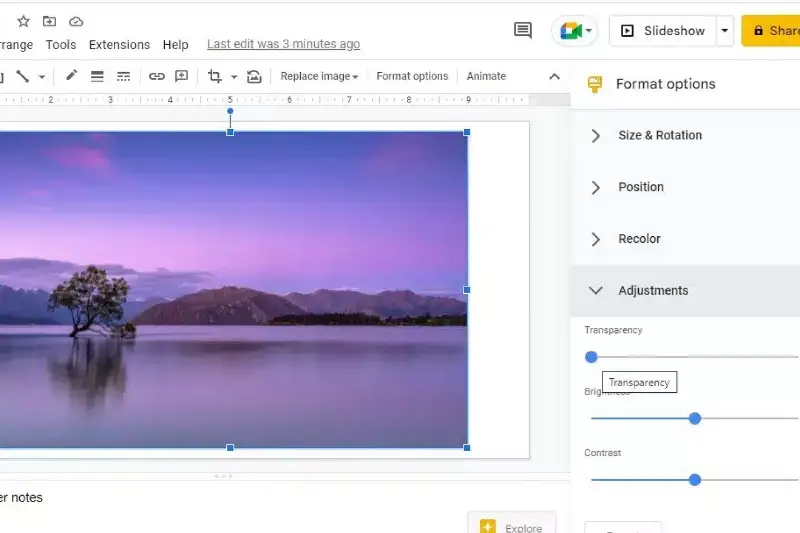
Step 5 - After this, a new panel for Transparency settings will open up on its own, next to the Format options panel.
By following these steps, you can easily create transparent backgrounds for images in Google Slides, allowing you to create more visually appealing and professional-looking presentations.
How to Make Transparent Background of Multiple Images in Google Slides?
Making the background transparent for multiple images in Google Slides can streamline your workflow and ensure consistency in your presentation's visual style. Here's how you can do it:
Select Images: Hold the Shift key and click on each image you want to adjust. This allows you to select multiple images at once.
Group Images: With the images selected, right-click on one of them and choose "Group" from the context menu. This groups the selected images together.
Access Format Options: Click on any of the grouped images to select them. Then, navigate to the toolbar at the top and click "Format options" (paint roller icon).
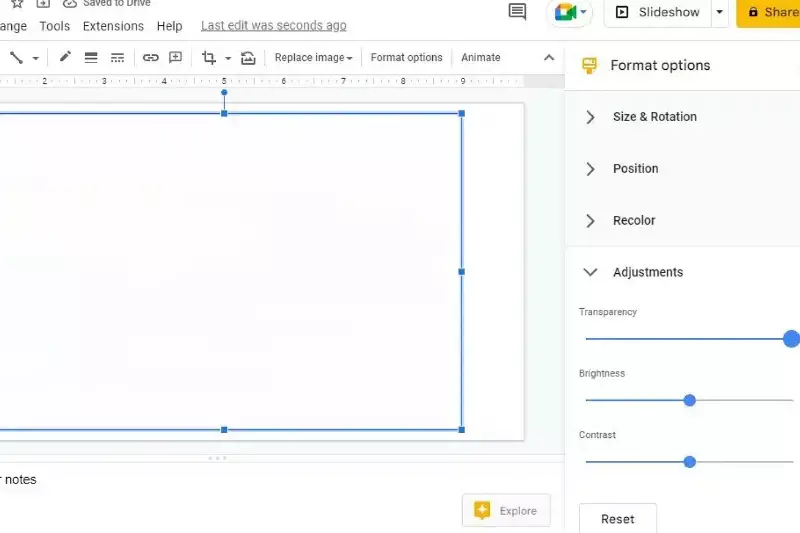
Adjust Transparency: In the Format options panel on the screen's right side, scroll down and locate the "Transparency" slider under the Adjustments section.
Apply Transparency: Slide the Transparency slider to the right to increase transparency until the background of the grouped images becomes transparent. You can preview the changes in real time.
Fine-Tune: Continue adjusting the transparency until you're satisfied with the result. You may need to experiment with different transparency levels to ensure the images blend seamlessly with your presentation's background.
Ungroup Images (Optional): If you need to edit individual images separately after adjusting transparency, right-click on the grouped images and choose "Ungroup" from the context menu.
Save and Present: Once you're happy with the transparent backgrounds of your multiple images, click outside the images or press Enter to apply the changes. Your images are ready to enhance your Google Slides presentation with a cohesive visual style.
Following these steps, you can efficiently create transparent backgrounds for multiple images in Google Slides, saving time and ensuring a professional look for your presentation.
How to Keep the Main Object Intact?
In presentations, maintaining focus on the main object is crucial for visual clarity and impact. When working with images in Google Slides, it's essential to know how to make the background transparent while keeping the main object intact. This skill ensures that your presentations are visually engaging and convey information effectively.
By following simple steps to select and refine the main object, apply transparency, and adjust settings, you can seamlessly integrate images into your slides without distractions. Understanding how to maintain the integrity of the main object enhances the overall quality and professionalism of your presentations.
Step 1 - Select the Main Object: Use the selection tool to choose the main object in your image that you want to keep intact.
Step 2 - Refine Selection (if necessary): If the initial selection is not precise, use tools like the lasso or brush tool to refine the selection around the main object, ensuring no important details are excluded.
Step 3 - Apply Transparency: Once the main object is selected, apply transparency to the background layer. This will remove the background while preserving the main object.
Step 4 - Adjust Transparency Settings: Fine-tune the transparency settings to achieve the desired level of opacity for the background. This ensures that the main object remains prominent without any distractions from the background.
Step 5 - Review and Edit: After applying transparency, review the image to ensure that the main object is intact and there are no unintended artifacts. Make any necessary adjustments to perfect the result.
By following these steps, you can effectively keep the main object intact while making the background transparent in Google Slides, ensuring that your images maintain their visual impact in your presentations.
Turning Shapes Transparent in Google Slides
In Google Slides, the process of making shapes transparent is relatively straightforward. By adjusting the fill colour and transparency settings, users can achieve the desired level of opacity for shapes within their presentations.
This feature is particularly useful for enhancing visibility and aesthetics, especially when incorporating darker shapes or intricate diagrams. By following a few simple steps, users can seamlessly integrate transparent shapes into their slides, creating visually appealing and professional presentations that effectively convey their message to the audience.
Creating Presentations with Google Slides
To create a presentation in slides, head to slides.google.com, click on the red plus button, and choose to create a blank presentation or a crucial existing file. One can also use Google slide up from the Play Store as it is available on any device.
There would be a slide already created beforehand, opening a blank presentation, in which one can set the default style in the slide as a layout. There would be two boxes, each for a title and subtitle.
You can add more slides to your presentation per your desire and carry out other functions, such as copying a specific part of any other document or adding an image or a video using several different templates and designs. However, the presentations one would make usually will be more transparent, and this is where the problem of making them transparent comes from.
How to Accelerate the Transparency of an Image in Google Slides?
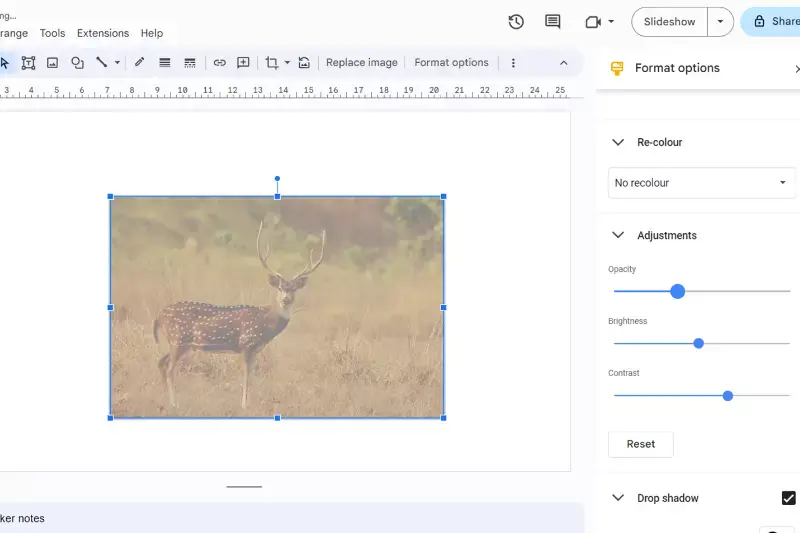
Accelerating the transparency of an image in Google Slides involves adjusting its opacity to achieve the desired level of transparency quickly. By right-clicking on the image and selecting "Format options," you can access the transparency adjustment slider.
Moving the slider to the right increases transparency, allowing objects underneath to be more visible, while sliding it to the left reduces transparency, making the image more opaque. This straightforward process ensures that your images integrate seamlessly into your slides, enhancing visual appeal and ensuring optimal clarity. With just a few simple steps, you can accelerate the transparency of images in Google Slides to create professional and engaging presentations.
Ways to Apply Gradients to an Image in Google Slides
The simple answer here is to employ numerous ways and functions in which one could play with the transparency of an image. To make the image more original, one can make a part of the image transparent, creating a gradient effect. The steps to apply gradients to an image or a shape in Google Slides are as follows-:
Step 1: Select the image or the shape for the gradient effect.
Step 2: Click the insert option from the top bar menu.
Step 3: Click on the shape option.
Step 4: Then select the shapes option. Here, one needs to choose the shape to which they want to add the transparency gradient.
Step 5: One can also make the border color transparent.
Step 6: After that, continue with the gradient of the shape. To do this, click on the Fill color option.
Step 7: Select the gradient you desire and create a custom gradient.
Step 8: To adjust the shape's colors and degree of transparency, one must adapt both gradient stops. After doing it, click on the okay option, and the desired final result will be available along with the image with the gradient transparency.
Step 9: Finally, one would have to customize and adapt the gradient as per their desire. One could add more transparency gradients to the image.
Step 10: One can also carry out the option of enlarging and reducing the gradient size. It is possible by modifying the size of the shape selected.
Resetting Your Background Image
Resetting your background image in Google Slides allows you to undo any changes or adjustments made to the image, restoring it to its original state. Whether you've applied transparency, gradients, or other modifications, the reset option simplifies the process of starting over or reverting to the initial appearance of the background.
By accessing the Format options and utilizing the reset function, you can quickly reset your background image, ensuring consistency and clarity within your presentation. This feature offers flexibility and convenience, enabling you to refine your slides with ease and precision.
How to make Transparent Background of Image in Erase.bg?
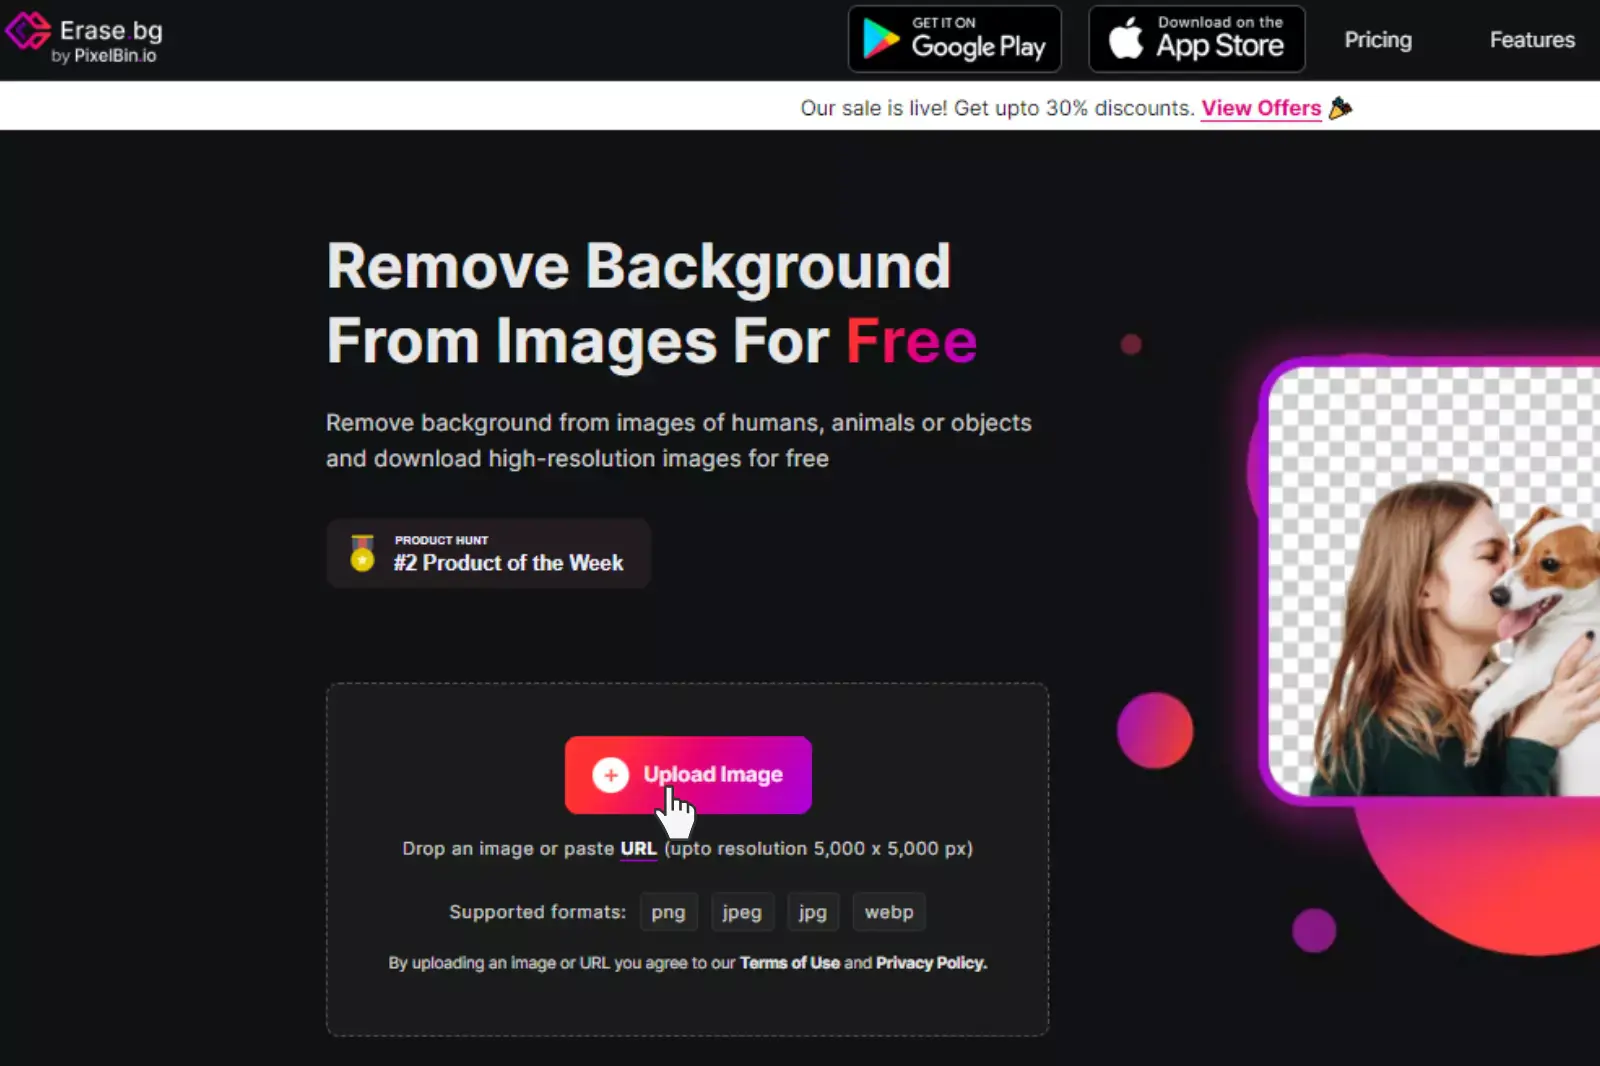
Erase.bg offers a seamless solution for removing backgrounds from images with precision and ease. Say goodbye to tedious manual editing – Erase.bg harnesses advanced AI algorithms to deliver impeccable results in seconds.
Whether you're a photographer, designer, or marketer, Erase.bg empowers you to create stunning visuals effortlessly. Simply upload your image, and Erase.bg works its magic, leaving you with a transparent background that enhances creativity. Discover how Erase.bg revolutionises image editing with its intuitive interface and powerful features.
Steps to Make a Transparent Background in Erase.bg:
Step 1 - Upload Image: Upload the image you want to edit to Erase.bg's platform.
Step 2 - Background Removal: Erase.bg automatically detects and removes the background, leaving only the subject.
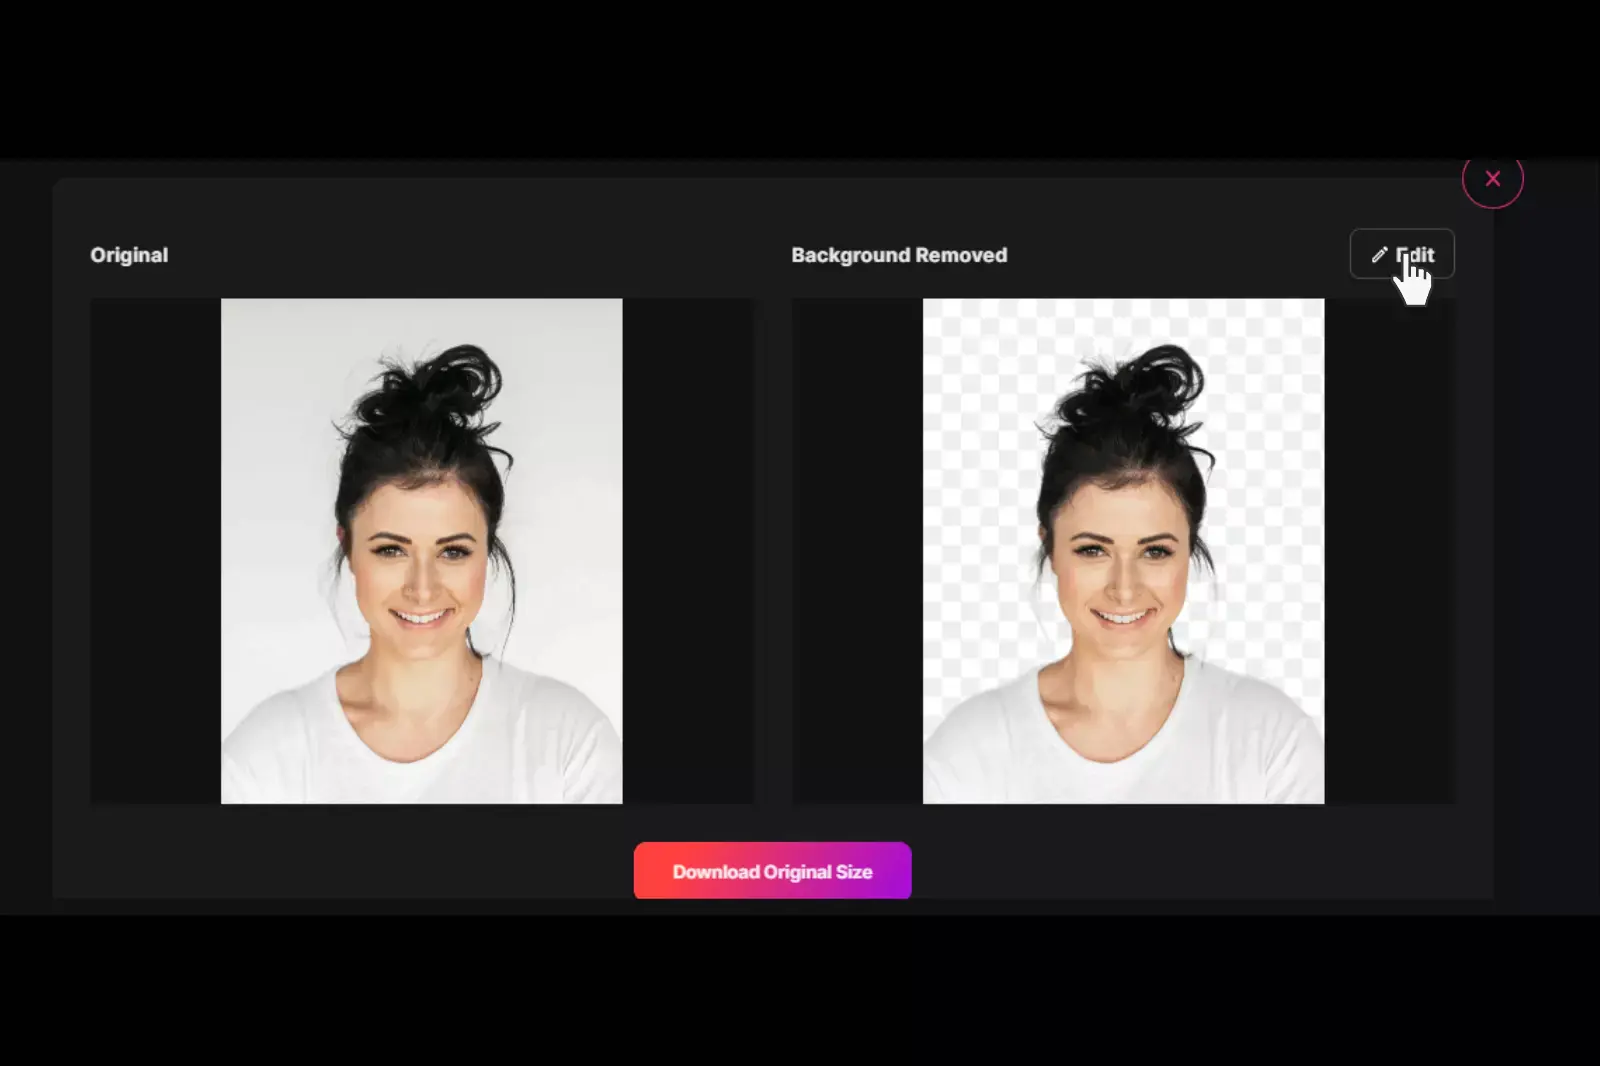
Sto 3 - Fine-Tune (Optional): Refine the results with Erase.bg's intuitive editing tools, adjusting areas as needed.
Step 4 - Download Transparent Image: Once satisfied, download your image with a transparent background in PNG format.

Step 5 - Enjoy Seamless Integration: Seamlessly integrate your transparent image into various projects, from presentations to marketing materials.
Features of Erase.bg:
- AI-Powered Background Removal: Harness the power of AI for precise and efficient background removal.
- User-Friendly Interface: Erase.bg's intuitive platform makes image editing accessible to all skill levels.
- Instant Results: Enjoy lightning-fast processing times, allowing you to focus on your creative vision.
- High-Quality Outputs: Get crisp, high-resolution images with transparent backgrounds that elevate your visuals.
- Versatile Applications: Whether for personal or professional use, Erase.bg caters to a wide range of needs, from photography to e-commerce.
Experience the next level of image editing with Erase.bg – where transparent backgrounds are just a click away.
Designing Transparent Images
One can enhance transparent images through design to attract the attention of one's viewers. The design overlaps visible pictures with transparent ones, boxes, and shapes. Through this method, one can change the size and placement of the image on the slides' background. The more transparent the image is, the easier it will be to blend various images in the slide within the selected background.
One can count several ways in which one can design transparent images. However, one should remember that their chosen method will depend on whether they wish the background to be visible while drawing the design. To design a transparent image, one could use web-based software.
One could draw the image directly over the white background and save it in the file format to create a transparent image. There is an evident and tedious method to create a transparent image. It involves deleting all the pixels in the picture you don't require. One could do this by erasing the unwanted pixels manually or by choosing specific areas of the image and selecting by clicking them, ending up deleting them.
Conclusion
Understanding how to manipulate transparency in Google Slides is crucial for crafting visually appealing presentations. By adjusting image opacity, making shapes transparent, and resetting backgrounds, users can create professional slides that effectively communicate ideas with clarity and impact.
FAQ's
How do I make a white background transparent?
To make a white background transparent using Erase.bg, you can follow these simple steps: Step 1: Go to Erase.bg in your web browser. Step 2: Click on "Upload Image" and select the image that you want to edit. Step 3: Once your image is uploaded, click on "Erase" to remove the background. Step 4: When you are satisfied with the background removal, click on "Download" to save the image with a transparent background. That's it! With these simple steps, you can easily make a white background transparent using Erase.bg.
Will making the background transparent affect the formatting of my slide?
No, making the background transparent will not affect the formatting of your slide. Your text, images, and other elements will remain in their original positions.
Is there a transparency option in Google Slides?
Yes, there is a transparency option in Google Slides. To access it, simply select the object or background you want to make transparent, expand the Adjustments tab in the toolbar, and you will find the Transparency option.
Are PNG backgrounds transparent?
PNG (Portable Network Graphics) is a file format that supports transparency. PNG files can have transparent backgrounds, which means that any part of the image that is not filled with pixels will be transparent and show through to the underlying layer or background.
How to make image background transparent?
To make the background of an image transparent using Erase.bg, you can follow these easy steps: Step 1: Go to Erase.bg in your web browser. Step 2: Click on "Upload Image" and select the image you want to edit. Step 3: Once the image is uploaded, the tool will remove the background automatically. Step 4: Click on "Download" to save the image with a transparent background. That's it! These simple steps will allow you to make the background of your image transparent using Erase.bg.
How do I get rid of checkered background?
Here are the easy steps: Step 1: Go to erase.bg in your web browser. Step 2: Click on "Upload Image" and select the image you want to edit. Step 3: Once the image is uploaded, the tool will remove the background automatically. Step 4:Then click on "Download" to save the image with a transparent background. That's it! Erase.bg makes it easy to remove any background from your image and create a transparent background, which will get rid of the checkered background.
.webp)

.webp)

.webp)

.webp)
.webp)


