


5 Ways To Remove The Background From Your Image In Photoshop


Are you looking to enhance your photos with a clean, professional touch? Discover how to remove the background from your images using Photoshop effortlessly. Whether you're a photographer aiming for flawless portraits or an e-commerce entrepreneur seeking stunning product displays, mastering this skill can transform your visuals. Imagine isolating your subjects precisely, ensuring they stand out against any backdrop you choose.
With our comprehensive guide on removing the background from your image in Photoshop, you'll learn step-by-step techniques that simplify the process. Say goodbye to distracting backgrounds and hello to polished, attention-grabbing photos that elevate your brand and personal projects. Unlock the power of Photoshop as we walk you through practical methods, tips, and tricks.
Whether you're a beginner or a seasoned editor, our insights cater to all skill levels, making background removal a seamless part of your creative workflow. Join us on this journey to mastering the art of visual storytelling with clean, professional images that leave a lasting impression. Discover how to remove the background from your image in Photoshop today and transform your visuals with precision and ease. Let's dive in and elevate your photography and design projects to new heights.
Different Tools In Photoshop To Remove The Background From An Image:
Quick selection tool
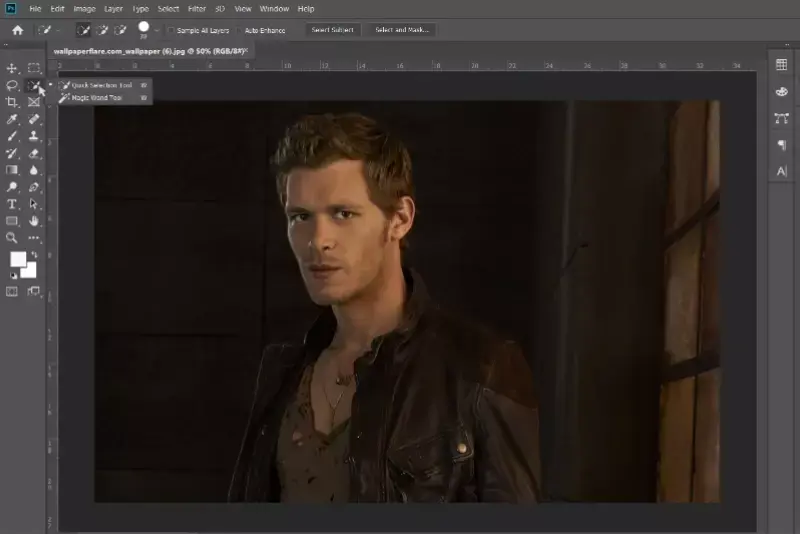
The Quick Selection Tool in Photoshop – your key to swift and precise background removal. Perfect for photographers, designers, and anyone looking to enhance their images effortlessly.
With the Quick Selection Tool, Photoshop simplifies removing backgrounds, making it accessible to beginners and professionals. Whether you're editing portraits, products, or landscapes, this tool ensures accurate selections with just a few clicks.
Discover how to master Photoshop's Quick Selection Tool for seamless background removal. Transform your photos with ease and achieve polished results that elevate your projects.
Step 1: Open your image editing software and choose the Quick Selection Tool from the toolbar.
Step 2: Modify the brush size as needed for more precise or broader selections.
Step 3: Click and drag over the area you want to select. The tool will automatically find edges and expand the selection.
Step 4: Use the Add to Selection or Subtract from Selection options to fine-tune your selection as needed.
Pros:
- Ease of Use: The Quick Selection Tool is intuitive and easy to learn, making it accessible for beginners.
- Speed: It allows for quick selections with just a few clicks, saving time compared to manual selection methods.
- Accuracy: With practice, it can achieve precise selections, especially for images with clear contrast between subject and background.
- Integration: Seamlessly integrates with other Photoshop tools and features, enhancing editing capabilities.
- Versatility: Useful for various editing tasks beyond background removal, such as selecting objects for adjustments or compositing.
Cons:
- Difficulty with Complex Backgrounds: Struggles with backgrounds needing more apparent contrast or intricate details.
- Edge Fringing: Sometimes leaves noticeable fringes or halos around the subject's edges, requiring additional refinement.
- Manual Refinement Needed: Often requires manual cleanup and refining of selections, especially in challenging areas.
- Limited Control: Less precise than advanced selection tools like the Pen Tool, particularly for fine details.
- Learning Curve: While easy to start, achieving mastery and handling complex scenarios may require practice and additional techniques.
Background eraser tool
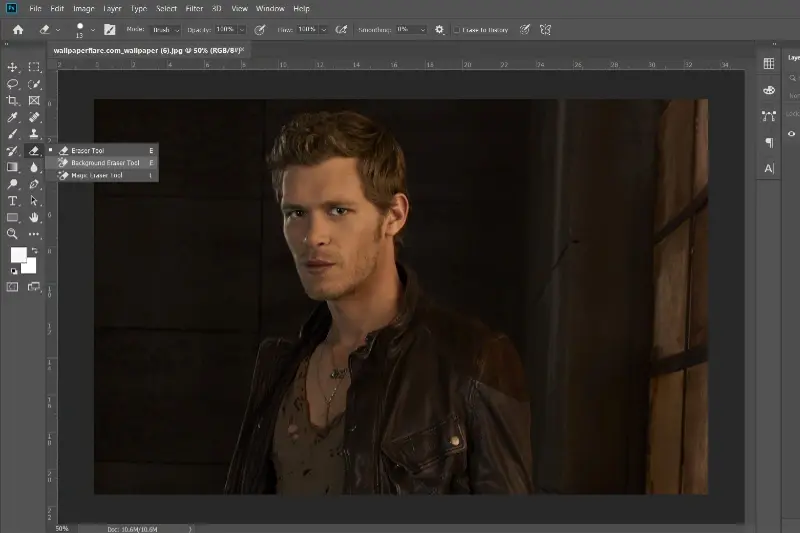
The world of seamless image editing with Photoshop's powerful Background Eraser Tool. Whether you're a seasoned professional or just beginning your journey in digital design, mastering this tool opens up a realm of creative possibilities.
The Background Eraser Tool in Photoshop empowers you to remove backgrounds from images with precision and ease. It intelligently detects edges and allows for real-time adjustments, ensuring your subjects stand out crisply against any backdrop. Perfect for photographers, graphic designers, and anyone looking to enhance their visuals, this tool balances control and automation, making complex editing tasks more manageable.
Join us as we delve into how to use the Background Eraser Tool in Photoshop effectively. Discover tips, tricks, and techniques to achieve clean, professional-looking results that elevate your projects to new heights. Let's unlock the potential of your images and transform your creative visions into reality with Photoshop's Background Eraser Tool.
Pros:
- Automatic Edging: The Background Eraser Tool automatically detects and removes edges, making it easier to isolate subjects from backgrounds.
- Real-Time Preview: Provides a live preview of the changes as you erase the background, allowing immediate adjustments.
- Precise Control: Offers control over the tolerance levels, allowing you to adjust how closely the tool adheres to edges.
- Versatility: Suitable for a wide range of images, from portraits to complex objects, enhancing its utility for various editing tasks.
- Integration: Seamlessly integrates with other Photoshop tools, enabling comprehensive editing workflows.
Cons:
- Edge Quality: This may sometimes leave remnants or artifacts along the subject's edges, requiring manual cleanup.
- Complex Backgrounds: Struggles with backgrounds with similar colors or textures to the subject, resulting in less accurate selections.
- Learning Curve: Requires familiarity and practice to master effectively, especially in achieving clean results consistently.
- Performance: Large or high-resolution images can slow erasing, affecting workflow efficiency.
- Limited to Photoshop: Being a Photoshop-specific tool, it may not be accessible for users who prefer or use other software.
Pen tool
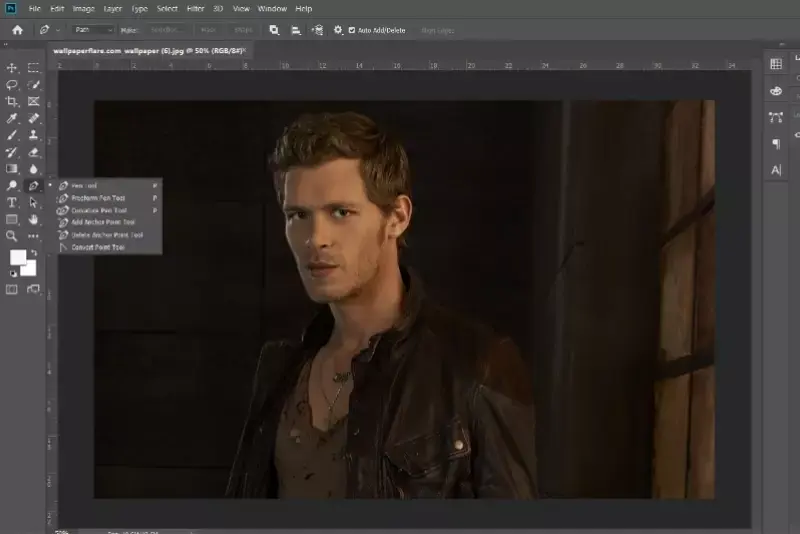
The Pen Tool in Photoshop is versatile and powerful for precise background removal and detailed selections. Unlike automated tools, the Pen Tool allows for meticulous control over anchor points and curves, enabling you to create precise paths around subjects with complex or intricate edges. This makes it ideal for removing backgrounds from images where accuracy is paramount.
By mastering the Pen Tool, you can achieve clean and professional results, free from the artifacts or fringing that can sometimes occur with automated selection methods. It's particularly effective for images with challenging backgrounds or subjects with fine details like hair or fur.
While the Pen Tool requires some practice to use effectively, its flexibility and precision make it indispensable for professional photographers, graphic designers, and digital artists. Whether editing portraits, product images, or creating composite artwork, the Pen Tool in Photoshop offers unparalleled control and quality in background removal and selection tasks.
Pros:
- Precision and Control: The Pen Tool offers unparalleled precision in creating selections and paths, making it ideal for detailed background removal tasks.
- Clean Edges: Provides smooth edges without halos or artifacts, especially beneficial for images with intricate details like hair or foliage.
- Versatility: Beyond background removal, the Pen Tool helps create vector shapes, paths for text, and intricate selections for advanced editing tasks.
- Scalability: Paths created with the Pen Tool are scalable without losing quality, making it suitable for high-resolution images and print materials.
- Professional Results: Used by professionals for their ability to deliver high-quality, polished results that meet the demands of commercial and artistic projects.
Cons:
- Learning Curve: Mastering the Pen Tool requires practice and familiarity with its features, which can be challenging for beginners.
- Time-Consuming: Creating precise selections with the Pen Tool can be time-consuming, especially compared to automated selection methods.
- Complexity: It can overwhelm users who prefer simpler or quicker selection tools.
- Manual Work: Requires manual adjustment of anchor points and curves, which can be tedious for large or complex selections.
- Not Ideal for All Images: While powerful, the Pen Tool may not be the best choice for images with very uniform or blurry backgrounds where automated tools may suffice better.
Photoshop quick action tool
The Quick Selection Tool in Photoshop is versatile and efficient for quickly removing backgrounds from images. Designed for users seeking a straightforward method for selecting and isolating subjects, the Quick Selection Tool operates by clicking and dragging over similar color and texture areas. This intuitive process automatically detects edges and adjusts selection boundaries, making it ideal for images with well-defined subjects and backgrounds.
With its real-time preview and adjustable brush size, the Quick Selection Tool allows quick adjustments and refinements during selection. This tool is handy for beginners or those looking to streamline their workflow, offering a balance of speed and accuracy.
While it may require additional fine-tuning in complex or detailed images, the Quick Selection Tool remains a go-to option for many Photoshop users seeking efficient background removal capabilities. Incorporating the Quick Selection Tool into your editing arsenal can significantly enhance productivity and deliver clean, professional results for various creative projects.
Pros:
- Ease of Use: The Quick Selection Tool is user-friendly and intuitive, making it accessible for beginners and experienced users.
- Speed: Allows for quick selections by clicking and dragging over areas of similar color and texture, saving time compared to manual selection methods.
- Real-Time Preview: Provides a live preview of selections, enabling immediate adjustments to ensure accurate results.
- Integration: Seamlessly integrates with other Photoshop tools and features, enhancing editing capabilities.
- Versatility: Effective for various images, from portraits to objects, facilitating editing tasks beyond background removal.
Cons:
- Accuracy with Complex Backgrounds: Struggles with backgrounds that need clear contrast or have intricate details, requiring manual refinement.
- Edge Quality: May leave rough edges or halos around the subject, especially in images with complex backgrounds.
- Limited Control: Less precise than advanced selection tools like the Pen Tool, particularly for fine details or challenging compositions.
- Learning Curve: While easy to start, achieving mastery and handling complex scenarios may require practice and additional techniques.
- Dependence on Image Quality: Performance can vary based on image resolution and quality, affecting the tool's effectiveness in specific scenarios.
Magnetic lasso tool
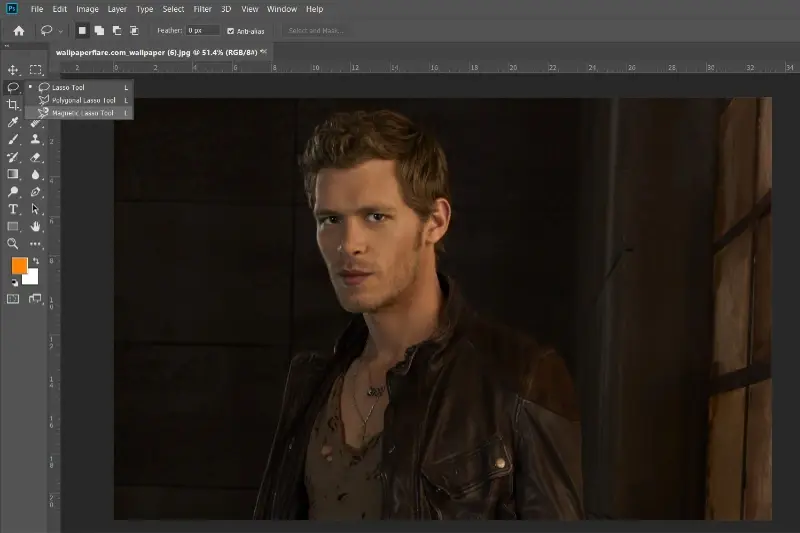
The Magnetic Lasso Tool in Photoshop is a powerful selection tool designed to accurately trace and select objects with distinct edges against contrasting backgrounds. It automatically snaps to edges based on color and contrast, making it particularly effective for images with well-defined subjects and backgrounds.
Ideal for users who prefer a semi-automated approach to selection, the Magnetic Lasso Tool offers a balance of control and efficiency. By clicking along the edges of an object, the tool intelligently detects and creates a selection path, reducing the need for manual adjustments. This makes it a valuable tool for tasks like background removal, where precision and speed are crucial.
While the Magnetic Lasso Tool excels in capturing detailed outlines and curves, it may require manual refinement in complex images or those with subtle transitions. Nevertheless, its intuitive operation and ability to produce clean selections make it a preferred choice for many Photoshop users aiming to streamline their editing workflow and achieve professional results.
Pros:
- Automatic Edge Detection: The Magnetic Lasso Tool automatically snaps to edges based on color and contrast, making it easier to create selections quickly.
- Ease of Use: Offers a user-friendly interface that allows users to click along the edges of an object to create selections, reducing the need for precise manual adjustments.
- Speed: Enables faster selection than manual selection methods, beneficial for images with well-defined edges and backgrounds.
- Versatility: Suitable for various images, from portraits to objects, providing flexibility in editing tasks beyond background removal.
- Integration: Seamlessly integrates with other Photoshop tools and features, enhancing editing capabilities.
Cons:
- Accuracy with Complex Backgrounds: Struggles with backgrounds that need clear contrast or have intricate details, requiring manual refinement.
- Edge Quality: This may produce rough edges or require additional cleanup, especially in images with complex or textured backgrounds.
- Limited Control: Less precise than advanced selection tools like the Pen Tool, particularly for fine details or challenging compositions.
- Learning Curve: While intuitive, mastering efficient use of the Magnetic Lasso Tool may require practice to achieve optimal results.
- Dependence on Image Quality: Performance can vary based on image resolution and quality, affecting the tool's effectiveness in specific scenarios.
How to Remove Background From Images Online
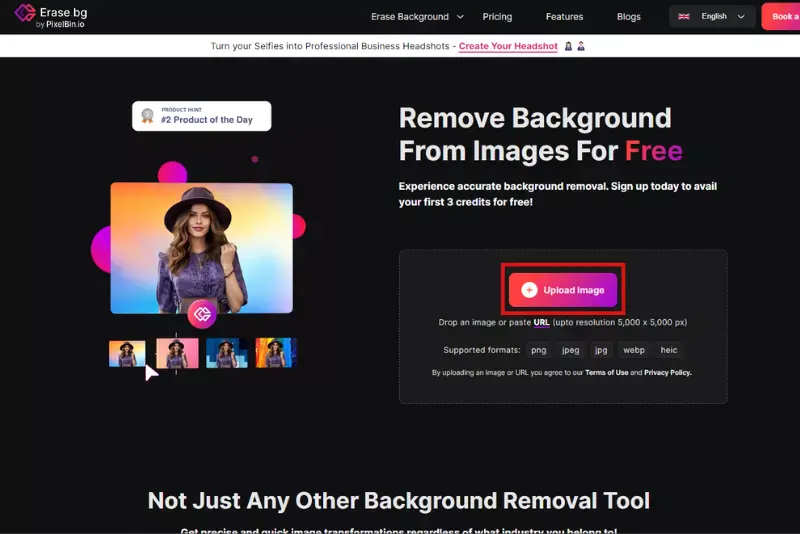
Erase.bg, your ultimate solution for effortless background removal from images. Powered by advanced AI technology, Erase.bg simplifies isolating subjects from their backgrounds with unparalleled accuracy and speed. Whether you're a photographer, designer, or e-commerce entrepreneur, our tool ensures clean, professional results in just a few clicks.
Using Erase.bg is straightforward: upload your image, and our AI algorithm swiftly identifies and removes the background, leaving you with a transparent or replaced background of your choice. Supported formats include PNG, JPG, JPEG, WEBP, and HEIC, accommodating various needs and preferences. Join thousands of users worldwide who trust Erase.bg for their background removal needs and experience the difference in your workflow today.
Steps to remove the background from images using Erase.bg
Step 1: Upload Your Image: Upload your image to Erase.bg. You can either drop the image into the designated area or paste the URL of the image.
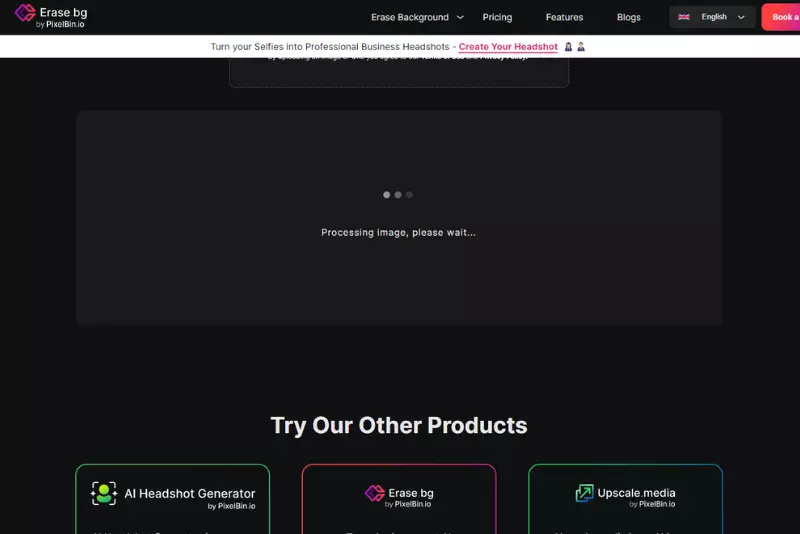
Step 2: Automatic Processing: Once uploaded, Erase.bg uses AI technology to automatically detect and remove the background from your image. This process is quick and usually takes just a few seconds.
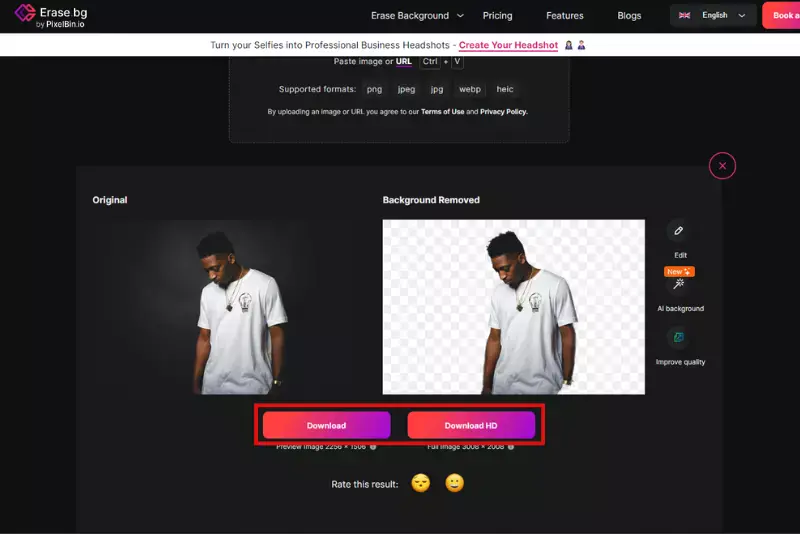
Step 3: Download Your Image: Once satisfied with the results, simply download your edited image. Erase.bg allows you to download the image in various formats, ensuring compatibility with your needs.
Conclusion
Mastering background removal in Photoshop opens endless creative possibilities. Whether using the Pen Tool for precision or the Quick Selection Tool for efficiency, these techniques empower users to transform images seamlessly. You'll elevate your editing skills and achieve professional-quality results for various projects with practice.
FAQ's
What are the different ways to remove the background in Photoshop?
Photoshop offers several methods for background removal, including the Magic Wand tool, Quick Selection tool, Pen tool for precise paths, Layer Masks, and the powerful Select and Mask feature.
Which method is best for removing backgrounds with intricate details?
The Pen tool is ideal for intricate details. It allows for precise outlining of complex shapes and objects, ensuring a clean and detailed background removal.
Can I remove the background from multiple images simultaneously in Photoshop?
Yes, Photoshop allows batch processing for background removal. Create an action or use scripts to apply the same background removal steps to a folder of images.
Is there a quick way to remove simple backgrounds without detailed editing?
Yes, the Magic Wand and Quick Selection tools are efficient for removing simple backgrounds. Select the background, refine the edges, and delete or mask to achieve a quick removal.
How can I maintain transparency in the background after removal?
Use Layer Masks to maintain transparency. Instead of deleting the background, mask it. This allows for non-destructive editing, enabling you to bring back parts of the background if needed.
Are there any online tools or plugins that work seamlessly with Photoshop for background removal?
Yes, there are online tools like remove.bg or plugins like Topaz Mask AI that integrate with Photoshop. These tools use advanced algorithms to automate background removal and can enhance the efficiency of your workflow.
.webp)

.webp)

.webp)

.webp)
.webp)


