


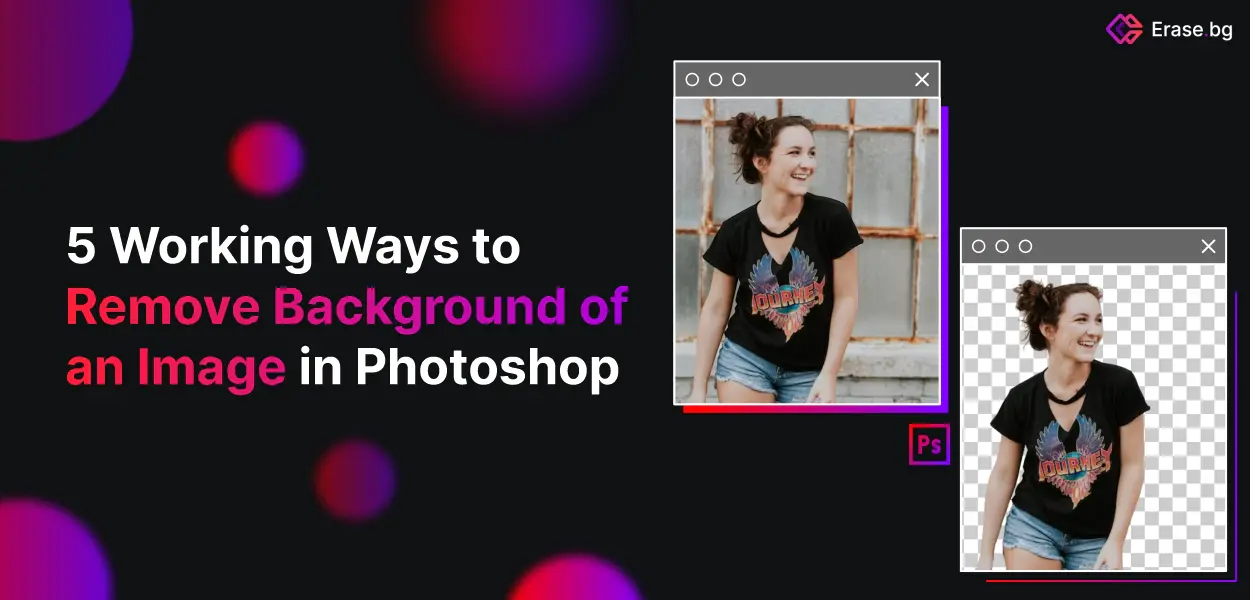
10 Working Ways To Remove The Background Of An Image In Photoshop


Are you tired of struggling with complex editing tools to remove backgrounds from your images? Look no further. At Erase.bg, we specialize in making background removal effortless and efficient. Whether you're a photographer, designer, or an e-commerce entrepreneur, our AI-powered tool ensures pristine results with just a few clicks.
Imagine transforming your photos instantly without compromising on quality. With Erase.bg, removing backgrounds from images is not only quick but also precise, thanks to our advanced algorithms. Say goodbye to tedious manual editing and hello to professional-grade images that captivate your audience.
Our platform integrates seamlessly into your workflow, whether you're using Photoshop or other design software. It's designed to simplify your creative process while enhancing the visual appeal of your projects. Join thousands of satisfied users who rely on Erase.bg for their background removal needs and experience the difference today.
10 Tools in Photoshop to Remove Image Background:
In the realm of digital image editing, mastering the art of background removal is crucial for achieving professional-quality results. Photoshop, renowned for its array of powerful tools, offers a suite of versatile options tailored for every editing need.
From the intuitive Magic Wand for quick selections to the meticulous precision of the Pen Tool, Photoshop empowers users to remove backgrounds with finesse seamlessly.
Whether you're refining product photos for e-commerce or enhancing portraits, these ten indispensable tools in Photoshop ensure that your editing process is efficient and your results, flawless.
Object Selection Tool:
The Object Selection Tool in Photoshop stands as a cornerstone for precise background removal, offering unparalleled ease and accuracy. Tailored for efficiency, this tool harnesses Adobe's advanced AI to isolate subjects from their backgrounds with remarkable detail swiftly.
Whether you're refining product images or perfecting portraits, the Object Selection Tool streamlines the process, empowering users to achieve professional-grade results effortlessly. Discover how this essential feature in Photoshop revolutionizes image editing, making intricate selections and background removals a seamless part of your creative workflow.
Step 1 - Start Photoshop on your PC and open your image in the software.
Step 2 - Go to the toolbar on the left in the same menu as the Quick selection tool and select the Object Selection tool.
Step 3 - Move your cursor around your subject with the help of a mouse and wait until it turns blue. If your subject does not turn blue after waiting for it, try another method by moving your cursor in tiny circles. Now, your subject is available for selection.
Step 4 - Press the Shift Key after selecting all the necessary objects you don't want to remove to erase the background. This shortcut key auto-selects every object by showing marching ants around every object.
Step 5 - Now, you must select the background instead of objects to remove it. For that, go to Select> Inverse. Your Selection is inversed, and the background is selected, leaving the objects unselected.
Step 6 - In this step, you need to unlock your image, depending on the background you need. After unlocking your photo, it is not considered a background anymore. For that, click on the lock on the right side of your photo's layer.
Step 7 - After the last step, your photo layer name is changed to "Layer 0" if no other layer is present. Take a large brush, click the Eraser Tool, and erase your background.
Pros:
- Precision: The Object Selection Tool offers high precision in selecting objects, allowing for detailed and accurate background removal.
- Ease of Use: It simplifies the process of making complex selections, even for beginners, through its intuitive interface and automated selection capabilities.
- Time Efficiency: Saves time by swiftly generating selections, reducing manual effort, and enhancing workflow efficiency.
- Versatility: Works effectively on a wide range of subjects and backgrounds, from simple to complex, adapting well to diverse editing needs.
- Integration with AI: Leveraging Adobe's AI technology, it intelligently refines selections based on content-aware algorithms, enhancing accuracy.
Cons:
- Learning Curve: Despite its user-friendly design, mastering the tool's full potential may require some learning and practice.
- Complex Backgrounds: Struggles with highly intricate backgrounds or scenes with overlapping elements, requiring manual adjustments.
- Resource Intensive: This can be resource-intensive on older or less powerful computers, affecting performance during intensive editing sessions.
- Occasional Errors: While generally accurate, it may occasionally misinterpret selections, necessitating manual corrections.
- Dependence on Image Quality: Selection accuracy can vary depending on image resolution and quality, impacting overall results.
Balancing its efficiency with potential challenges, the Object Selection Tool remains a robust choice for photographers, designers, and digital artists seeking streamlined selection and background removal capabilities in Photoshop.
By Quick Action:
By utilizing quick actions in Photoshop, users can swiftly remove backgrounds from images. This feature streamlines the process, making it efficient and straightforward. With just a few clicks, Photoshop’s quick actions analyze the image and apply automated tools to eliminate backgrounds seamlessly.
This functionality is particularly beneficial for users needing fast turnaround times without compromising on quality. Whether for e-commerce, design projects, or personal use, the quick action feature ensures that background removal tasks are completed swiftly, enhancing productivity and workflow efficiency in Photoshop.
Step 1- Open your photo in Photoshop. Right-click your background layer; now click "Duplicate Layer" to form a new layer. A dialogue box will open; you will name your layer (name it your personal choice) and click Ok. Lastly, turn off the layer by clicking on the eye icon to the left of the original layer.
Step 2 - Check whether your Property's Panel is open or not. If it is not open, go to Window> Properties and click it to open it on the right-hand side.
Step 3 - Click your new layer by going to the layer panel. To remove the background, select the button Remove Background under Quick Action. Remove Background button is present in the Properties Panel above Layer Panel.
Step 4 - Since the background is eliminated quickly, your layer has a mask around the object.
Pros:
- Precision and Control: Photoshop offers precise selection tools like the Pen Tool and Quick Selection Tool, allowing users to control exactly which areas to keep or remove.
- Advanced Editing Capabilities: Beyond background removal, Photoshop enables comprehensive image editing, such as retouching, color correction, and adding effects, all in one platform.
- Compatibility and Integration: It integrates seamlessly with other Adobe products like Lightroom and Illustrator, enhancing workflow efficiency.
- Customization Options: Users can adjust settings for edge refinement, feathering, and output formats to achieve professional-grade results tailored to their needs.
- Wide Range of Tools: Photoshop provides a wide array of tools and techniques for background removal, catering to various skill levels and project requirements.
Cons:
- Learning Curve: Mastering Photoshop's advanced features for precise background removal requires time and practice, making it less accessible for beginners.
- Resource Intensive: It can be demanding on system resources, especially when handling large files or complex edits, potentially slowing down performance.
- Cost: Photoshop is subscription-based, which might be costly for occasional users or small businesses compared to free or one-time purchase alternatives.
- Complex Interface: The abundance of tools and features in Photoshop can overwhelm new users, requiring familiarisation to navigate effectively.
- Software Dependency: As proprietary software, users are tied to Adobe's ecosystem, limiting flexibility compared to open-source or platform-independent alternatives.
These factors highlight Photoshop's powerful capabilities for background removal but also underscore considerations like cost, learning curve, and system requirements that users should weigh based on their specific needs and proficiency level.
Background Erase Tool:
The Background Erase Tool in Photoshop is a powerful feature designed for efficient background removal from images. It simplifies the process by automatically detecting and removing the background based on contrast and color differences. This tool offers a straightforward approach, where users can adjust settings like brush size and sampling options to refine the selection.
It's particularly useful for quickly isolating subjects from their backgrounds, making it a favorite among photographers and designers for its speed and effectiveness. With its intuitive controls and real-time feedback, the Background Erase Tool streamlines the workflow, ensuring precise results with minimal manual effort.
Step 1 - Open your photo in Photoshop. Right-click your background layer; now click "Duplicate Layer" to form a new layer. A dialogue box will open; you will name your layer (name it your personal choice) and click Ok. Lastly, turn off the layer by clicking on the eye icon to the left of the original layer.
Step 2 - On the left-hand side, the Background eraser tool is in the toolbox. If not visible, check below the Eraser Tool for it. Long press Eraser Tool and more options will be displayed along with Background Eraser Tool; select it. You can also press E to highlight the eraser submenu.
Step 3 - At the top of the screen, there is a Tool Options Bar. Go for the brush icon, select it, and the brush panel will open. Now change its hardness near to 100%. You are free to choose any size you think is acceptable for the photo you are working with—for example, 50 pixels. The brush size can be changed using square brackets ([and]).
Step 4 - Sampling adjustment is present in the first three icons in the tool options bar after brush size selection. Go to the top and adjust the sampling to be continuous. Then, set the tolerance between 20 and 25 per cent and adjust the Limits to Find Edges.
Be aware that tolerance is directly related to the detection of color differences. If you set a high tolerance value, it will select more colors. In contrast, low tolerance will detect fewer differences in color.
Step 5 - Glide the brush around your subject to remove the background using this tool. Keeping the crosshairs inside the tool would be best so they will not touch your object. If you want more precise details, zoom in on the photo.
Pros :
- Efficiency: The Background Erase Tool is efficient for quick background removal, saving time compared to manual methods.
- User-Friendly: It offers a straightforward interface with adjustable settings, making it accessible for both beginners and experienced users.
- Real-Time Preview: Users can see real-time previews of changes, allowing for immediate adjustments and ensuring accurate selections.
- Customizable Settings: Options like brush size, hardness, and sampling allow users to fine-tune selections, enhancing control over the process.
- Integration: Seamlessly integrates with other Photoshop tools and workflows, enhancing productivity in professional image editing.
Cons :
- Accuracy Challenges: It may need help with complex backgrounds or images with intricate details, requiring manual refinements.
- Edge Detection Issues: Occasionally, it might not accurately detect edges, leading to rough selections that need refining.
- Learning Curve: While user-friendly, mastering the tool's nuances and settings can require time and practice.
- Resource Intensive: Processing large or high-resolution images can be resource-intensive, impacting system performance.
- Limited to Photoshop: Requires a subscription to Adobe Photoshop, limiting access for users without the software.
Overall, the Background Erase Tool in Photoshop is a powerful asset for fast and effective background removal tasks, favored for its usability and integration with Adobe's comprehensive image editing suite. However, it's important to consider its limitations regarding accuracy with complex images and its dependency on Photoshop for access and functionality.
Using The Pen tool
Using the Pen tool in Photoshop provides precise control over background deletion, which is ideal for intricate selections and detailed editing needs. By outlining the desired area with anchor points and curves, users can create accurate paths around objects, ensuring clean and refined edges. This method is favored for its versatility in handling complex shapes and fine details, offering superior quality compared to automated tools.
However, mastering the Pen tool requires practice due to its manual nature and steep learning curve. Overall, it's a powerful tool for professional-level image editing, ensuring high-quality results when deleting backgrounds in Photoshop.
Step 1 - This step is the same as the previous one. Open your photo in Photoshop. Right-click your background layer; now click "Duplicate Layer" to form a new layer. A dialogue box will open; you will name your layer (name it your personal choice) and click Ok. Lastly, turn off the layer by clicking on the eye icon to the left of the original layer.
Step 2 - Click the Pen Tool from the toolbox on the left-hand side above the text tool. To start editing, zoom into an area of your photo. You can choose the starting area of your own choice, but it's better to start from the edges.
Step 3 - To begin the first anchor, click. After that, begin circling your subject while introducing new anchors to begin detailing it. If you need to create a curved line, click-hold-drag the desired shape, adjusting the curve as necessary.
Step 4 - In the toolbox, under the Path Selection tool, select Direct Selection Tool. You can use this to fix any anchor point or other directional lines for fine-tuning. Use a keyboard shortcut (command + Z for macOS, control + Z for windows) or go to File > Undo to reverse an anchor.
Step 5 - First, complete your path by meeting up with the first point. You will get the closed figure. If the result is according to your desire, you can save it. To save your path, go to Window> Paths on the right-hand side by default for the paths panel. Click New Path in the three-bar menu and give your path a suitable name. By following these steps, your path is saved.
Step 6: Go to the path panel and right-click for your new path. Click to Make Selection, then press OK in the dialogue box. Your path will be outlined as marching ants.
Step 7 - Now, you must select the background instead of objects to remove it. For that, go to Select> Inverse. Your Selection is inversed, and the background is selected, leaving the objects unselected.
Step 8 - Press Delete to remove the background from your photo. Your photo will now have a white/grey checkered background instead of your previous background. You can use any other method and pen tool to get 100% results.
Pros:
- Precision and Control: The Pen tool allows for precise selection and editing, making it ideal for intricate details and complex shapes.
- Smooth and Clean Edges: Compared to automated tools, the Pen tool produces smoother and cleaner edges around objects, resulting in professional-looking edits.
- Editable Paths: Paths created with the Pen tool are editable, allowing adjustments to be made easily without affecting the rest of the image.
- Versatility: It can be used for various editing tasks beyond background removal, such as creating shapes, selections, and outlines.
- Quality Output: Provides high-resolution results suitable for professional use, maintaining image quality and detail.
Cons:
- Steep Learning Curve: Mastering the Pen tool requires time and practice due to its complexity and manual operation.
- Time-Consuming: Compared to automated tools, using the Pen tool can be more time-consuming, especially for large or detailed images.
- Precision Required: It demands a steady hand and precision, making it challenging for beginners and those unfamiliar with vector graphics.
- Complexity for Beginners: Beginners may find it overwhelming due to the multiple functions and options available with the Pen tool.
- Not Suitable for All Images: There may be better choices for images with very soft or fuzzy edges, where automated tools perform better.
Using the Pen tool in Photoshop provides unparalleled control and precision in background removal tasks, albeit with a learning curve and time investment that may deter beginners or those with simpler editing needs.
Magnetic Lasso Tool:
The Magnetic Lasso Tool in Photoshop is a versatile option for erasing backgrounds with precision. By automatically snapping to edges of contrasting colors or tones, it enables quick and accurate selections. This tool is ideal for images with well-defined edges, allowing users to outline objects smoothly without manual tracing.
Its intuitive nature simplifies the selection process, making it accessible for users at varying skill levels. However, its effectiveness can be limited by complex backgrounds or areas needing more clear contrast, requiring more manual adjustments. Overall, the Magnetic Lasso Tool offers efficient background removal capabilities with a balance of automation and user control.
Step 1 - This step is the same as the previous one. Open your photo in Photoshop. Right-click your background layer; now click "Duplicate Layer" to form a new layer. A dialogue box will open; you will name your layer (name it your personal choice) and click Ok. Lastly, turn off the layer by clicking on the eye icon to the left of the original layer.
Step 2 - Go to the toolbox on the top left and choose the Magnetic lasso tool. Start outlining from the edges of your object with this tool. A path is formed as you hover the cursor around your object. Do it patiently to get the best results.
Step 3 - First, complete your path by meeting up with the first point. You will get the closed figure. Click to Make Selection to turn your path into marching ants.
Step 4 - Now, save your new path by clicking Save Selection in the Selection and name it.
Step 5 - You must select the background instead of objects to remove it. For that, go to Select> Inverse. Your Selection will be inversed, and the background will be selected, leaving the objects unselected. Press Delete to remove the background from your photo.
Pros:
- Automatic Edge Detection: The Magnetic Lasso Tool automatically snaps to edges based on color and contrast, speeding up the selection process.
- Ease of Use: It's relatively easy to learn and use, making it accessible for beginners and intermediate users.
- Quick Selections: Allows for quick selections of objects with defined edges, saving time compared to manual selection methods.
- Controlled Selections: Users can adjust the width of the magnetic edge and add or remove anchor points for more control over the selection.
- Integration with Photoshop: Seamlessly integrates with other Photoshop tools and functions, enhancing workflow efficiency.
Cons:
- Limited Effectiveness on Complex Backgrounds: Struggles with backgrounds that need clear contrast or have intricate details, requiring more manual adjustments.
- Accuracy Issues: Can occasionally produce inaccurate selections, especially on images with ambiguous or busy backgrounds.
- Time-Consuming Edits: This may require additional refining and corrections, especially for detailed or irregularly shaped objects.
- Learning Curve: While relatively intuitive, mastering precise selections may require practice and familiarity with the tool.
- Dependency on Image Quality: Performance can vary based on image quality and resolution, affecting overall selection accuracy.
In summary, the Magnetic Lasso Tool in Photoshop offers a blend of automation and user control, making it a valuable asset for quick and moderately complex background removal tasks. However, its effectiveness can be limited by challenging backgrounds and may require additional manual adjustments for optimal results.
Using the Magic Wand Tool
The Magic Wand Tool in Photoshop is a powerful feature designed for quick and efficient background removal from images. By simply clicking on the part of the background, it selects areas of similar color and tone, facilitating rapid isolation of background elements. This tool is particularly effective for images with uniform backgrounds or distinct color contrasts, allowing users to achieve speedy selections without extensive manual effort.
However, its performance can be hindered by complex backgrounds or areas with subtle color variations, requiring additional adjustments for precise selections. Overall, the Magic Wand Tool offers a convenient solution for basic background removal tasks in Photoshop, enhancing workflow efficiency and saving time in editing processes.
Step 1: Open Your Image: Launch Photoshop and open the image from which you want to remove the background.
Step 2: Select the Magic Wand Tool: In the Tools panel, select the Magic Wand Tool. You can also press W on your keyboard to quickly select it.
Step 3: Adjust Tool Settings: At the top of the screen, adjust the Magic Wand Tool settings. Set the Tolerance to a value that suits your image—higher values select more colors, while lower values select fewer.
Step 4: Click on the Background: Click on the background area you want to remove. The Magic Wand Tool will select pixels of similar color and tone.
Step 5: Refine Selection (if necessary): Hold down the Shift key and click additional areas to add to the selection. Alternatively, hold down the Alt key (Option key on Mac) to subtract areas from the selection.
Step 6: Delete or Mask: Once satisfied with your selection, press Delete to remove the selected background. Alternatively, use Layer > New > Layer via Copy to copy the selection onto a new layer with transparency.
Pros:
- Speedy Selections: The Magic Wand Tool allows for quick selections by clicking on areas of similar color, making it efficient for basic background removal tasks.
- Ease of Use: It's user-friendly and requires a minimal learning curve, making it accessible even for beginners in Photoshop.
- Automated Selections: It automates the selection process based on color and tone, which can save time compared to manual selection methods.
- Adjustment Options: Photoshop offers various adjustment settings for the Magic Wand Tool, such as tolerance and anti-aliasing, allowing for customization of selection accuracy.
- Integration with Workflow: It integrates well with other tools and functions in Photoshop, enhancing overall editing workflow efficiency.
Cons:
- Limited Precision: The Magic Wand Tool may need help with complex backgrounds or images with subtle color variations, resulting in inaccurate selections.
- Edge Fringing: It can create jagged edges or halos around selections, especially when dealing with high-contrast areas or intricate details.
- Manual Refinement Required: Even after initial selection, manual refinement is often necessary to achieve precise results, which can be time-consuming.
- Dependence on Image Quality: The tool's effectiveness heavily depends on the quality and clarity of the image being edited.
- Not Suitable for Fine Details: It may not be suitable for images requiring detailed selection around objects with intricate edges or transparent elements.
Using the Color Range Selection
Using the Color Range selection tool in Photoshop offers a precise method to remove backgrounds from images. By allowing users to select specific colors or tones within an image, it facilitates detailed and accurate masking of background areas. This tool is particularly useful for images with well-defined color contrasts between foreground and background elements.
It enables users to refine selections through adjustment of fuzziness and range settings, ensuring fine control over the editing process. Overall, the Color Range selection tool enhances workflow efficiency by providing a straightforward method to isolate and remove backgrounds. It is a preferred choice for tasks requiring meticulous selection and masking in Photoshop.
Step 1: Open Your Image in Photoshop: Start by opening the image you want to work on in Photoshop. Ensure it's a high-resolution image for better results.
Step 2: Access the Color Range Tool: Navigate to Select > Color Range from the top menu. This will open the Color Range dialog box, which is where you'll make your selections.
Step 3: Select the Background Color: Use the eyedropper tool within the Color Range dialogue box to click on the background color you want to remove. Adjust the fuzziness slider to include more or fewer shades of the selected color.
Step 4: Refine Your Selection: After selecting the initial range of colors, use the + eyedropper tool to add more shades of the background color to your selection. Use the - eyedropper tool to remove any unwanted selections.
Step 5: Output Your Selection: Once you're satisfied with your selection, you can output it to a new layer with Layer Mask or simply hit OK to apply the selection directly. You can refine the mask further using the refine edge tool if necessary.
Pros:
- Precision Selection: Allows for precise selection of specific colors or tones in an image, making it easier to isolate complex areas like hair or intricate patterns.
- Adjustable Parameters: Offers flexibility with adjustable sliders for fuzziness and range, providing control over the selection's sensitivity and accuracy.
- Quick Selection: Facilitates relatively quick selection and masking compared to manual methods, speeding up workflow for users.
- Non-Destructive Editing: Supports non-destructive editing practices by enabling selections to be refined or modified without permanently altering the original image.
- Integration with Photoshop Tools: Seamlessly integrates with other Photoshop tools and functions, enhancing versatility in image editing tasks.
Cons:
- Complexity in Settings: Adjusting parameters like fuzziness and range may require some learning and experimentation to achieve desired results effectively.
- Limited in Certain Scenarios: May struggle with images lacking distinct color contrast or with very subtle color variations, requiring additional refinement.
- Potential for Halos: Inaccurate selections or improper adjustment of settings can lead to visible halos or artifacts around the edges of selected areas.
- Time-Consuming for Detailed Work: Despite its efficiency, meticulous work on intricate details can still be time-consuming due to necessary adjustments and refinements.
- Skill and Experience Required: Achieving optimal results often depends on user skill and experience, necessitating practice to master its full potential.
Using The Channel Tool
Using the Channel Tool in Photoshop for background removal involves several precise steps. By converting an image into its color channels (Red, Green, Blue), you can identify the channel with the highest contrast between foreground and background. Selecting the appropriate channel, typically Blue or Green, then duplicating and enhancing it produces a selection that isolates the subject.
Once refined with adjustment layers, this selection enables efficient removal of the background. This method is particularly effective for images with distinct subject-background color differences.
Step 1: Open Image and Duplicate Layer: Start by opening your image in Photoshop. Duplicate the background layer to preserve the original.
Step 2: Convert to Channels: Go to the Channels panel (Window > Channels) and view the Red, Green, and Blue channels individually to identify the one with the most contrast between the subject and the background.
Step 3: Duplicate the Channel: Duplicate the channel that provides the best contrast by dragging it onto the "Create new channel" icon at the bottom of the panel.
Step 4: Enhance the Channel: Enhance the duplicated channel by adjusting levels (Image > Adjustments > Levels) or curves (Image > Adjustments > Curves) to make the subject stand out against the background.
Step 5: Create Selection: Ctrl-click (Cmd-click on Mac) on the duplicated channel thumbnail to load it as a selection. This selects the lighter areas (typically the subject) while leaving the darker areas (background) unselected.
Step 6: Refine and Output: Refine the selection using tools like the Refine Edge dialog (Select > Refine Edge) or layer masks. Finally, apply the selection to isolate the subject from the background.
Pros:
- Precision: The Channel Tool allows for precise selection based on color contrast, making it effective for complex images with detailed edges.
- Control Over Selections: It provides fine control over selections, especially in images where other tools like Magic Wand or Quick Selection Tool may not be effective.
- Non-Destructive Editing: Using channels for selections keeps the original image intact, allowing for non-destructive editing.
- Ability to Work with Low-Contrast Images: It can effectively handle images with low contrast between subject and background, which other selection tools may struggle with.
- Flexible Adjustments: Channels can be adjusted using Levels, Curves, or other adjustment layers to enhance contrast and improve selection quality.
Cons:
- Complexity: It requires understanding and familiarity with Photoshop's Channels panel and adjustments, which can be daunting for beginners.
- Time-Consuming: Compared to some automated tools, using Channels for selection can be time-consuming, especially for intricate selections.
- Manual Refinement Required: Even after selecting Channels, manual refinement using tools like masks or the Refine Edge feature is often necessary.
- Limited Use for Some Images: It may only work well for images where there is sufficient color contrast between the subject and background.
- Learning Curve: Mastering the Channel Tool for effective background removal requires practice and experimentation, adding to the learning curve.
Using The Layer Mask Tool
The Layer Mask Tool in Photoshop is a versatile feature for precise background removal. By creating a layer mask, you can selectively hide or reveal portions of an image without permanently deleting pixels. This non-destructive method allows for seamless adjustments and refinements during the editing process.
It's particularly useful for complex images with intricate edges, where other selection tools may not suffice. However, using layer masks requires a good understanding of Photoshop's masking techniques and may involve manual refinement for detailed results. Overall, it offers flexibility and control over edits, making it a preferred choice for professional-level background removal tasks.
Step 1: Open Your Image: Start by opening your image in Adobe Photoshop.
Step 2: Duplicate the Layer: Right-click on the background layer in the Layers panel and choose "Duplicate Layer." This step ensures that you work non-destructively.
Step 3: Add a Layer Mask: With the duplicated layer selected, click on the "Add Layer Mask" icon at the bottom of the Layers panel. This creates a white layer mask thumbnail next to your image.
Step 4: Paint on the Layer Mask: Select the Brush Tool (B) and set the foreground color to black. Black hides the parts of the layer, revealing the layers below. Use white to reveal parts as needed.
Step 5: Refine Edges: Use the Brush Tool with varying opacity and hardness settings to refine the edges around your subject. You can also use other selection tools like the Pen Tool or Quick Selection Tool to make initial selections before refining with the layer mask.
Step 6: Fine-tune and Adjust: Continue painting on the layer mask, switching between black and white to hide or reveal areas of the image until you achieve the desired background removal effect.
Step 7: Review and Save: Zoom in to check for any remaining background areas. Once satisfied, save your work in the desired file format.
Pros:
- Precision Control: The Layer Mask Tool offers precise control over which parts of the image are visible or hidden, allowing for detailed background removal without affecting the original image.
- Non-Destructive Editing: It enables non-destructive editing, as the original image remains untouched on a separate layer. This allows for easy adjustments and corrections without permanently altering the image.
- Edge Refinement: You can refine edges smoothly using brushes with varying opacity and hardness, ensuring that the subject blends seamlessly into a new background or composition.
- Layer Flexibility: Layer masks are versatile and can be combined with other adjustment layers and effects in Photoshop, offering creative flexibility in editing and enhancing images.
- Undo and Redo: Changes made with layer masks are reversible with simple brush strokes using black and white colors, providing flexibility in experimenting with different editing techniques.
Cons:
- Learning Curve: Mastering layer masks requires some learning and practice, especially for beginners unfamiliar with Photoshop's advanced editing tools.
- Time-Consuming: Achieving precise results with layer masks can be time-consuming, especially when working on complex backgrounds or intricate details.
- Requires Patience: It demands patience and attention to detail to achieve seamless background removal, as errors in masking can lead to unnatural edges or visible artifacts.
- Complexity with Hair and Fine Details: Removing backgrounds around intricate details like hair can be challenging with layer masks, requiring additional techniques and tools for better results.
- File Size Concerns: Working with multiple layers and masks can increase file size, especially for high-resolution images, which may impact performance and storage.
Using The Refine Edge
Refine Edge in Photoshop is a powerful tool for swiftly and accurately removing backgrounds from images. This tool enhances the selection process by refining edges, smoothing transitions, and preserving fine details like hair and fur.
It's ideal for isolating subjects from complex backgrounds with precision, offering intuitive controls for adjusting edge detection and transparency. By utilizing Refine Edge, users can achieve professional-grade results efficiently, making it indispensable for tasks requiring quick and high-quality background removal in Photoshop.
Step 1: Open Your Image: Launch Adobe Photoshop and open the image from which you want to remove the background.
Step 2: Select the Subject: Use any selection tool like the Quick Selection Tool or the Pen Tool to select the subject you want to keep.
Step 3: Access Refine Edge: With the subject selected, go to Select > Refine Edge from the top menu bar. Alternatively, you can right-click on the selection and choose Refine Edge.
Step 4: Adjust Edge Detection: In the Refine Edge dialog box, adjust the Edge Detection settings to refine the selection. Use tools like Smart Radius to automatically detect edges or Refine Radius Tool to refine edges manually.
Step 5: Smooth and Feather: Use the Smooth and Feather sliders to soften the selection edges for a more natural transition between the subject and the background.
Step 6: Output Options: Choose how you want to output the selection. Options include New Layer with Layer Mask, New Layer with Layer Mask and Decontaminate Colors, and more, depending on your editing needs.
Step 7: Apply Changes: Once satisfied with the selection and adjustments, click OK to apply the changes and remove the background while preserving the fine details of the subject.
Pros:
- Precision in Selection: Refine Edge allows for precise selection of complex edges such as hair, fur, and intricate details, resulting in cleaner cutouts.
- Edge Detection: The tool offers advanced edge detection algorithms that automatically detect and refine edges, saving time compared to manual selection.
- Fine Detail Preservation: It effectively preserves fine details and textures, making it suitable for high-resolution images and professional editing.
- Adjustable Settings: Users can adjust parameters like Smooth, Feather, Contrast, and Shift Edge within the Refine Edge dialogue to fine-tune selections according to specific needs.
- Output Options: It provides various output options, including creating a new layer with a layer mask, which allows for non-destructive editing and further adjustments.
Cons:
- Learning Curve: Mastering the Refine Edge tool requires practice to utilize its full potential, especially for beginners or those unfamiliar with advanced Photoshop features.
- Resource Intensive: Processing complex selections with Refine Edge can be resource-intensive, potentially slowing down older or less powerful computers.
- Requires Clean Edges: It performs best with images where the subject has clear, distinguishable edges. Images with blurry or ambiguous edges may require more manual adjustments.
- Not Always Perfect: While advanced, it may only sometimes produce perfect results, requiring manual touch-ups, especially in challenging scenarios like complex backgrounds or low-contrast edges.
- Limited Control in Some Cases: Despite its advanced features, users may find limited control over certain edge refinements, requiring additional tools or techniques for precise adjustments.
How To Remove Background From Picture With Erase.bg
Removing backgrounds from pictures is crucial for creating clean, professional images, and Erase.bg offers a streamlined solution for achieving this with ease. Whether you're a photographer, designer, or an avid social media user, Erase.bg simplifies the process with its advanced AI technology. By leveraging artificial intelligence, Erase.bg swiftly detects and removes backgrounds, leaving you with a transparent or replacement backdrop of your choice.
This tool excels in accuracy, handling intricate details like hair and fine textures seamlessly. With Erase.bg, there's no need for complex manual editing—simply upload your image, and within seconds, the background is removed, ready for use in various creative projects.
It's an invaluable tool for enhancing product photos, creating compelling marketing materials, or simply enhancing personal images effortlessly. Discover how Erase.bg can transform your editing workflow with its intuitive interface and powerful background removal capabilities.
Upload Your Image: Start by uploading the image you want to edit to the Erase.bg platform. You can do this easily by dragging and dropping the image file into the designated area or by selecting it from your computer.
Automatic Background Removal: Once the image is uploaded, Erase it.bg's AI technology will automatically detect and remove the background. This process is quick and efficient, leveraging advanced algorithms to isolate the main subject from its background accurately.
Download or Edit: After the background has been removed, you have the option to download the edited image with a transparent background directly from Erase.bg. Alternatively, you can further refine the image using Erase.bg's editing tools to adjust settings or add a new background.
Conclusion
Mastering the various methods to remove backgrounds in Photoshop offers unparalleled flexibility and precision for editing images. Whether using the Pen Tool for meticulous selections or leveraging AI-powered tools like the Object Selection Tool, Photoshop provides diverse options to cater to different editing needs and skill levels.
FAQ's
Which is the quickest method to remove the background?
The built-in Photoshop Quick Action is the fastest method to remove image backgrounds. Quick Action will do most of the job for you, removing the background, but the results will not meet your expectations. But you can use any other method described in the article to refine your photo to fulfil your expectations quickly.
Which tool provides you with the most control?
The most used tool for removing background from images is the pen tool. The pen tool is straightforward and gives you the most control.
How to use a brush in the Background eraser tool?
Always use short strokes and leave the cursor occasionally. This trick will let you undo undesired strokes more often without removing the essential strokes. You can accomplish this by returning to the top tools option bar or by using "[" and "]" to alter the size of the brush down and up.
Why is Magnetic Lasso Tool preferred?
Magnetic Lasso Tool would be the best option for the subject with complex edges and when it is highly contrasted from the background. It will also save you plenty of time.
Do you want to reverse an anchor?
If yes, go to the toolbox under the Path Selection tool and select Direct Selection Tool. You can use this to fix any anchor point or other directional lines for fine-tuning. Use a keyboard shortcut (command + Z for macOS, control + Z for windows) or go to File > Undo to reverse an anchor.3
What is the best tool to remove the background of an image in Photoshop?
The best tool to remove the background of an image in Photoshop is the Magic Wand tool, which allows you to select and delete a specific color or area of the image. You can also use the Lasso tool to manually select and delete the background, or the Pen tool to create a path around the object and then remove the background. It's important to use a combination of these tools and techniques to achieve the best results, depending on the complexity of the image and the level of detail required for the final result.
.webp)

.webp)

.webp)

.webp)
.webp)


