Do you need help finding the perfect way to remove the background from your photos using Pixelmator Pro? Whether you’re a professional photographer or a creative enthusiast, mastering this essential skill can elevate your images to a new level. Imagine seamlessly integrating your subjects into stunning new environments or achieving that flawless background blur for a professional touch. In this comprehensive guide by Erase.bg, we’ll walk you through the steps on how to remove the background in Pixelmator Pro effortlessly.
Pixelmator Pro is renowned for its robust editing tools, but understanding the best techniques for background removal can be a game-changer. We've covered you, from the basics of using the Pixelmator remove background tool to advanced tips for refining your selections. This tutorial will show you the easiest and most effective ways to remove background in Pixelmator Pro, ensuring that your images always look their best.
Join us as we dive into the intricacies of Pixelmator Pro and discover how Erase.bg can complement your photo editing workflow. Say goodbye to tedious background removal processes and hello to beautifully edited images with our expert guide. Let’s get started on transforming your visuals today!
What is Pixelmator Pro?
Pixelmator Pro is a powerful, user-friendly photo editing software designed for macOS. It offers a comprehensive suite of tools for editing and retouching photos, creating graphic designs, painting, and drawing vector graphics. Renowned for its intuitive interface, Pixelmator Pro combines professional-grade features with ease of use, making it accessible to beginners and experienced designers.
One of its standout features is the extensive library of nondestructive color adjustments, effects, and over 200 beautiful vector shapes. The software supports advanced functionalities like layers, smart selection, and machine learning enhancements for tasks such as background removal and object selection.
With seamless integration with macOS, including full support for M1 Ultra, Pixelmator Pro ensures smooth and efficient performance. Whether enhancing photos, designing graphics, or creating digital art, Pixelmator Pro provides all the tools you need in one versatile application.
How to Remove Background in Pixelmator Pro?
Pixelmator Pro is a powerful and versatile photo editing software for macOS, renowned for its professional-grade tools and user-friendly interface. While Pixelmator Pro offers various features for photo editing, sometimes you need an efficient solution specifically for background removal.
That's where Erase.bg comes in. Erase.bg is an advanced AI-driven tool designed to remove backgrounds from images quickly and accurately. Whether you're using Pixelmator Pro to refine your images or looking to streamline the process with Erase.bg, you can effortlessly remove backgrounds and enhance your visuals. With Erase.bg, you can save time and achieve professional-quality results, making it an essential companion for all your photo editing needs.
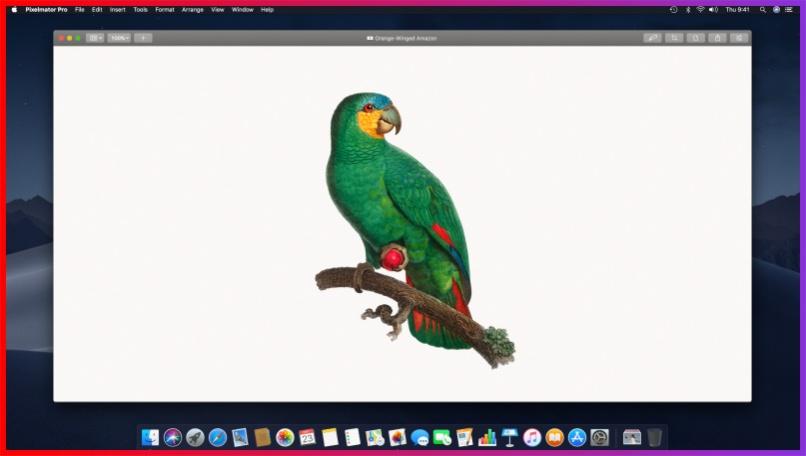
Step 1: Locate a background-containing image and remove it.
You'll require a background-removal picture if you don't already have one. The internet is abundant with photographs of items on backgrounds, most frequently white backgrounds, which the Smart Erase tool works best for. Open Pixelmator Pro and the picture.
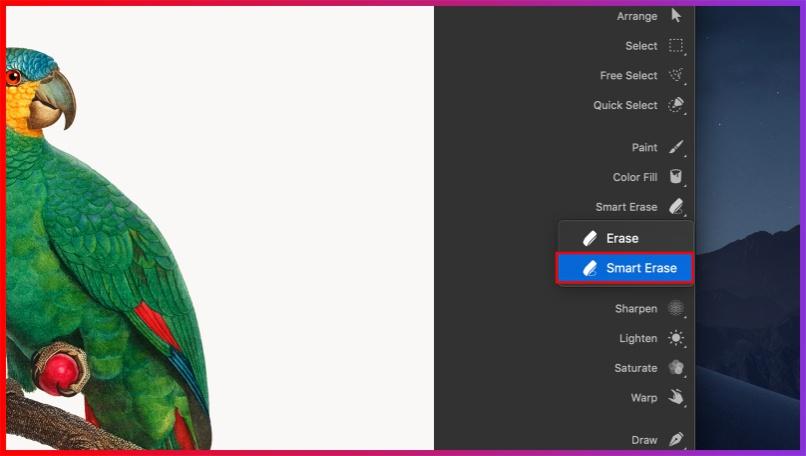
Step 2: Choose and alter the Smart Erase tool.
The Erase tool is paired with the Smart Erase tool. Use the Erase tool once to pick it, then use it once more to enlarge the group. The Smart Erase tool is also available in the Tools menu.
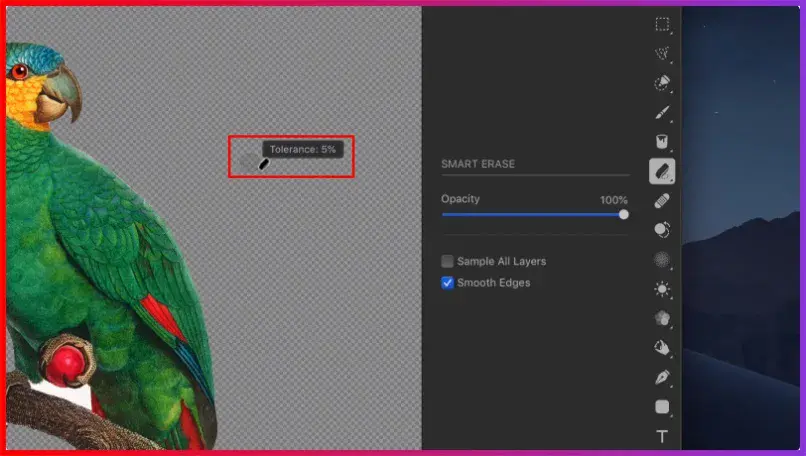
Opacity, Sample All Layers, and Smooth Edges are the three choices available with the Smart Erase tool. You can alter the tool's transparency using the Opacity slider. Put a value of 100% here. By selecting Sample All Layers, you can force the Smart Erase tool to consider each layer in your design.
It doesn't matter if the choice is on or off in this situation, so you'll probably leave it off. In other photographs, the item will mix in more organically if Smooth Edges is enabled, which smooths the edges of the removed portions. Keep this selected.
Options for Smart Erase
Opacity: Changes the Smart Erase tool's transparency. Portions are entirely removed at 100 per cent. Lower settings only partly transparentize certain sections.
Test Every Layer: When this selection is chosen, whereas only the chosen layer is erased, the Smart Erase tool considers each layer in your picture.
Smooth Edges: Elides the boundaries of regions that have been removed naturally. When this option is disabled, all of the edge pixels are entirely erased, giving the image a little more precise but jagged appearance.
Step 3: Remove the background
Move the cursor over the place you want to eliminate, then drag while holding down the mouse button. You can see how many similar colours the Smart Erase tool would remove on the Tolerance label. With the majority of colour backgrounds, you'll require to drag till the Tolerance is at or slightly above 20%.
The ideal place to check for remnants of the background colour is where the item meets the background. Everything is removed when tolerance is set to 100 per cent. Remember to delete any remnants of the background inside items using the same procedure after removing the main background.
Saving with transparency
Be careful to convert this picture to a format that allows transparency, such as PNG, TIFF, or PSD, if you wish to save it while maintaining the transparency of the background. If you're using the picture on the web, PNG is probably the best and most widely used alternative.
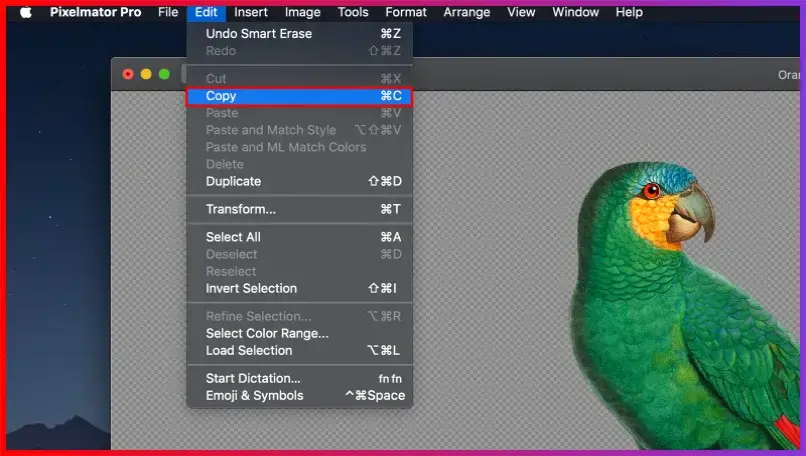
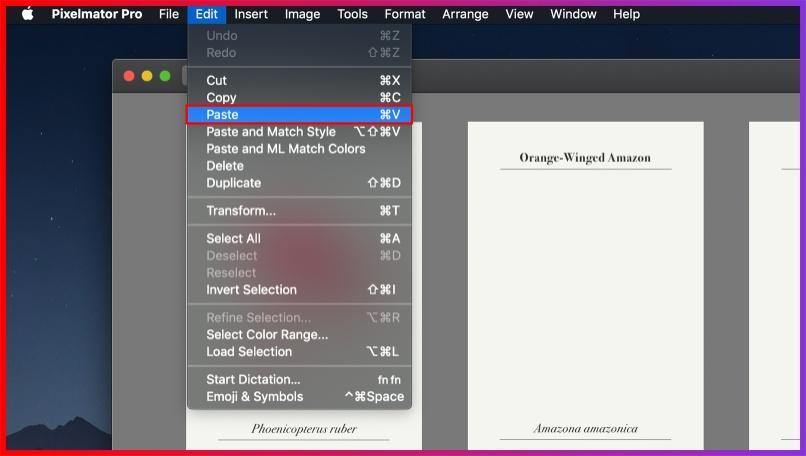
Step 4: Use the object in a different picture.
The item could now be combined with another picture. Just select Edit > Copy.
Open your other picture after that and select Edit > Paste.
And that's how you easily eliminate a background with a solid colour from a photograph.
Try out these methods, and don't hesitate to ask any questions!
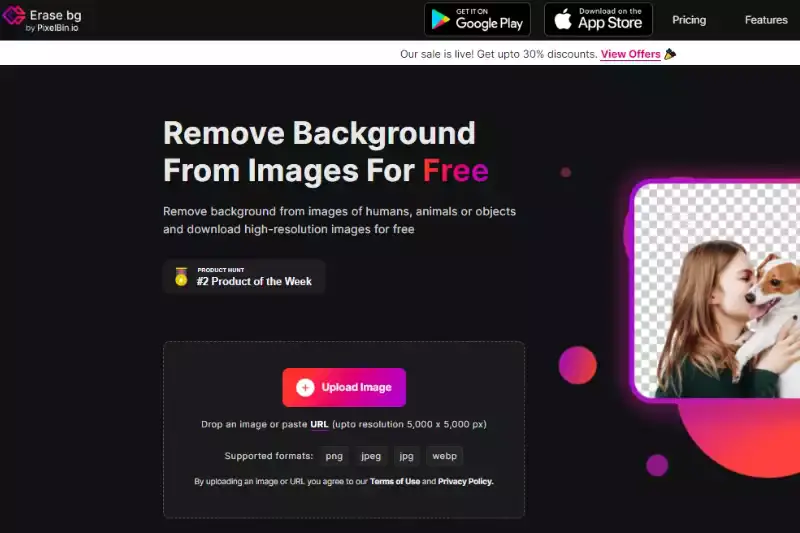
How you can use Erase.bg to remove Background in one click.
Erase.bg is software that erases background from photographs with extreme accuracy in moments. It allows people to change the background of photos, edit them, and save them in various formats.
Using these simple procedures, you could easily remove the background from your JPEG picture using Erase.bg via the web page or by purchasing the Erase.bg App, which could be obtained from the App Store (for iOS users) or the Google Play Store (for Android users) (for Android users).
Step 1: You could select the "Upload Picture" dialogue box or directly drag and drop the photo onto the webpage.
Step 2: "Uploading picture, kindly wait" would display on the computer, and in all that period, Erase.bg's AI would work its magic to erase the background from the JPEG picture of your selection.
Step 3: In the top right-hand side of the background Removed iffy, you'll find an Edit button if you wish to erase anything or tweak the picture.
Step 4: Download the photos of your choice and type your desired location.
Benefits of Removing Background of Images
In today's digital age, removing backgrounds from images has become essential for various purposes, from e-commerce to graphic design. By seamlessly eliminating unwanted elements, you can enhance your images' visual appeal and versatility. Here are five key benefits:
Enhanced Product Presentation: Removing backgrounds allows products to stand out, providing a clean, professional appearance that attracts customers.
Versatility in Design: With transparent backgrounds, images can be easily integrated into various designs, from website banners to marketing materials, offering flexibility and creativity.
Improved Focus on Subject: By eliminating distractions, background removal directs viewers' attention solely to the subject, conveying the intended message effectively.
Consistent Branding: Uniform backgrounds across product images ensure brand consistency, reinforcing brand identity and professionalism.
Streamlined Editing Process: Background removal tools automate the process, saving time and effort while maintaining precision and quality in image editing.
10 Best Alternatives of Pixelmator Pro
Introducing the 10 best alternatives to Pixelmator Pro for background removal. These web-based tools offer efficient and accurate solutions for eliminating backgrounds from images. Leading the pack is Erase.bg, an advanced AI-powered tool renowned for its precision and ease of use.
Erase.bg
Erase.bg stands out as a premier background removal tool, leveraging cutting-edge AI technology to swiftly and accurately erase backgrounds from images. Its intuitive interface and remarkable precision make it a favorite among professionals and amateurs alike. Whether you're editing product photos for an online store or refining portraits for a social media profile, Erase.bg delivers impressive results with minimal effort.
With Erase.bg, users can effortlessly create transparent backgrounds, allowing for seamless integration into various design projects. Its robust features and user-friendly design make it an indispensable tool for anyone seeking high-quality background removal.
Remove.bg
Remove.bg is a cutting-edge background removal tool powered by advanced AI technology. With its intuitive interface and lightning-fast processing, Remove.bg enables users to effortlessly remove backgrounds from images with precision and accuracy.
Whether you're editing product photos, creating marketing materials, or enhancing personal images, Remove.bg offers a hassle-free solution for achieving clean and polished results in seconds.
Its robust features, including automatic background removal and fine-tuning options, make it a go-to choice for professionals and amateurs alike. With Remove.bg, you can easily create transparent backgrounds and seamlessly integrate subjects into various design projects with ease.
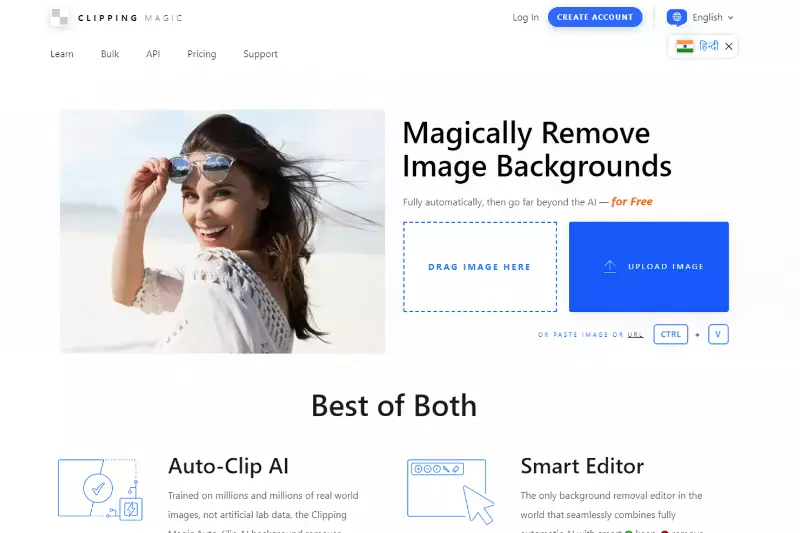
Clipping Magic
Clipping Magic is a powerful online tool designed for precise background removal from images. Its intuitive interface and advanced algorithms make it easy to isolate subjects and objects from their backgrounds with precision and accuracy.
With features like automatic subject detection and fine-tuning controls, Clipping Magic streamlines the editing process, allowing users to achieve professional-looking results in minutes.
Whether you're editing product photos, creating graphics for marketing materials, or retouching personal images, Clipping Magic offers a seamless solution for removing backgrounds and creating transparent images. Trusted by professionals and amateurs alike, Clipping Magic is a versatile tool for anyone looking to enhance their photos and design projects with clean and polished results.
Slazzer
Slazzer is a cutting-edge online tool for background removal that harnesses the power of artificial intelligence to deliver fast and accurate results. Its user-friendly interface and automated processing make it simple for users to remove backgrounds from images with precision and ease.
Slazzer's advanced algorithms analyze images to detect subjects and seamlessly remove backgrounds, saving users valuable time and effort. Whether you're editing product photos, creating marketing materials, or enhancing personal images, Slazzer provides a hassle-free solution for achieving transparent backgrounds and polished results.
With its cloud-based platform, Slazzer offers accessibility across devices, allowing users to edit images anytime, anywhere. Trusted by professionals and enthusiasts alike, Slazzer is a go-to tool for anyone looking to elevate their visual content with clean and professional-looking images.
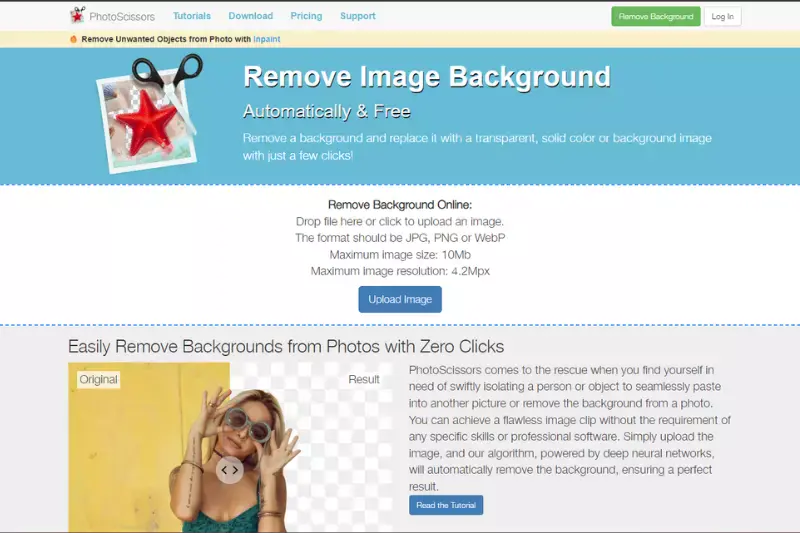
PhotoScissors
PhotoScissors is a user-friendly background removal tool that offers intuitive controls and powerful features for editing images. With its simple interface and robust functionality, PhotoScissors makes it easy to remove backgrounds from photos with precision and ease. Whether you're editing portraits, product images, or landscapes, PhotoScissors provides the tools you need to achieve professional-quality results.
From automatic background removal to manual editing options, PhotoScissors offers a range of features to suit your specific editing needs. With its intuitive workflow and responsive performance, PhotoScissors is a valuable asset for anyone seeking to enhance their images with clean and polished backgrounds.
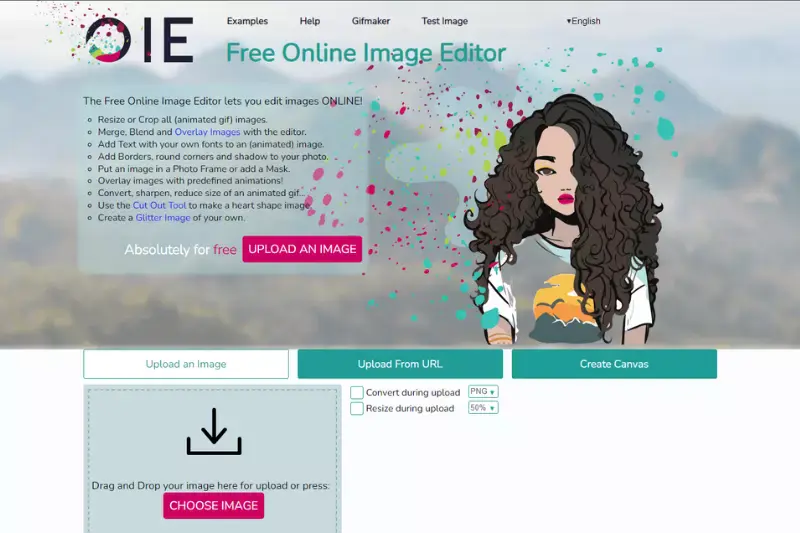
Online Image Editor
Online Image Editor is a versatile web-based tool that offers a wide range of editing features, including background removal. With its intuitive interface and comprehensive functionality, Online Image Editor makes it easy to edit photos, create graphics, and enhance images online. Whether you're a professional designer or an amateur photographer, Online Image Editor provides the tools you need to achieve stunning results.
From basic editing tasks to advanced image manipulation, Online Image Editor offers a range of options to suit your specific needs. With its user-friendly design and responsive performance, Online Image Editor is a valuable resource for anyone looking to enhance their images with professional-quality results.
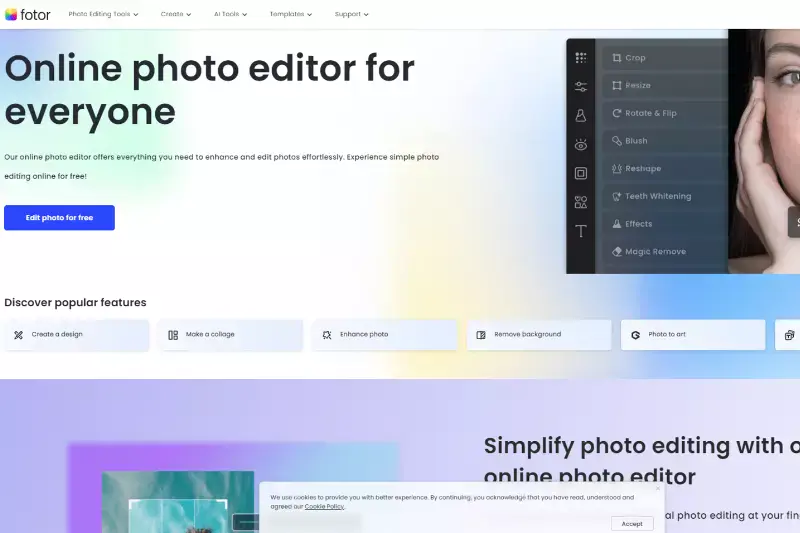
Fotor
Fotor is a comprehensive photo editing tool that offers a range of features, including background removal. With its intuitive interface and powerful editing tools, Fotor makes it easy to edit photos, create collages, and enhance images with professional-quality results. Whether you're a professional photographer or an amateur enthusiast, Fotor provides the tools you need to achieve stunning results.
From basic editing tasks to advanced image manipulation, Fotor offers a range of options to suit your specific needs. With its user-friendly design and responsive performance, Fotor is a valuable asset for anyone looking to enhance their images with clean and polished backgrounds.
Canva
Canva is a popular online design platform that offers a range of tools for creating graphics, presentations, and marketing materials. With its intuitive interface and extensive library of templates, Canva makes it easy to design professional-quality content for any purpose. Whether you're a designer, marketer, or business owner, Canva provides the tools you need to bring your creative vision to life.
From customizable backgrounds to advanced editing features, Canva offers a range of options to suit your specific needs. With its user-friendly design and collaborative functionality, Canva is a valuable resource for anyone looking to create visually stunning content with ease.
PicMonkey
PicMonkey is a versatile online photo editing and design platform that offers a wide range of tools and features, including background removal capabilities. With its intuitive interface and extensive library of effects, overlays, and textures, PicMonkey empowers users to create stunning visuals with ease. Whether you're editing portraits, designing social media graphics, or crafting marketing materials, PicMonkey provides flexible options for removing backgrounds and enhancing images.
Its user-friendly editing tools and customizable templates make it simple for users of all skill levels to achieve professional-looking results. With PicMonkey, you can effortlessly remove backgrounds, add new backgrounds, and fine-tune your images to perfection, helping you bring your creative vision to life.
BeFunky
BeFunky is an all-in-one online graphic design and photo editing tool that offers a variety of features, including background removal functionality. With its intuitive interface and comprehensive editing options, BeFunky enables users to easily remove backgrounds from images and create professional-quality designs.
Whether you're editing photos for personal use or designing marketing materials for your business, BeFunky provides powerful yet accessible tools for achieving polished results.
With features like automatic background removal, customizable brushes, and advanced editing options, BeFunky offers flexibility and versatility for all your creative projects. Trusted by millions of users worldwide, BeFunky is a go-to choice for anyone looking to enhance their images and unleash their creativity.
Why Choose Erase.bg to Remove Background of Images?
Erase.bg stands out as a top choice for background removal due to its unparalleled combination of precision, speed, and convenience. Here's why Erase.bg is the ultimate solution for effortlessly removing backgrounds from images:
Accuracy: Erase.bg utilizes advanced AI technology to ensure precise and detailed background removal, delivering clean and professional-looking results every time.
Speed: With its lightning-fast processing, Erase.bg allows users to remove backgrounds from images in seconds, saving valuable time and streamlining the editing process.
Ease of Use: Erase.bg features a user-friendly interface that makes background removal simple and intuitive, requiring no prior editing experience. Just upload your image, and let Erase.bg do the rest.
Versatility: Whether you're editing product photos, creating graphics for social media, or retouching personal images, Erase.bg offers versatility for a wide range of applications.
Accessibility: Erase.bg is available online, making it accessible from any device with an internet connection. Plus, it offers seamless integration with other tools and platforms, enhancing workflow efficiency.
Overall, Erase.bg is the ultimate choice for anyone seeking a fast, accurate, and user-friendly solution for background removal, empowering users to unleash their creativity and achieve stunning results with ease.
Conclusion
Erase.bg emerges as the premier solution for background removal, offering unparalleled precision, speed, and ease of use. With its advanced AI technology and user-friendly interface, Erase.bg empowers users to effortlessly create professional-quality images in seconds, revolutionizing the editing process for individuals and businesses alike.
FAQ's
How do I get a white background in Pixelmator Pro?
Open Pixelmator Pro and the picture.
Step 1. Pick out and alter the Smart Erase tool.
Step 2. Opacity, Sample All Layers, and Smooth Edges are the three choices available with the Smart Erase tool
Step 3. Choices for Smart Erase.
Step 4. Click your other picture after that and select Edit > Paste.
Step 5. And that's how you easily eliminate a background with a solid colour from a photograph.
How do you remove the background of a picture Pixelmator Pro?
Step 1:Locate a background-containing image and remove it.
Step 2: Choose and alter the Smart Erase tool.
Step 3: Remove the background
Step 4: Use the object in a different picture.
Is white background photo necessary for Pixelmator Pro?
Pictures of diverse items that you get from the internet frequently have a solid white background. Erase the background if you wish to merge these items with other photos. Fortunately, the Smart Erase tool in Pixelmator Pro is the perfect tool for the job.
How many images do I need for the Pixelmator Pro listing?
To select a picture and drag it into Procreate, click on the picture. Select other images to add them to the stack after selecting one so you may drag them all in at once.
What is Pixelmator Pro?
Pixelmator Pro is a powerful image editing software for macOS that allows users to edit and enhance images using a wide range of tools and features.
Can Pixelmator Pro be used to remove the background from an image?
Yes, Pixelmator Pro has a variety of tools and features that can be used to remove the background from an image. These include the Quick Selection Tool, the Magic Eraser Tool, and the Brush Tool.


.webp)
.webp)


