In today's visually-driven world, mastering the art of image editing is no longer just a skill but a necessity. Whether you're a professional graphic designer or a casual enthusiast, knowing how to remove background in Illustrator can significantly elevate your creative prowess. With the ever-expanding toolkit of Adobe Illustrator at your disposal, the possibilities are limitless.
Unlocking the secrets of removing background in Illustrator opens up a world of possibilities for your designs. From creating captivating logos to crafting intricate illustrations, seamlessly erasing backgrounds empowers you to bring your imagination to life. This comprehensive guide delve into the intricacies of removing backgrounds in Adobe Illustrator, exploring both the Pen Tool and Image Trace methods step by step.
But why stop there? We'll also shed light on the alternative approaches and introduce you to the wonders of online automatic background removal tools like Fotor, offering a simplified solution for those seeking efficiency without compromising quality. So, whether you're a seasoned Illustrator fan or a novice eager to dive into the world of graphic design, join us as we unravel the secrets of removing backgrounds in Illustrator and unleash your creative potential.
What is Illustrator?
Illustrator is a powerful vector graphics editor developed by Adobe Inc. It's widely used by graphic designers, artists, and illustrators to create scalable artwork for various purposes. Unlike raster-based image editors like Photoshop, Illustrator uses mathematical equations to generate shapes, lines, and curves, allowing designs to be scaled infinitely without losing quality. This makes it ideal for creating logos, icons, typography, and complex illustrations that require precision and clarity.
Illustrator offers many tools and features, including the Pen Tool for creating precise paths, the Shape Builder Tool for combining shapes, and the Image Trace Tool for converting raster images into editable vector graphics. With its intuitive interface and robust capabilities, Illustrator remains a go-to software for professionals and amateurs alike in graphic design and digital art.
What is The Difference Between Background Removal in Illustrator And Photoshop?
Removing backgrounds in Illustrator and Photoshop involves different tools and techniques, reflecting the distinct nature of these software programs.
Illustrator:
1.Vector-based: Illustrator primarily deals with vector graphics, allowing for precise and scalable designs.
2. Pen Tool: The Pen Tool is often used to create complex paths around objects for background removal.
3.Clipping Masks: Objects can be masked to hide or reveal parts of an image, including background removal.
Photoshop:
1. Raster-based: Photoshop is designed for raster graphics, making it suitable for detailed image editing and manipulation.
2.Selection Tools: Photoshop offers a variety of selection tools like the Magic Wand and Quick Selection Tool for isolating and removing backgrounds.
3. Layer Masks: Layer masks allow for non-destructive editing, making it easier to refine selections and adjust background removal.
Overall, Illustrator is best for simple shapes and illustrations, while Photoshop excels in detailed photo editing and manipulation.
How to Remove Background in Illustrator?
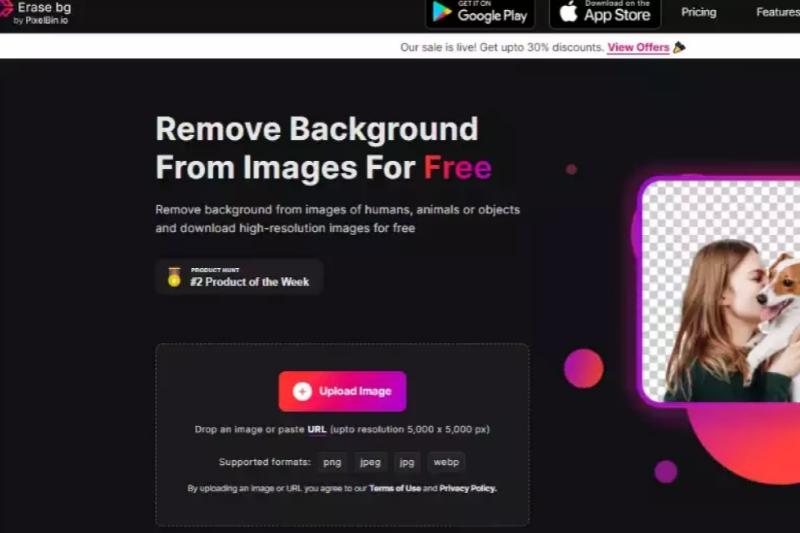
Do you need help with removing backgrounds in Illustrator? Look no further! With the innovative tool Erase.bg, removing backgrounds from your images becomes a breeze. Whether you're a seasoned graphic designer or just starting, Erase.bg simplifies removing backgrounds in Adobe Illustrator. Say goodbye to tedious manual editing and hello to seamless background removal.
With Erase.bg, you can effortlessly achieve professional-looking results in no time. So, if you're wondering how to remove background in Illustrator, Erase.bg is the solution you've been searching for. Experience the convenience and efficiency of easily removing backgrounds from images, and take your designs to the next level with Erase.bg.
Step 1 - Click on the dialogue box that reads "Upload Image," or drag and drop the image on the page.
Step 2 - A message will appear on the screen that says, "Uploading image, please wait…" and during this time, Erase. bg's AI will perform its wonders to remove the background from the image of your choice.
Step 3 - If you want to remove something or edit the image, you will see an Edit option on the top right corner of the Background Removed image.
Step 4 - Download the image in your chosen format to your preferred destination.
Benefits of illustrator
Adobe Illustrator is a versatile graphic design software renowned for its powerful tools and capabilities. With its intuitive interface and extensive features, Illustrator empowers designers to bring their creative visions to life easily.
Benefits:
Precision Editing: Illustrator offers precise control over vector graphics, allowing users to manipulate shapes, lines, and colors with accuracy.
Versatility: Illustrator supports various design projects from logos and illustrations to typography and web graphics.
Seamless Integration: Illustrator seamlessly integrates with other Adobe applications like Photoshop and InDesign as part of the Adobe Creative Cloud.
Scalability: Vector graphics created in Illustrator can be scaled to any size without losing quality, making them ideal for both print and digital media.
Time Efficiency: With features like the Background Remover tool, Illustrator streamlines workflows and speeds up the design process, saving valuable time for designers.
Best Methods Of Removing background With Illustrator
When removing backgrounds in Illustrator, having the right tools at your disposal can make all the difference. These tools offer various methods for seamless background removal, catering to different design needs and preferences. Whether you're a graphic designer, illustrator, or photographer, finding the best method for removing backgrounds can significantly enhance your workflow and productivity.
Erase.bg
Erase.bg is an advanced AI-powered tool designed for effortless background removal from images. With its intuitive interface and cutting-edge technology, Erase.bg simplifies removing backgrounds, allowing users to achieve professional-quality results in just seconds. By leveraging artificial intelligence, Erase.bg accurately detects and separates the foreground subject from the background, eliminating the need for manual editing or complex selection tools.
Whether you're a graphic designer, photographer, or social media enthusiast, Erase.bg offers a fast and efficient solution for creating stunning visuals with transparent backgrounds, saving you time and effort in your creative projects.
Adobe Illustrator Background Remover
Adobe Illustrator's Background Remover feature provides users with powerful tools to eliminate backgrounds from images seamlessly. Leveraging the application's robust capabilities, users can easily employ methods like the Pen Tool, Image Trace, and Magic Wand to achieve precise background removal. By utilizing vector-based techniques, Illustrator ensures high-quality results while maintaining image integrity.
Whether removing backgrounds for logo design, illustration, or photography projects, Adobe Illustrator offers versatile solutions tailored to various needs. With its user-friendly interface and comprehensive editing options, the Background Remover feature empowers users to unleash their creativity and produce professional-grade visuals effortlessly.
Open Adobe Illustrator and import your image.
Use the Pen Tool to trace the areas you want to keep.
Create a clipping mask to hide the background.
Export the image with the background removed.
Background Eraser Tool in Photoshop
The Background Eraser Tool in Photoshop is a powerful feature designed to remove backgrounds from images effectively. With its intuitive interface and precise controls, users can quickly isolate subjects from their backgrounds accurately and efficiently. By adjusting the tool's brush size, hardness, and tolerance settings, users can tailor their selections to match the complexity of the image.
The Background Eraser Tool employs a combination of sampling and tolerance settings to intelligently remove similar colors while preserving the integrity of the subject. This allows for seamless extraction of subjects from busy or intricate backgrounds, making it an invaluable tool for photographers, designers, and digital artists.
Open your image in Photoshop.
Select the Background Eraser Tool from the toolbar.
Adjust the brush settings and brush over the background to erase it.
Fine-tune any areas as needed.
Save the image with the background removed.
Magic Wand Tool in Illustrator
In Illustrator, the Magic Wand Tool is a versatile feature that selects areas of similar color or appearance within vector graphics. With just a click, users can quickly isolate specific regions of an image based on color, stroke, or fill attributes. This tool helps select and manipulate individual elements or sections of complex illustrations, logos, or designs.
By adjusting the Magic Wand Tool's tolerance setting, users can control the range of colors or attributes in the selection, allowing for precise adjustments and edits. Whether refining details or making broad changes, the Magic Wand Tool streamlines the editing process, enhancing efficiency and workflow in Adobe Illustrator.
Open Illustrator and import your image.
Select the Magic Wand Tool from the toolbar.
Click on the background area you want to remove.
Adjust the tolerance level to refine the selection.
Press Delete to remove the selected background.
Pen Tool in Illustrator
The Pen Tool in Illustrator is fundamental for creating precise and custom vector paths and shapes. It allows users to draw lines and curves by placing anchor points and manipulating direction handles to control the path's shape. With its versatility and precision, the Pen Tool is essential for creating complex shapes, tracing artwork, and outlining objects with smooth, crisp lines.
By mastering the Pen Tool, users can achieve intricate designs and illustrations with complete control over every detail. Despite its initial learning curve, the Pen Tool empowers users to unleash their creativity and produce professional-quality artwork in Adobe Illustrator.
Import your image into Illustrator.
Use the Pen Tool to draw a path around the areas you want to keep.
Close the path to create a selection.
Right-click and choose Make Clipping Mask to remove the background.
Clipping Path Technique
The clipping path technique is used in graphic design and image editing to isolate specific parts of an image from the background. It involves creating a path or outline around the desired object using tools like the Pen Tool or the Magic Wand Tool. Once the path is defined, the area outside it can be removed or hidden, effectively "clipping" the object from its surroundings.
This technique is used in product photography, e-commerce, and digital marketing to create clean, professional-looking images with transparent or customized backgrounds. By employing clipping paths, designers can enhance the visual appeal of images, improve focus on the subject, and seamlessly integrate them into various design projects.
Open your image in Illustrator.
Use the Pen Tool to draw a path around the subject.
Close the path to create a clipping path.
The area outside the path will be removed when saved in a compatible format.
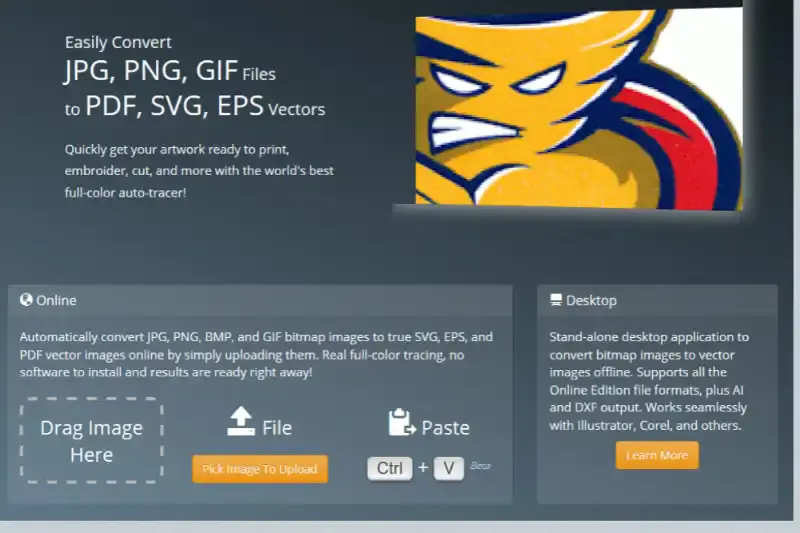
Image Trace Tool in Illustrator
The Image Trace tool in Illustrator is a powerful feature that allows users to convert raster images into editable vector graphics. It analyzes the colors and shapes in an image and creates paths, fills, and anchor points based on those elements. This tool is handy for transforming scanned drawings, photographs, or other bitmap images into scalable vector artwork.
Users can choose from various presets and options to customize the tracing process according to their preferences and the complexity of the image. With the Image Trace tool, designers can achieve clean and precise vectorizations while retaining the essence of the original artwork. It's a versatile tool that opens creative possibilities for illustrators, designers, and artists.
Import your image into Illustrator.
Go to Object > Image Trace and select a preset.
Adjust settings if necessary and click Trace.
Expand the image trace and delete unwanted areas using the Direct Selection Tool.
Select and Mask Features in Photoshop
Photoshop's "Select and Mask" feature is a powerful tool for refining selections and masks with precision and control. It allows users to isolate objects from their backgrounds or make complex selections easily. With this feature, you can fine-tune selections using advanced edge detection algorithms, refine edges, adjust edge properties such as smoothness, feathering, and contrast, and even create detailed masks for intricate subjects like hair or fur.
The "Select and Mask" workspace provides various viewing options, including overlay modes and transparency settings, to help you visualize and perfect your selections. Whether you're compositing images, extracting subjects, or performing detailed retouching, the "Select and Mask" feature empowers you to achieve professional-level results with precision and efficiency in Photoshop.
Open your image in Photoshop.
Use selection tools like Quick Selection or Magic Wand to select the subject.
Go to Select > Select and Mask.
Refine the selection using tools like Refine Edge Brush and Output to make the background transparent.
Quick Selection Tool in Photoshop
The Quick Selection Tool in Photoshop is versatile for making selections based on color and texture similarity. It lets users quickly and easily select objects or areas within an image by clicking and dragging over the desired region. The tool automatically detects and selects pixels similar in color and tone to the area you're clicking on, making it ideal for selecting objects with well-defined edges or distinct contrasts.
With its intuitive interface and responsive performance, the Quick Selection Tool is a go-to option for various tasks, including image editing, retouching, and compositing. It offers options for adjusting brush size, hardness, and tolerance to fine-tune selections and ensure accuracy. Users can also refine selections using tools like the Refine Edge Brush or Feather options to achieve seamless blending and transitions between selected and unselected areas.
Open your image in Photoshop.
Select the Quick Selection Tool from the toolbar.
Click and drag over the subject to select it.
Refine the selection using the Add to Selection or Subtract from Selection options.
Once the subject is selected, go to Select > Inverse and press Delete to remove the background.
Vector Magic Plugin for Illustrator
The Vector Magic plugin for Illustrator is a powerful tool designed to streamline the process of converting bitmap images into vector graphics directly within Adobe Illustrator. This plugin offers seamless integration with Illustrator, allowing users to access its advanced vectorization capabilities without leaving the familiar environment of their favorite design software.
With the Vector Magic plugin, users can effortlessly convert raster images, such as JPEGs, PNGs, or GIFs, into scalable vector formats, including AI, SVG, and PDF. The plugin employs sophisticated algorithms to analyze the bitmap image and automatically trace it, producing smooth, clean vector paths that accurately represent the original image.
Install the Vector Magic plugin in Illustrator.
Open your image in Illustrator.
Use the plugin to convert the image to a vector format.
Adjust settings to remove the background as needed.
Save the vectorized image with the background removed.
Why Choose Erase.bg ?
Choosing Erase.bg offers numerous advantages for users seeking a reliable and efficient solution for background removal. Here are some compelling reasons to opt for Erase.bg:
Accuracy: Erase.bg leverages advanced AI technology to ensure precise and accurate background removal, resulting in clean and professional-looking images.
Speed: With Erase.bg's fast processing capabilities, users can remove backgrounds from images within seconds, saving valuable time and effort.
Ease of Use: The intuitive interface of Erase.bg makes it accessible to users of all skill levels, eliminating the need for complex manual editing techniques.
Versatility: Whether you're editing product photos, portraits, or other types of images, Erase.bg supports a wide range of file formats and image types.
Consistency: Erase.bg delivers consistent results across different images, maintaining quality and clarity throughout the background removal process.
Cost-Effective: Erase.bg offers affordable pricing plans, making it an economical choice for individuals and businesses alike.
Accessibility: As a web-based tool, Erase.bg can be accessed from any device with an internet connection, providing flexibility and convenience for users on the go.
In summary, Erase.bg stands out as a reliable, efficient, and user-friendly solution for background removal, offering unmatched accuracy, speed, and versatility for a wide range of editing needs.
Conclusion
Erase.bg emerges as the ideal choice for users seeking a fast, accurate, and user-friendly solution for background removal. With its advanced AI technology, intuitive interface, and affordability, Erase.bg ensures professional-quality results with minimal effort, making it the go-to tool for all image editing needs.
FAQ's
How to erase specific colours in Illustrator?
In order to remove some specific colours in Illustrator, here’s what you need to do:
Step 1: Launch Illustrator and open your File.
Step 2: Select the object that has colours that you wish to erase and then click on the Select menu.
Step 3: In the Select menu, pick the Same and then Fill Color.
Step 4: Now, click on the Window menu and select Color again. A window will pop-up showing the colour you picked.
Step 5: Select None and the Illustrator will erase the colours you picked.
How do I make a white background transparent in Illustrator?
In order to make a white background transparent in Illustrator, here is what you must follow:
Step 1: Launch Adobe Illustrator and press be Illustrator. On your keyboard, press Ctrl + Shift + D on Windows or Cmd + Shift + D on Mac.
Step 2: Pick the image on the artboard using the Selection Tool. You can also do this by pressing V.
Step 3: Now, click on Window and a dropdown menu will show up. From that dropdown menu, select Image Trace.
Step 4: In the Image Trace Menu, switch the Mode from Black and White to Colored.
Step 5: The next step is to open Advanced Settings by hitting the triangle next to it and then head to Options and tick Ignore White.
Step 6: Now, click on Trace and you are good to go!
How to cut part of an Image in Adobe Illustrator?
There are a lot of ways to cut part of an image in Adobe Illustrator. One of them is explained below:
Step 1: Go to Adobe Illustrator and click on the image. When you do so, you will see a Crop Image option in the Properties Panel.
Step 2: Select the Crop Image option and you will spot a crop frame around your image. You can move it and reposition it as per your liking.
Step 3: Click on Apply and you are all set!
PS: In case you do not want any background on the image, you can use the Pen Tool to cut that part out.
How do you remove the background of a drawing?
The easiest way to remove the background of a drawing is by using a background removal tool like Erase.bg. Simply upload the drawing to the website and let the tool do the work for you.
Does Illustrator offer a way to refine edges when removing a background?
Yes, Illustrator's Refine Edge feature can be used to refine the selection and edges of an image when removing the background.
Can I use Illustrator to remove the background from complex images?
Yes, but it requires more advanced techniques such as creating a clipping mask or using the Object > Clipping Mask > Make option.


.webp)
.webp)

.webp)
.webp)
.webp)
.webp)
.webp)

.webp)
.webp)


