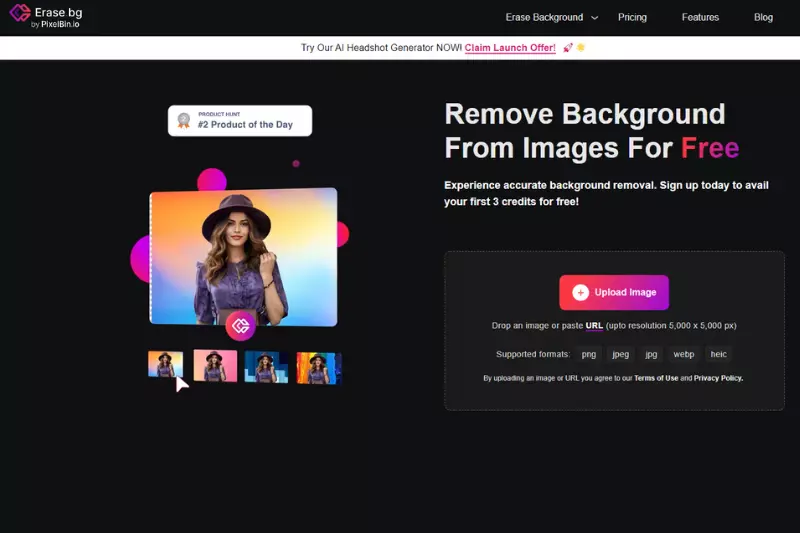
In a world where visual storytelling reigns supreme, seamlessly removing backgrounds from images has become a prized skill for creators across industries. Enter Erase.bg – the game-changing solution that bridges the gap between simplicity and sophistication in image editing.
Thanks to this intuitive tool, aspiring photographers, seasoned marketers, and everyone can now easily elevate their visuals. Erase.bg empowers users to effortlessly remove backgrounds from images, providing a gateway to endless creative possibilities.
Whether you're a Photoshop novice or a seasoned pro, this tool seamlessly integrates with the platform, offering a streamlined editing experience without compromising quality. With just a few clicks, you can transform ordinary images into captivating works of art while retaining the fine details that make each picture unique.
This comprehensive guide explore how Erase.bg seamlessly integrates with Photoshop, unlocking creative potential for users of all skill levels. We'll cover everything you need to know to achieve professional-grade results, from removing backgrounds with precision to refining edits with advanced techniques. Say goodbye to tedious manual editing processes and hello to a new era of visual storytelling – powered by Erase.bg and fueled by your imagination.
What is Photoshop?
Photoshop is a powerful and versatile software developed by Adobe, renowned for its robust image editing capabilities. It is a cornerstone tool for photographers, graphic designers, artists, and professionals across various industries.
With Photoshop, users can manipulate and enhance digital images with precision and creativity. The software offers a wide array of features, including but not limited to, layer-based editing, advanced selection tools, filters, masks, and blending modes.
Whether retouching photographs, creating intricate digital artwork, or designing captivating visuals for marketing materials, Photoshop provides the tools and flexibility to bring imaginations to life. Its intuitive interface and extensive functionality make it a staple in the digital toolkit of professionals and enthusiasts, empowering users to unleash their creativity and achieve stunning results with every edit.
How to Remove Background in Photoshop?
Looking to remove backgrounds from images in Photoshop seamlessly? Look no further than Erase.bg. With Erase.bg, you can effortlessly eliminate backgrounds from your photos with just a few clicks, saving you time and effort. Whether you're a graphic designer, photographer, or simply looking to enhance your images, Erase.bg offers a user-friendly solution.
Say goodbye to tedious manual background removal and hello to efficient editing. Explore how to remove background in Photoshop effortlessly using Erase.bg, the go-to tool for achieving professional-looking results. Say hello to smoother workflows and stunning visuals with Erase.bg.
Step 1 - Open your image in Adobe Photoshop, right-click on the Background layer, then click Duplicate Layer.
Step 2 - A dialogue box will appear where you must assign a name to your layer and click OK. After that, click on the icon that resembles an eye on the left side of the original layer to turn off that layer.
Step 3 - Now, head to the Properties Panel by going to Windows and then Properties.
Step 4- The next step is to go to the Layers panel and click on the new layer. And then, in the Properties Panel, which is located above the Layers panel, select the Remove Background option under Quick Action.
And just like that, the background from your image is removed.
How to Remove the Background Using Erase.bg Plugin in Photoshop
In photo editing, achieving a professional look often hinges on removing backgrounds seamlessly. Thanks to the Erase.bg plugin for Photoshop, this task has always been challenging.
Whether you're a graphic designer, a marketer, or a content creator, Erase.bg simplifies the process, allowing you to focus on your creative vision without getting bogged down by tedious manual editing.
Install the Erase.bg Plugin
Start by downloading and installing the Erase.bg plugin for Photoshop. This user-friendly plugin integrates directly into your Photoshop workflow, providing an accessible and efficient way to remove backgrounds from images.
Open Your Image in Photoshop
Launch Photoshop and open the image from which you want to remove the background. Ensure your layer is unlocked to make editing possible.
Select the Erase.bg Plugin
Navigate to the Erase.bg plugin within Photoshop's interface. You can find it under the 'Extensions' tab. Selecting it will activate the plugin and prepare your image for background removal.
Refine Your Edges
If needed, use the refinement tools within the plugin to perfect the edges of your subject. Adjust the smoothness, contrast, and edge shift to ensure a polished look.
Remove the Background
Click on the 'Remove Background' button within the Erase.bg plugin. The advanced AI algorithms will quickly and accurately identify and remove the background, leaving your subject intact. This process is designed to handle even the most complex edges and fine details.
Save Your Image
Once satisfied with the results, save your image in the desired format. The removed background will give you a clean, professional-looking image ready for any application.
Benefits of Removing Background
Looking to enhance your images? Removing the background can transform your photos, making them cleaner and more professional. By using tools like Erase.bg in Photoshop, you can achieve seamless edits and elevate your visual content. Here are five benefits:
Professionalism: Removing backgrounds creates a polished look, perfect for e-commerce, presentations, and marketing materials.
Focus on Subject: Without distractions, viewers can focus solely on the image's main subject.
Versatility: Isolated subjects can be placed on various backgrounds, allowing flexibility and creativity.
Improved Aesthetics: Clean backgrounds enhance the overall aesthetic appeal of your images, making them more visually pleasing.
Consistency: Removing backgrounds ensures consistency across your image library, maintaining a cohesive visual identity.
Removing backgrounds in Photoshop offers numerous techniques, each suited to different types of images and user preferences. Here are 12 ways to remove backgrounds in Photoshop, explained briefly with steps for each method:
12 Ways to Remove Backgrounds in Photoshop
Quick Selection Tool
The Quick Selection Tool is a versatile option for removing backgrounds in Photoshop. It selects areas of similar color and tone with a simple click-and-drag motion. To use it, select the Quick Selection Tool from the toolbar, adjust the brush size as needed, and then click and drag over the subject you want to keep.
Photoshop will automatically detect the edges of the subject and create a selection. Refine the selection using the tool's options for better accuracy. This method is ideal for images with clear distinctions between the subject and background.
Select the Quick Selection Tool from the toolbar.
Click and drag over the subject to select it.
Refine the selection using the tool's options.
Magic Wand Tool
The Magic Wand Tool is another efficient way to remove backgrounds with Photoshop. It selects pixels of similar color and tone based on a specified tolerance level.
Select the Magic Wand Tool from the toolbar, click on the background area you want to remove and adjust the tolerance level to refine the selection. This method works best when the background has uniform colors and contrasts nicely with the subject.
Choose the Magic Wand Tool from the toolbar.
Click on the background area you want to remove.
Adjust the tolerance level to refine the selection.
Background Eraser Tool
The Background Eraser Tool is handy for removing backgrounds with more intricate details. It erases pixels based on color similarity while preserving the subject's edges.
Select the Background Eraser Tool from the toolbar, adjust brush settings like size, hardness, and tolerance, and then click and drag over the background to erase it. This method offers more control over the removal process, making it suitable for images with complex backgrounds.
Select the Background Eraser Tool from the toolbar.
Adjust brush settings like size, hardness, and tolerance.
Click and drag over the background to erase it.
Pen Tool
The Pen Tool provides precise control for removing backgrounds by creating paths around the subject. It involves manually tracing the subject's outline using anchor points and curves. Select the Pen Tool from the toolbar, click to create anchor points, and adjust the curves as needed to follow the subject's contours.
Once the path is complete, right-click and choose "Make Selection" to isolate the subject. This method is time-consuming but offers the most accurate results, making it suitable for images with intricate details and irregular shapes.
Select the Pen Tool from the toolbar.
Outline the subject with anchor points.
Right-click and choose "Make Selection."
Layer Mask
Layer Masks offer a non-destructive method for removing backgrounds in Photoshop, allowing easy adjustments and edits. To use them, make a selection using any selection tool, then add a Layer Mask by clicking the Layer Mask icon at the bottom of the Layers panel.
The selected area will be preserved while the rest of the image becomes transparent. Use the Brush tool to paint on the Layer Mask to refine the selection or back parts of the background if needed. This method is flexible and ideal for images requiring fine adjustments and multiple editing iterations.
Add a Layer Mask to the layer.
Paint with black to hide background areas.
Use white to reveal parts of the image.
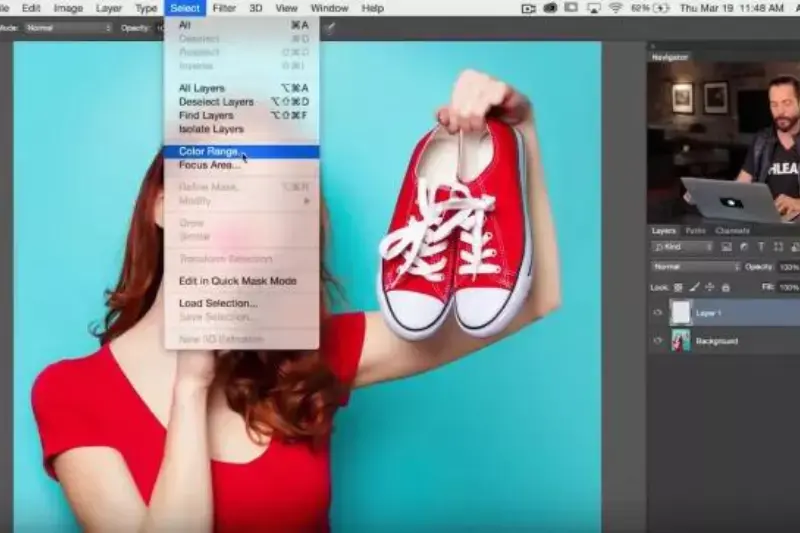
Color Range
The Color Range tool allows for precise selection based on color and tone, making it useful for removing backgrounds with specific hues. To use it, go to the Select menu, choose Color Range, then use the eyedropper tool to sample the background color you want to remove.
Adjust the Fuzziness slider to refine the selection, previewing the results in real-time. Once satisfied, click OK to create the selection. This method is effective for images with uniform backgrounds but may require additional refining for complex color variations.
Go to Select > Color Range.
Use the eyedropper to select background colors.
Adjust fuzziness to refine the selection.
Channels
Channels provide another method for creating selections based on color and tone information stored in individual color channels (Red, Green, Blue). To use this method, open the Channels panel, then select the channel with the most contrast between the subject and background.
Duplicate the selected channel, then use adjustment tools like Levels or Curves to enhance the contrast further. Finally, use the resulting channel as a selection by Command/Ctrl-clicking on it, then create a Layer Mask to isolate the subject. This method offers precise control over selection refinement but may require more manual adjustments than other methods.
Open the Channels panel.
Duplicate the channel with the most contrast.
Apply Levels or Curves to enhance contrast.
Object Selection Tool
The Object Selection Tool is a newer feature in Photoshop that uses AI technology to detect and automatically select objects in an image. To use it, select the Object Selection Tool from the toolbar, then click and drag around the subject you want to select.
Photoshop will analyze the image and create a selection around the subject. Refine the selection as needed using additional tools like Select and Mask. This method is quick and convenient for images with clear subject-background distinctions but may require additional refining for complex backgrounds.
Select the Object Selection Tool from the toolbar.
Draw a rectangle or lasso around the subject.
Refine the selection using the options bar.
Magnetic Lasso Tool
The Lasso Tool is a versatile option for removing backgrounds, offering both freehand and polygonal selection modes. To use it, select the Lasso Tool from the toolbar, choose the desired selection mode (freehand or polygonal), and then trace around the subject to create a selection. For freehand mode, simply click and drag around the subject.
For polygonal mode, click to create anchor points around the subject, closing the selection by connecting the last point to the first. Once the selection is complete, refine it using the selection options like Feather and Smooth. This method is suitable for images with irregular shapes and fine details.
Select the Magnetic Lasso Tool from the toolbar.
Click around the subject to create a selection path.
Complete the selection path and refine as needed.
Select Subject
The Select Subject feature in Photoshop uses Adobe's AI technology to detect and select the main subject in an image automatically. To use it, open your image in Photoshop, then go to the Select menu and choose Select Subject.
Photoshop will analyze the image and create a selection around the main subject. Refine the selection as needed using additional tools like Select and Mask. This method is quick and convenient for images with clear subject-background distinctions but may require additional refining for complex backgrounds.
Open an image and choose Select > Subject.
Photoshop uses AI to select the main subject.
Refine the selection using Select and Mask.
Quick Mask Mode
Select and Mask is a powerful tool in Photoshop for refining selections, including background removal. It offers various options for fine-tuning selection edges and adjusting transparency. To use it, make a selection using any of the selection tools mentioned earlier, then go to the Select menu and choose Select and Mask.
Use the tools and sliders in the Select and Mask workspace to refine the selection edges, adjust transparency, and output the selection as a layer mask. This method provides precise control over selection refinement and is suitable for images with complex backgrounds and detailed subjects.
Press Q to enter Quick Mask Mode.
Paint over the background with a brush.
Exit Quick Mask Mode to create a selection.
Refine Edge
Refine Edge is a tool in Photoshop that allows for fine-tuning selection edges, making it helpful in removing backgrounds with intricate details. To access it, make a selection using any selection tool, then go to the Select menu and choose Refine Edge.
Use the tools and sliders in the Refine Edge dialog box to adjust the selection edges, smoothness, feathering, and contrast. Preview the results in real-time to achieve the desired effect, then output the selection as a layer mask. This method is ideal for images with complex backgrounds and requires precise selection refinement.
Use any selection tool to make a rough selection.
Go to Select > Refine Edge.
Adjust sliders for smoothness, feathering, and contrast.
These methods offer flexibility in background removal, catering to different image complexities and user preferences.
Difference Between Erase.bg and Photoshop
Erase.bg and Photoshop are powerful tools for image editing, but they serve different purposes and cater to different user needs. Here are the main differences between Erase.bg and Photoshop:
1.Specialization
- Erase.bg specializes in background removal. It is explicitly designed for efficiently and accurately removing backgrounds from images, using advanced AI algorithms to detect and remove backgrounds while preserving the subject automatically.
- Photoshop, on the other hand, is a comprehensive image editing software with a wide range of features beyond background removal. It offers tools for photo manipulation, retouching, graphic design, and more, making it versatile for various creative projects.
2.Ease of Use
- Erase.bg is known for its simplicity and user-friendly interface. It is designed to streamline the background removal process, allowing users to remove backgrounds from images quickly and easily without extensive manual editing.
- Photoshop, while powerful, has a steeper learning curve due to its extensive feature set and complex interface. It requires more time and effort to master, especially for beginners.
3. Automation
- Erase.bg utilizes AI technology to automate the background removal process. It can accurately detect and remove backgrounds from images with minimal user input, saving time and effort.
- Photoshop offers manual background removal tools, such as the Magic Wand tool and the Background Eraser tool, which require users to select and erase background areas manually. While Photoshop also offers some automated features, such as Select Subject, they may only sometimes produce accurate results, especially for complex backgrounds.
4. Cost
- Erase.bg typically offers subscription-based pricing models or pay-per-use plans, making it a cost-effective solution for users who only need to remove backgrounds occasionally or on a small scale.
- Photoshop is available through Adobe's Creative Cloud subscription service, which may be more expensive for users who only require basic background removal functionality. However, Photoshop's subscription includes access to a wide range of other Adobe software and services, making it a better value for users who require comprehensive image editing capabilities.
While both Erase.bg and Photoshop offer background removal functionality, they differ in terms of specialization, ease of use, automation, and cost. Users should choose the tool that best suits their needs and workflow preferences.
10 Alternatives of Photoshop to Remove Background
Erase.bg
Erase.bg streamlines the background removal process, eliminating the need for complex editing software or manual selection tools. With its user-friendly interface and rapid processing speed, Erase.bg is the perfect solution for anyone looking to quickly remove backgrounds from images for various purposes, such as graphic design, e-commerce, or personal projects.
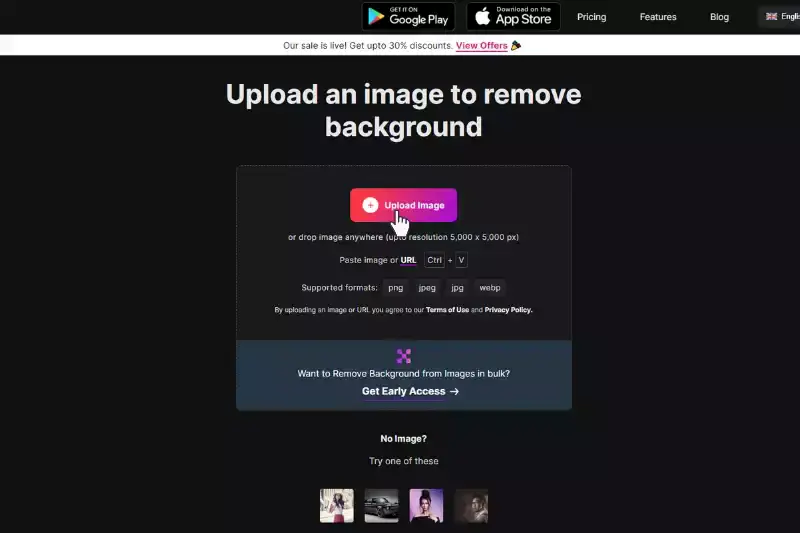
Step 1 - Click on the dialogue box that reads "Upload Image," or drag and drop the image on the page.
Step 2 - A message will appear on the screen that says, "Uploading image, please wait…" and during this time, Erase. bg's AI will perform its wonders to remove the background from the image of your choice.
Step 3 - If you want to remove something or edit the image, you will see an Edit option on the top right corner of the Background Removed image.
Step 4 - Download the image in your chosen format to your preferred destination.
GIMP (GNU Image Manipulation Program)
GIMP is a powerful, open-source image editing software that rivals Photoshop in functionality. It offers many features, including layer-based editing, customizable brushes, advanced selection tools, and support for various file formats. GIMP's user-friendly interface and extensive community support make it an excellent choice for beginners and professionals alike.
Open your image in GIMP.
Use the Foreground Select Tool to outline the subject roughly.
Refine the selection using the Free Select Tool.
Invert the selection (Select > Invert) and hit the Delete key to remove the background.
Affinity Photo
Affinity Photo is a professional-grade image editing software known for its speed, power, and precision. It features non-destructive editing, advanced retouching tools, HDR merging, and panoramic stitching. Affinity Photo's streamlined interface and affordable one-time purchase model make it a popular alternative to Photoshop.
Open your image in Affinity Photo.
Select the Selection Brush Tool and carefully paint over the subject.
Refine the selection using the Refine Selection Brush Tool.
Invert the selection and delete the background.
Corel PaintShop Pro
PaintShop Pro is a comprehensive photo editing software that offers a wide range of tools for editing, retouching, and enhancing images.
It includes features like content-aware fill, AI-powered editing tools, and support for RAW files. PaintShop Pro's user-friendly interface and affordable pricing make it a favorite among hobbyists and professionals.
Open Corel PaintShop and import your image.
Use the toolbar for basic adjustments like cropping and resizing.
Explore the Effects tab for creative enhancements and filters.
Save your edited image in the desired format or share it directly from the software.
Pixlr
Pixlr is a web-based photo editing tool that offers a range of features similar to Photoshop. It includes tools for basic edits, filters, overlays, and effects. Pixlr's intuitive interface and accessibility make it a convenient option for quick photo edits without software installation.
Upload your image to Pixlr Editor.
Use the Magic Wand Tool to select the background.
Refine the selection as needed.
Delete the selected background area.
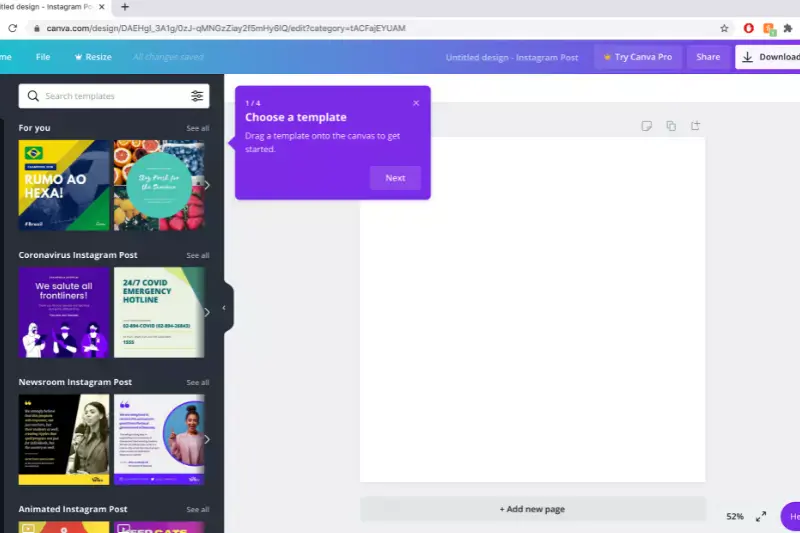
Canva
Canva is a web-based graphic design platform that offers a range of tools for creating social media graphics, presentations, posters, and more.
While it may not offer the same advanced editing capabilities as Photoshop, Canva's drag-and-drop interface and extensive library of templates make it a popular choice for beginners and non-designers.
Upload your image to Canva.
Select the image and click on the "Remove Background" button.
Canva automatically removes the background from the image.
Photopea
Photopea is a free, web-based image editor that resembles Photoshop's functionality. It supports layers, masks, blending modes, and many file formats. Photopea's compatibility with Photoshop files and its browser-based interface make it a convenient alternative for users who need to edit images on the go.
Open your image in Photopea.
Use the Quick Selection Tool to select the background.
Refine the selection using the Refine Edge Tool.
Delete the selected background area.
Krita
Krita is a free and open-source painting program offering powerful digital painting, illustration, and animation tools.
While it may not have the same extensive editing features as Photoshop, Krita's focus on digital art and its customizable brush engine make it a popular choice among artists and illustrators.
Launch Krita and create a new canvas or open an existing image.
Familiarise yourself with the user interface, including the toolbar, brush presets, and layer panel.
Use the brush tools to start painting or drawing on your canvas.
Explore additional features such as layers, blending modes, and filters to enhance your artwork.
Save your work in Krita's native file format (.kra) or export it to standard image formats like PNG or JPEG.
Experiment with different brushes, colours, and techniques to unleash your creativity in Krita.
Inkscape
Inkscape is a free and open-source vector graphics editor that offers robust tools for creating scalable graphics, logos, icons, and illustrations. While it may not be as feature-rich as Photoshop, Inkscape's vector graphics support and user-friendly interface make it a valuable tool for graphic designers and illustrators.
Import your image into Inkscape.
Trace the subject using the Bezier or Pen tool.
Delete the background and save the image as a PNG file.
Acorn
Acorn is a lightweight image editing software for Mac that offers essential tools for photo editing, layer-based compositing, and vector graphics. While it may lack some of the advanced features of Photoshop, Acorn's simplicity and affordability make it a suitable alternative for casual users and hobbyists.
Launch Acorn and open the image you want to edit.
Familiarize yourself with the toolbar, which contains various tools for editing images.
Use the selection, brush, and text tools to make edits to your image.
Explore the layers panel to add multiple layers to your image and make non-destructive edits.
Experiment with filters and effects to enhance your image creatively.
Once you're satisfied with your edits, save your image in your desired format.
Each alternative to Photoshop offers unique features and capabilities, catering to different user needs and preferences. Whether you're a professional designer, photographer, or hobbyist, there's a tool out there that can meet your image editing needs without breaking the bank.
Why Choose Erase.bg for Removing Background?
Erase.bg is the premier choice for background removal due to its unparalleled efficiency, precision, and user-friendly interface. Here's why Erase.bg is the top pick for removing backgrounds:
Effortless Removal: With Erase.bg, removing backgrounds from images is a breeze. Its advanced AI technology swiftly identifies and separates the subject from the background with remarkable accuracy, saving you valuable time and effort.
High Precision: Erase.bg ensures pixel-perfect precision in background removal, preserving even the finest details of the subject while seamlessly eliminating the background. You can trust Erase.bg to deliver professional-grade results every time.
User-Friendly Interface: Designed with simplicity in mind, Erase.bg offers an intuitive interface that makes background removal accessible to everyone, regardless of their level of expertise. Just upload your image, and Erase.bg easily handles the rest.
Versatile Compatibility: Whether you're a photographer, designer, or business owner, Erase.bg caters to your needs. It seamlessly integrates with various platforms and software, allowing for effortless background removal in any workflow.
Instant Results: With Erase.bg, there's no waiting around for background removal. Enjoy instant results, allowing you to focus on more important tasks without delay.
Cost-Effective Solution: Erase.bg offers exceptional value for money, providing professional-quality background removal at a fraction of the cost of traditional methods. Say goodbye to expensive software licenses and outsourcing fees.
Secure and Private: Your privacy and security are paramount with Erase.bg. Rest assured that your images and personal information are kept confidential, with no risk of data breaches or unauthorized access.
Choose Erase.bg for fast, precise, and hassle-free background removal, empowering you to elevate your images effortlessly. Experience the difference with Erase.bg today.
Conclusion
Erase.bg simplifies background removal with its user-friendly interface and efficient processing. Users can achieve professional-looking results with just a few clicks, making it an invaluable tool for creative projects and business needs.
FAQ's
How do I isolate an object in Photoshop?
If you wish to isolate an object in Photoshop, you can do so by following these steps:
Step 1: Select the Object Selection tool from the toolbar present at the left side of your screen.
Step 2: In the Options menu, pick Rectangle or Lasso as your selection mode.
Step 3: Move the cursor over your image that you wish to select and then click in order to automatically select the object for you.
Step 4: Now, go to Settings in the Options bar and pick add to, subtract or intersect, if you need any more refinement to the image.
What is the fastest way to remove background in Photoshop?
If you wish to remove the background from an image quickly, we recommend using the Quick ACtion tool in photoshop. Here rae the steps you need to follow:
Step 1: Launch Photoshop on your system and open the image you wish to remove the background of. Now, right-click on the Background layer and select the Duplicate layer. A dialogue box will appear where you need to assign the name for your layer and once you do so, click on OK. And then, turn that layer off by selecting an icon that looks like an eye.
Step 2: Go to the toolbox in the left side of your screen and select the Quick Selection tool which is under the Object Selection Tool.
Step 3: Now, start painting the subject and you will spot marching ants as you paint. In order to adjust the size of your tool, you can use the square brackets.
Step 4: In case you think you have painted outside your subject, press and hold Option key (for macOS) or Alt key ?(for Windows) and you will spot “+” or “-“ symbols that indicate your selection. Paint on the part of your selection you wish to remove as you hold the Option or Alt key.
Step 5: Save your selection by going to Select and then Save Selection. Then, assign a name to it.
Step 6: After saving your selection, the next step is to remove the background and in order to do so, you need to go to the Select option and then Inverse. After that, hit Delete.
How to make an image transparent on Photoshop?
If you wish to make an image transparent on Photoshop, you need to adhere to these steps:
Step 1: Launch Photoshop on your system and open the image you wish to make transparent.
Step 2: Select the layer you wish to make transparent by going to the Layers tab.
Step 3: Now, select the opacity level from the box that is on the top of the Layers tab. The standard is 100 percent but you can bring it to 0 percent too, if needed.
Step 4: Now, simply save your image.
Which Photoshop tool removes background?
The Magic Wand and Quick Selection tools in Photoshop can be used to remove backgrounds from images. The Magic Wand tool selects pixels based on color and tone, while the Quick Selection tool selects pixels based on edges and contrast.
Additionally, the Pen tool can be used for precise manual selection of the background to be removed.
What is Magic Eraser tool in Photoshop?
The Magic Eraser tool in Photoshop is a tool that allows you to quickly remove the background from an image. It works by erasing all pixels of a selected color in the image. To use the Magic Eraser tool, simply select the tool from the toolbar, click on the area of the image that you want to erase, and Photoshop will automatically erase all pixels of that color.
This can be a quick and easy way to remove a solid-colored background from an image, but it may not work as well on images with complex backgrounds or multiple colors.
What are some best practices for removing the background in Photoshop?
To ensure that your images look their best when you remove the background in Photoshop, it's important to choose the right tool for the job and to take your time when making selections.
Additionally, you should make sure that the edges of your subject are clean and well-defined, and that there are no remnants of the background left behind. It's also important to consider the overall composition of your image and to make sure that the background you choose complements your subject.


.webp)
.webp)


