Setting up and laying out projects for creation with a Cricut machine requires using a digital design program called Cricut Design Space. Everything in your Cricut projects may be created, modified, and customized using the features in the Cricut Design Space. A huge collection of pre-designed solutions, typefaces, and graphics are also included in Design Space. The program may be used on desktop computers, tablets, and smartphones, including iPhone and Android models.
And here is how to use Design Space's new automatic backdrop removal function to eliminate backgrounds. This is useful if you want to "print then cut" just a segment of a picture or picture or use cardboard or vinyl to cut a picture into a shape. In Cricut Design Space, remove the image's background.
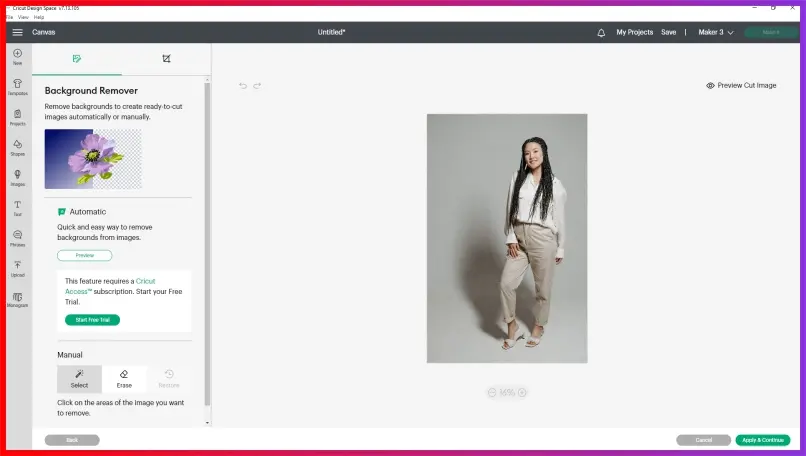
Step 1: Put your image or photo online
In Design Space, start a new project, then select "Upload." On your desktop, select "Browse" to choose the picture you want to crop out the backdrop of, or drag & drop it onto the website. Select "Continue" after selecting "Complex". You should now observe a new screen design that resembles this:
It's possible that you don't yet have the Remove Background feature in your Design Space if your display DON'T look like this. If so, don't worry; an update will happen soon! It could take a few weeks to receive the upgrades because they are being issued sequentially.
Step 2: Eliminate the backdrop
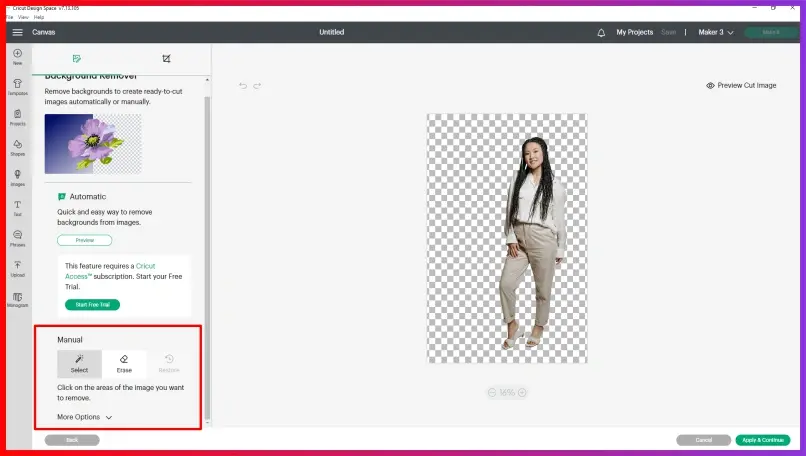
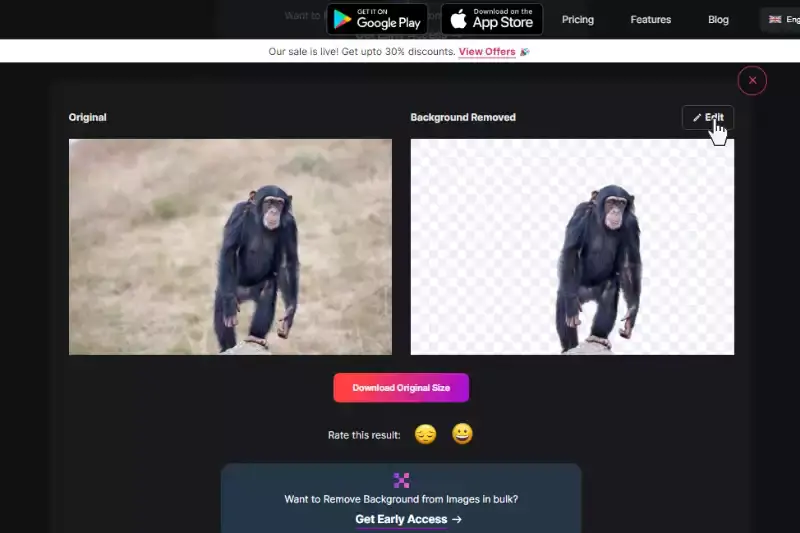
To begin the background removal procedure, select "Remove Background." The backdrop removal procedure can take a little bit, but after it's done, your photo will refresh. As you can see, it did a great job getting the backdrop out of this picture!
Step 3: Retouch the image if necessary.
The background removal tool may occasionally fail to remove the backdrop completely or unintentionally delete portions of the image you did not intend to have removed. You can correct it by using the tools listed under "Manual." With the "choose" magic wand tool, you can select to remove areas with various colors.
With the "erase" tool, you can select the portions of the image you want to eliminate by clicking and dragging your mouse over them. When you press and drag your mouse over an area of a picture, the "restore" tool restores that area to how it appeared before you make any modifications.
Step 4: Complete the uploading procedure
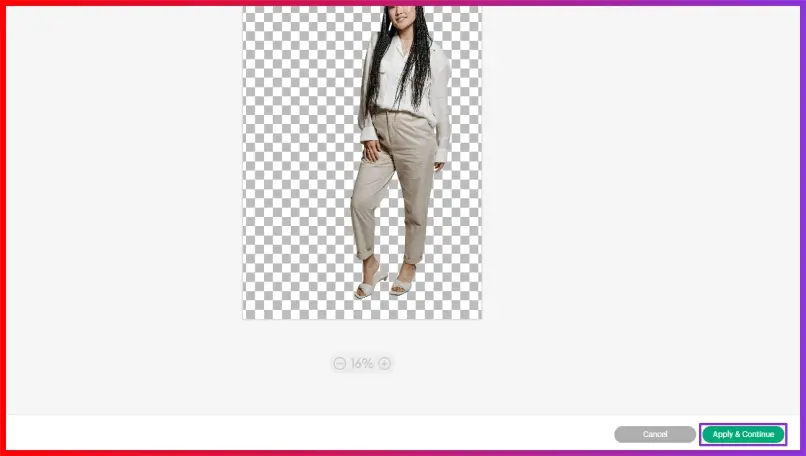
In my opinion, the background removal tool is most helpful for print-then-cut graphics because it enables you to remove precise areas of the picture that the Cricut can subsequently cut around. But you can cut the outline out of the card, vinyl, or another material. Select "Apply & Continue" in the bottom-right corner of the display when you are satisfied with the picture's appearance.
Select if you can save it as a Print or a Cut Picture. Then select "Upload" after cutting the picture. Your updated picture is now visible under "Latest Uploads." Select it and then press the green "Add to website" button to include it in your design. It is currently prepared for use in your Project!
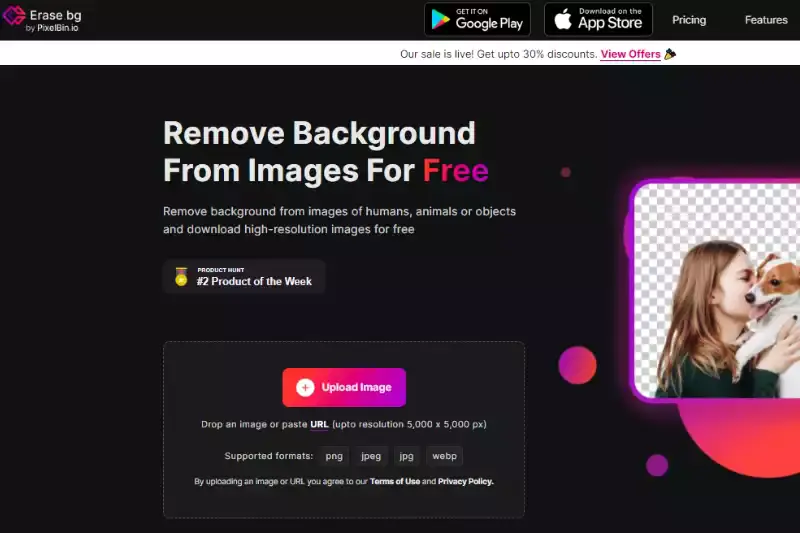
How to remove Background from Erase.bg?
By following these easy steps, you should be able to remove background from JPEG image using Erase effortlessly.bg via the website or by purchasing the Erase.bg App, which can be found in the Google Play Store (for Android users) or App Store (for iOS users), respectively (for Android users).
Step 1: Drag and drop the image directly onto the website or use the "Upload Picture" dialogue box.
Step 2: The computer will show the message "Uploading photo, kindly wait" during Erase.bg's AI worked its magic to remove the background from the JPEG image of your choice.
Step 3: To edit or delete something from the image, click the Edit button in the top right corner of the background. Removed iffy.
Step 4: Download your chosen photos to the place you wish.
Any photo can be improved by erasing the background using Erase.bg in only a few seconds. With any luck, it will help you edit photos as efficiently as possible.
FAQ's
How Do I Make A Circuit Design Space Image Background Transparent?
In the Cricut Design Space, tidy up the picture.
Step 1-Select continue to the "clean up" page after uploading your picture to Cricut Design Space and selecting if it is a simple, relatively complicated, or intricate image.
Step 2-Your picture would be "Cleaned Up" on the following page.
Step 3-The "Erase" tool is the following utility.
How Do I Change The Background From A Circuit Design Space?
The color of your canvas's background can be changed with ease. This makes it Quite far accessible and easy to see the white portions of your design. Additionally, it will let you have a clear concept of how your design would seem on various surfaces or backgrounds. Simply select BLANK CANVAS from the layers panel's bottom right menu.
How Do I Remove A White Background From Circuit Design Space Image?
Here are the steps given.
Step 1-Once choosing Upload, choose a raster image from your computer (.png, .jpg, .gif, .bmp)
Step 2-Please Click after selecting either the Simple, Challenge Posed, or Complex image type.
Step 3-Locate Automatic and choose Remove Background in the Background Removal section on the left of the screen.
How Do I Extract An Object From The Background from Circuit Design Space Image?
Here is the step:
Step 1-Double-click the "background" label in your layers palette after opening your image.
Step 2-Image > Extract or Option/Alt+Cmd/Ctrl+X will launch the extract utility.
Just take the.
Step 3-There may be a few places that were unintentionally removed.
How To Save A Circuit Design Space With A Transparent Background?
Click the three points on the topic tile you wish to save by going to the My Projects page. Choose Save for Offline after that. On any of the project tiles that have been properly saved for offline use, you will notice a small computer icon.
Is there an eraser tool in design space?
Yes, Cricut Design Space, the software used with Cricut machines, features an eraser tool. This tool allows users to manually remove parts of an image or design by brushing over them, similar to traditional eraser functions in graphic design software.


.webp)
.webp)


